Truth be told, I’ve always struggled with the “i before e except after c” rule. It was not until well after college that I thought I was finally getting the concept. But a weird discussion with my friend Keith about ‘eight counterfeit sleighs’ that really sent me reeling back into a tailspin! He mentioned it was quite simple, think of the Old MacDonald Had A Farm, song refrain: “E-I-E-I oh!” At that point, I needed to start drinking wine: Reisling, or was it Riesling? This resulted in the need to drink more wine! Years passed and I still didn’t know how to apply the rule properly. But with respect to grapes, Jancis Robinson set me ‘streight’ or is it straight, and I can finally spell R-i-e-s-l-i-n-g with confidence.
It was a fiftieth birthday escape to Germany that really sparked my love for Riesling. My birthday is in December and it was cold. I had been disappointed in the German beers, plus they didn’t taste as good when it was so cold. Red wine was relatively scarce and expensive, but a liter of the local Riesling was somewhere in the range of €5 (~$5.60 USD). Not a bad deal for a wine made from the noblest grapes of Germany. I wanted to learn a little more about it, since my only previous consuming experience with it was from my college years, when it was sold in a tall blue bottle under the Blue Nun brand. Historically, Riesling was the grape of Germany, but many of the Riesling vineyards were destroyed during the latter stages of World War II, and they were replanted post-war to Sylvaner and Müller Thurgau, which have higher yields and often are blended with Riesling. These wines are made for the bigger bulk market, with more of a focus on quantity than quality. These bulk wines are largely exported, leaving the 100% Riesling wines for the domestic market. But in recent years there has been a movement back in the other direction where quality trumps quantity for most producers and containers of bulk Riesling are now being imported and bottled here in the US.
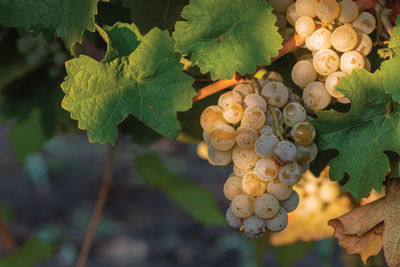
Riesling is a cold-hardy grape that can tolerate high latitude growing conditions — up to fifty degrees north latitude. It buds late, tending to avoid most spring frosts, and is a variety that ripens mid-to late-season depending on the wine styles it is being produced for, which Germany has many. It is resistant to downy mildew, and only slightly susceptible to powdery mildew and Botrytis, the latter characteristic making Germany home to some of the world’s best sweet wines. In general though, it is grown to produce low-alcohol, dry to semi-sweet wines with high acidity. Characteristics of floral, fruity, spice, and petrol (diesel) are used to describe the wines. Sometimes these prominent bouquets can be a turn-off to some wine drinkers.
In winemaking, I find these characteristics quite inviting to work with the grape. Choosing the picking time with respect to sugar accumulation to harvest is important, and the decision to employ some brief period of skin contact are some of the things I think of. Skin contact during maceration, regardless of your harvest sugar levels, can release more of the aromatic compounds, which are present in the skins. This certainly can be enhanced with the use of certain enzyme products. Employing enzymes like Lallzyme Cuvée Blanc™ or Enartis Zym Arom MP can help break down the cell wall structure of the berry skins, releasing these aromatic compounds. These products can also be useful to help increase juice yields, although that is all equipment dependent. In home winemaking, most of us do not have the luxury of having a pneumatic membrane press ($$$); rather we use the typical vertical basket press. Choosing a design that forces the must outward is better than the design that forces down.

Picking the fruit at a lower sugar level will reduce some of the intense aromatics, and would be something you can get back via the ‘fermentation bouquet’ by selecting the right yeast. My favorites in this style of Riesling would be QA23 or CY3079, only because these are what I am used to, but I have also conducted yeast trials with other variants from other yeast companies and found desirable results as well. These strains are not yet released to the public, so you should not limit yourself to any specific yeast producer. New products come out often, so be sure to do your research. With a harvest decision to pick later, in going for a little higher alcohol, I sometimes split the juice into equal volumes and ferment with each of the above yeasts. Here, I am looking for the best of both worlds when I start working to construct the final blend. In either case, you must have the ability to control your temperatures to 55–60 °F (13–16 °C). It is the cool temperatures that favor the formation of the esters during fermentation and retain them after the wines go into their aging period. Unless I am working with acidity higher than around 8 g/L, I do not consider inoculating for the malolactic conversion. But then, I am looking forward to where I want it to be in the end, so would not rule out any winemaking technique at this point. Inoculating for malolactic fermentation (MLF) may be something worth exploring in that case.
Riesling is a cold-hardy grape that can tolerate high latitude growing conditions — up to fifty degrees north latitude.
As the wine enters the aging phase, it is important to assess its balance. Riesling is reported to express the terroir of the site, so post-fermentation you could have wines with very thin mouth structure and perhaps bitter, or they could be creamy. While that may sound positive, they could come off as dull and uninteresting. Therefore, balance all relates to what I feel is a very important attribute in wine and that is mouthfeel. Having a full mouthfeel keeps the grape’s bouquet and aroma characteristics in the mouth longer, in my humble opinion, making for a more positive overall experience. The general equation I use is: Sweetness is balanced by acidity + bitterness and/or astringency.
Astringency is important if you employed skin contact during maceration. Too long of skin contact can extract undesirable phenolic compounds. Because of their natural high acidity, Riesling wines can be bitter, but the bitter taste can be compensated by leaving some residual sugar behind or by the addition of grape juice concentrate. Conversely, too high of a sweetness can be compensated with leaving higher acid levels, thus inhibiting the malolactic conversion would be way to achieve this. The particular approach is with respect to the trocken (dry < 8 g/L residual sugar [RS]), or halbtrocken (semi-dry 8–18 g/L RS). There is a grey zone here in that ‘dry’ is generally considered less than 2 g/L RS, but the perception of sweetness is difficult to discern at less than 8 g/L RS.
A cautionary word-of-warning here: Residual sugar left in wine can be a source for re-fermentation both pre- and post-bottling. So understanding how to work with wines that are technically unstable is paramount. This is where low cellar temperatures (< 50 °F/10 °C) and higher sulfur dioxide levels help slow the yeast down. The Rieslings of Germany can have higher than typical sulfur dioxide sometimes exceeding 50 mg/L. But that is not the only solution. I ran across a small Riesling producer in the Rheingau region a few years back. This winemaker grew his vines in a strict biodynamic fashion (see “Wines Naturally” found in the April-May 2018 issue for more on biodynamic wines), conducted all native fermentations, no sulfur dioxide, and didn’t have any refrigeration capabilities. This is a recipe for microbial soup, but he knew where he was going. Filtration was his answer. So when he got what he wanted out of the fermentation and aging, he sent it through a sterile filter to the bottle. Those familiar with the food and beverage industry’s Hazard Analysis and Critical Control Points (HACCP) would recognize that filtration process was this winemaker’s critical control point.
At the top of the wine pyramid in Germany are the sweet to very sweet, Beerenauslese and Trockenbeerenauslese wines. These wines are specialized in that they are cluster-selected or even berry-selected; to be sure they are properly infected with the noble rot, Botrytis. Taking it one-step further, the eiswein is wine made after the grapes freeze, where the grapes are harvested and pressed cold before they thaw. A tricky process, in that many automated presses do not work well in cold weather. In either case, the concentrated flavors add considerable complexity to the wines, but the juice must be treated differently in order to get the fermentation started. Due to the high sugar levels of the juice, the osmotic stress the yeast will be subjected to can be very problematic. In response, a healthy culture of yeast should be built up to help offset this stress. It can be different proportions depending on the volume of the juice used. A general home winemaking version is included in the recipe below. A small portion (~5%) of the juice is diluted 1:1 with water and nutrients. Yeast is inoculated into this culture at twice the normal pitch rate, 50 g/hL and the sugar is depleted by half, where it is then doubled in size with the original juice. Once three to four doublings have taken place, it is time to add this starter to the bulk (~80%) sweeter juice. The fermentation will eventually arrest itself with a high sugar and low alcohol, with little need for stabilization thanks to the very harsh growing conditions for all organisms.
I have found Riesling to be one of the most versatile grapes to make wine from and every style of wine needs to focus on overall balance. In Germany, this may be governed from the local customs and laws, but here in North America, home winemakers can be creative. Understanding what you are starting with and where you want to go is a way to think of the balance you are seeking in the wine you are creating. These basic principles of winemaking go a long way in making your best Riesling from the grapes you have.
Riesling Recipe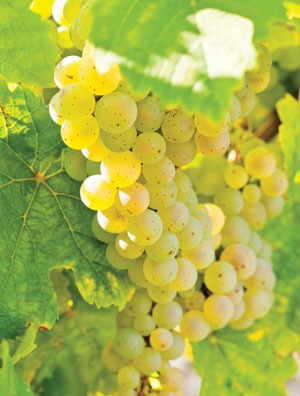

NOTE: This recipe covers a dry and sweet style of Riesling wine. Making a sweeter version requires advanced skills, specifically with mathematical calculations. I have done some for you. You can use this recipe to make a sweeter version of Riesling by adjusting your initial dilution and yeast hydration procedures (as outlined).
Ingredients
5 cans Riesling Juice Concentrate, ~68-70 °Brix (46-oz. packaging)
Distilled water
5 grams Lalvin QA23 yeast (10 grams if making a sweet version).
10% potassium metabisulfite (KMBS)solution.
5 grams Go-Ferm (or equivalent yeast starter)
10 grams Fermaid K (or equivalent yeast nutrient)
5 grams di-ammonium phosphate (DAP)
Other equipment or needs
6-gallon (22.7-L) food-grade plastic bucket
5-gallon (19-L) carboy
1 to 2 one-gallon (3.8-L) jugs
Racking hoses
Inert gas (nitrogen, argon or carbon dioxide)
Ability to maintain fermentation temperature of 55–58 °F (13–15 °C) Ability to hold wine at 38–40 °F (3–4 °C) while settling
Thermometer
Pipettes with the ability to add in increments of 1 mL
Modifications for Sweeter (Ice) Version
Adjust your initial dilution. Use seven 46-oz. cans of concentrate to 3 gallons (11 L) of water. Measure dehydrated yeast by pouring it into a disposable weigh boat on the scale. Weigh out 2–2.5 times the amount stated on the package (around 50–65 g/hL). Measure Go-Ferm by pouring it into a disposable weigh boat on the scale. Weigh out 50 g/hL. Pour carefully, the dust is fine and can be irritating. Adjust hot non-chlorinated tap water to reach 104 °F (40 °C). Add 10 times the weight of the yeast in water to a beaker or other container. Add Go-Ferm to water and dissolve completely by stirring with whisk. Sprinkle the yeast on the surface of the water and let sit to rehydrate for 15 minutes. While waiting, dilute a small amount of wine must to ~20 ˚Brix and warm it to 77 °F (25 °C). Once rehydration is complete, add an equal volume of the diluted room temperature must to the yeast hydration container. Maintain this mixture at 86 °F (30 °C) for one hour, stirring every 30 minutes with whisk. A water bath may be helpful to maintain a constant temperature. After one hour, add another equal volume of 77 °F (25 °C) high Brix must. Maintain the mixture for 2 hours at 77 °F (25 °C), mixing every 30 minutes with whisk. The yeast starter culture is now at approximately 20 °Brix. Add the yeast starter culture to the main ice wine must tank. Must should be pre-heated to 68 °F (20°C). Maintain this temperature for 24 hours to allow yeast to further acclimate, then drop temperature to 59 °F (15 °C) for the remainder of the fermentation.
Step by Step
1. Clean and sanitize your winemaking tools, supplies, and equipment.
2. Warm water to about 65 °F (18 °C). You will use 3.5 gallons (13 L) to dilute the concentrate.
3. Add five cans of juice concentrate, using the warmed water to completely dissolve remaining concentrate in the can. Mix well. You should have about 5.5 gallons (21 L) of juice in the bucket at about 22.5 °Brix.
4. Mix in to the juice the Fermaid K or equivalent yeast nutrient.
5. Prepare yeast with the Go-Ferm. When the yeast is ready, add it to the fermenter.
6. Initiate the fermentation at room temperature (65–68 °F/18–20 °C) and once fermentation is noticed, (24–48 hours) move to a location where the temperature can be maintained at 55–58 °F (13–15 °C). You should see signs of fermentation within about one to two days. This will appear as some foaming on the juice. If using a refrigerator, be sure to monitor your fridge temperature as some older models can be too cold even at the warmest temperature. If your fridge is too cold (colder than 55 °F/13 °C) consider placing the carboy in an ice bath and add ice to the water as needed while monitoring the temperature.
7. Two days after fermentation starts, dissolve the DAP in as little distilled water required to completely dissolve (~20 mL). Add to the carboy.
8. Normally you would monitor the progress of the fermentation by measuring Brix. One of the biggest problems with making white wine at home is maintaining a clean fermentation. Entering the carboy to measure the sugar is a prime way to infect the fermentation with undesirable microbes. So at this point, the presence of noticeable fermentation is good enough.
9. Leave alone until bubbles in the airlock are about one bubble per minute. Usually about two to three weeks. Measure the Brix every
2-3 days.
10. The wine is considered dry, or nearly dry when the Brix reaches -1.5 °Brix or less. For the sweet version, the absence of fermentation is the key that the “end is near.” Nevertheless, add 3 mL of fresh KMBS (10%) solution per gallon (3.8 L) of wine. This is the equivalent to ~40 ppm addition. Transfer the wine to the 5-gallon (19-L) carboy and lower the temperature to 38–40 °F (3–4 °C).
11. After two weeks, test for pH and SO2 adjust as necessary to attain 0.8 ppm molecular SO2. (There is a simple SO2 calculator on the Web at www.winemakermag.com/guide/sulfite.) Check the SO2 in another two weeks, prior to the next racking and adjust while racking. HINT: Rack to another sanitized 5-gallon (19-L) carboy, or your bucket. In the case of the latter, clean the original carboy and transfer the wine back to it. This is done at about 4–6 weeks after the first SO2 addition. Once the free SO2 is adjusted, maintain at the target level by monitoring every 3–4 weeks. At about three months you are ready to bottle. Be sure to maintain sanitary conditions while bottling. Once bottled, you’ll need to periodically check your work by opening a bottle to enjoy with friends.

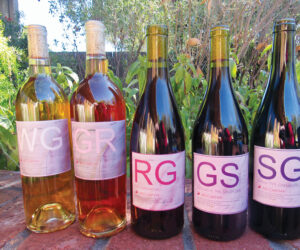
A home winemaker sets out to explore just how versatile Grenache can be by making five different wines from it in a single vintage, including red, pink, and white versions.
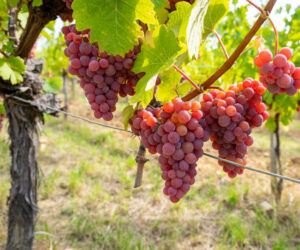
While it may not look like a white wine grape, Gewürztraminer is well known to produce world-class white wines. Learn some best practices to work with this grape varietal that can thrive when grown in cooler climates.

