Sangiovese: The king of Tuscany
When the movie Under the Tuscan Sun, directed by Audrey Wells and starring Diane Lane, came out in 2003, I should’ve known it was a “chick-flick.” The story involves a recently divorced woman who tries to get her life back on track by purchasing a run down villa in Tuscany, renovating it and looking to blend in to the local life. She met a guy, who turned out to be a flake, and eventually discovered herself. Much to my naivety, the part about the grapes, specifically the noble grapes of Tuscany, were nowhere to be found in the movie, other than an occasional wine bottle on the table, something in Tuscany that is far from occasional.
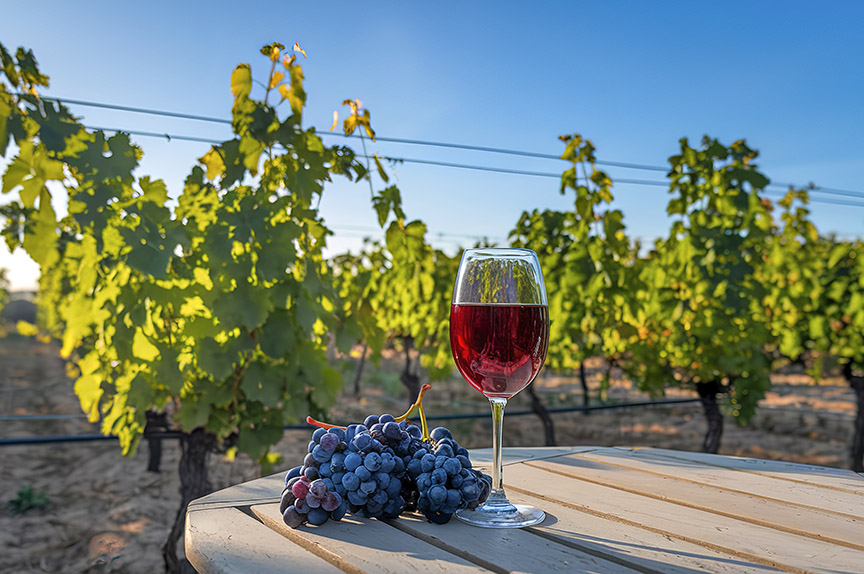
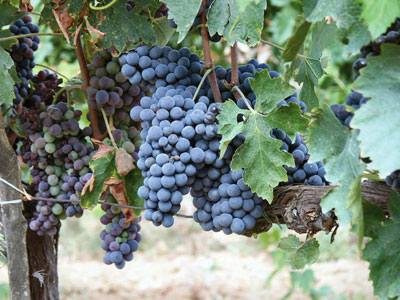
Wine in Tuscany has happened for centuries and it seems odd that there could be anything “under the Tuscan sun” other than grapes. Grapes in Tuscany are a way of life, and Sangiovese, the red workhorse of Tuscany through the millennia, is as noble as they get — well, depending who you talk to.
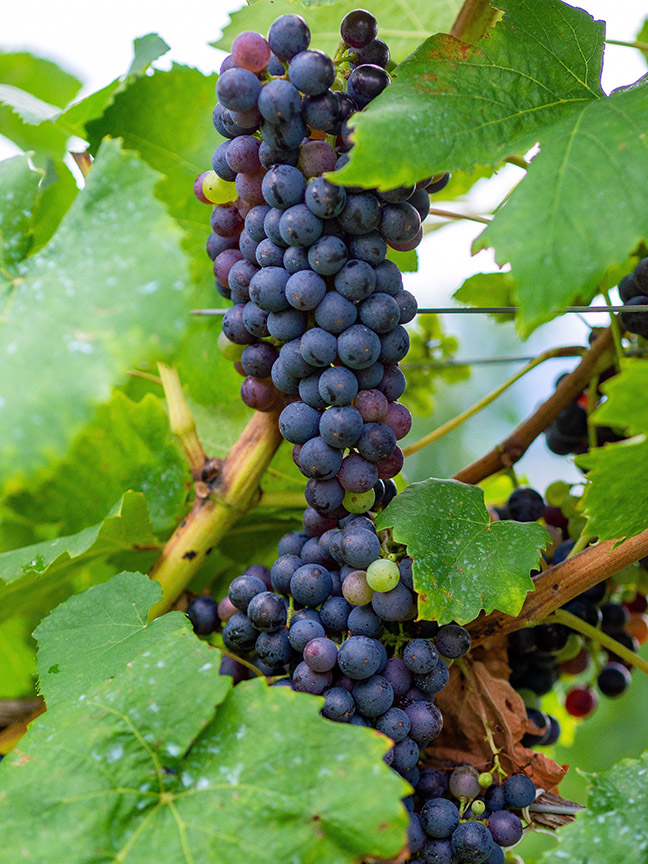
Sangiovese is native to Tuscany and is widely planted in central Italy where it is the mainstay grape in Chianti, Carmignano, and Montepulciano. Plantings stretch as far south as Campania and north to Romagna. Tuscany is the third most widely planted region in Italy behind Sicily and Apulia. However, the Tuscany region is eighth in volume due to the poor nature of the soil there, which naturally keeps yields low.
Like France, the Italians have an appellation system that designates regional authenticity and exerts some control in how the product is produced. In Italy, there are three designations; Denominazione di Origine (DO), Denominazione di Origine Controllata (DOC) and Denominazione di Origine Controllata e Garantita (DOCG). All three designations assure the origin of the wine, but when the DOC labeling appeared to be abused and perceived inferior wines were being labeled as DOC, the designation DOCG was developed. It is essentially the same as the DOC, but the DOCG wines are analyzed and tasted by government-licensed individuals prior to bottling. A numbered seal identifies the bottles across the cap or cork. Within the DOC and DOCG designations are the terms classico and riserva. The former referring to wines made in the classical style for that region, for example Chianti Classico consists of at least 80% Sangiovese. To be able to be labeled riserva the wine must have been aged at least two years longer than the traditional wine. A much higher regulation level, Chianti Superiore, addresses lower crop yields, higher alcohol and extract in the wines.

It was some of these regulations that led a group of Italian winemakers to spurn all the rules regarding DOC and DOCG. As inferred above, the rules of any appellation, or in this case DOC system, can be very restrictive, and in some winemakers’ minds, lead to an inferior product — giving the region a poor reputation. Such was the case in Chianti where prior to 1970 the wines labeled Chianti could not contain more than 70% Sangiovese and also had to contain at least 10% of the local white grape. If these regulations were not adhered to, the wine would only be labeled in the lowest classification of table wines. Knowing that they could make a far superior product using Sangiovese and the typical Bordeaux varieties, the Super Tuscan was born from these winemakers and was soon outcompeting the classic style. Regulations have since been modified to bring these winemakers into compliance. Sometimes it just pays to be a rebel!
My first experience with Sangiovese came when I was working at Amador Foothill Winery in the Shenandoah Valley of California’s Amador County. The proprietors were enamored by the Italian varieties and wanted to make them a signature part of the winery’s portfolio. They retained a consulting winemaker from Tuscany who visited three times a year to advise on pruning regimens in the winter, suckering and crop thinning in the summer, and blending the final product after nine months in barrels. The consultant’s philosophy was very cosmopolitan; to make the best Sangiovese, you must start in the vineyard and progress to the winery, where your ultimate blend is only the best barrels.
It’s hard to swallow, but this is a variety that you taste whatever you put at it, “delicate,” as some would say, so only your best showing product should be put forward. The experience that I share is a personal one, as I have made a lot of Sangiovese in my career and all of the following is valuable information. Truth be told, outside of Italy, this is a very difficult grape to work with; over-cropping tendencies, poor color, cellar choices based on dollars spent not quality.
As is the case with many grapes, Sangiovese starts in the vineyard. Sangiovese is a grape variety that tends to over crop. In the age-old debate of quantity versus quality between viticulturists and winemakers, this is one argument against the research that states it does not matter. Controlling vigor with rootstock choice is the first key. The best Sangiovese are that which are planted on low vigor rootstocks that do not promote excessive vegetative growth of the plant. This creates a balance between leaves and fruit, and promotes moderate sun exposure to mature tannins. A grower once told me that pulling the first two leaves opposite the developing flowers prior to anthesis (flowering) promotes shatter, which results in the development of a looser cluster. I don’t know of any research to support that, as when we did this the clusters always seemed the same, but intuitively, this does promote somewhat more sun exposure to the cluster early in its development, thus ‘hardening’ the skin and making it less susceptible to sunburn. The sun exposure, though, has been scientifically proven to promote tannin development in the grape. Vigor control via irrigation practices is common in California, however the DOC/G regulations in vineyards in Italy are to be that they are dry-farmed, and watering is only practiced to establish young vines.
Vineyard practices also dictate the quality of the fruit. The vine tends to over crop, and given that Sangiovese has a relatively long growing season — early to bud and late to ripen — it could be troublesome in some seasons and in some areas. Therefore, the fruit is usually thinned just after veraison to roughly one cluster per shoot. This allows the plant to concentrate its maturation of the clusters to a much smaller number. At thinning time in the vineyard it is easy to see the clusters that are not as advanced. They are evident by still fleshy green attachments to the cane, whereas the more advanced cluster attachments are woody and brown. Another technique with respect to fruit thinning is to wait until average Brix levels reach about 19-21 °Brix, but keep the fruit and make a Blanc de noir or rosé wine. This technique is best done when a longer growing season can be assured; one that is devoid of heavy rain or cold temperatures that could delay ripening.

Sangiovese is picked at optimal ripeness, when flavors of strawberry and cherry are evident. In a well-balanced, vineyard, this is typically 24-25 °Brix. Standard maceration techniques of crushing direct to tank are practiced, however some winemakers will remove a portion of the juice from the must after some skin contact time, typically around 24 hours, to increase the skin to juice ratio, which presumably leads to better color development. This process of “bleeding” the must is known by the French term saignée, which literally means, “to bleed.” The good part about this bleeding is that the juice is often made in to a rosé-style wine. Red musts are sometimes treated with oak products to promote color stabilization, and blending with grapes such as Petite Sirah can also help.
With Sangiovese it is all about color preservation. Having a good pH and titratable acidity (TA) to start with is key. Targeting a pH typically around 3.5-3.6 and a TA around 6-7 g/L is good.
here are a host of yeast choices when it comes to Sangiovese. Check the yeast manufacturer’s website for suggestions based on what you are seeking to achieve. I personally used Lalvin D254 this last season as I feel it enhances the fruitier qualities of the grape, however QA23 is another great option and can be sourced in quantities more suitable for home winemaking. Fermentation should typically be allowed to warm to 85 °F (29 °C) and be able to be held there until peak fermentation begins to subside, which happens around 6-10 °Brix. Being able to hold the diminishing ferment around 80 °F (27 °C) until the cap is just about to fall, typically around 10-14 days, is helpful in color stabilization as well. Take care in protecting the headspace from oxygen intrusion at this stage or else you run the risk of oxidizing the ethanol and nutty or Sherry-like characters will develop.
Up to now we have focused on developing the fruit in the vineyard and getting it through primary fermentation. Pressing of the wine to tank or barrel is typical, with subsequent inoculation with malolactic bacteria. Once the malolactic fermentation (MLF) is complete, a cautious approach to sulfur dioxide addition is recommended. The first addition of 35 mg/L should be made at the completion of MLF. Testing and subsequent additions to maintain a free sulfur dioxide of 35 mg/L should be made at your normal racking intervals.
Previously, I referred to Sangiovese as being a grape that is delicate in nature. To elaborate on this is that the trueness of this grape comes from the fruit itself. It is not one that can be manipulated or muscled around with heavy toasting oak regimens or the use of inexpensive oak adjunct products.
My most positive experiences with this are with high quality, medium toast French oak barrels. Something that I didn’t understand at the time was that we put 100 percent of the lot in brand new oak. My biased training prior to that somewhat resisted this notion, but this consultant, after all, was an expert with Sangiovese. While my initial impressions of the wine after nine months in brand new oak were reasonable, what I came to appreciate after three years in the bottle was how well the oak characters had mellowed and integrated with the rich strawberry flavors of the grape. The deep red color was still evident. This underscores the importance of bottle aging. I owe a lot of respect to my early career mentors who were both business-minded but also understood what the statement, “We will release no wine before its time” meant. (My apologies to the other family-owned winery that originally coined this phrase).
The Tuscan sun is fading, and in reality, the best examples of this noble grape of Italy are ones in which quality is addressed in the vineyard as well as the cellar. Sangiovese is a variety in which I cut my winemaking teeth on, and learned the meaning of the phrase, “If you are not going to make good wine, why bother!”
You too can make a good Sangiovese, you just need patience and the understanding that this is one of the more difficult varieties to work with, but it all starts in the vineyard — “under the Tuscan sun” — or wherever you may be.
Sangiovese Recipe
(yield: 5 gal/19 L)
Ingredients
• 125 lbs. (57 kg) Sangiovese fruit
• Distilled water
• 10% potassium metabisulfite (KMBS) solution. Weigh 10 grams of KMBS, dissolve into about 50 milliliters (mL) of distilled water. When completely dissolved, make up to 100 mL total with distilled water.
• 5 grams Lallemand D254 yeast
• 5 grams Di-ammonium Phosphate (DAP)
• 5 grams Fermaid K (or equivalent yeast nutrient)
• Malolactic Fermentation Starter Culture (CHR Hansen or Equivalent)
Other equipment or needs
• 15-gallon (57-L) food-grade plastic bucket for fermentation.
• 5-gallon (19-L) carboy,
• (1-2) 1-gallon (3.8 L) jugs
• Racking hoses
• Destemmer/crusher
• Wine press
• Inert gas (nitrogen, argon or carbon dioxide)
• Ability to maintain a fermentation temperature of 81-86 °F (27-30 °C).
• Thermometer capable of measuring between 40-110 °F (4-43 °C) in one degree increments.
• Pipettes with the ability to add in increments of 1 milliliter.
• Tartaric acid
Step by step
1. Clean and sanitize all your winemaking tools, supplies and equipment.
2. Crush and destem the grapes. Transfer the must to your fermenter. During the transfer, add 15 mL of 10% KMBS solution (This addition is the equivalent of 50 ppm SO2). Mix well.
3. Take a sample to test for Brix, acidity and pH. Keep the results handy.
4. Layer the headspace with inert gas and keep covered. Keep in a cool place overnight.
5. The next day, sprinkle the Fermaid K directly on the must and mix well.
6. Go back to those lab results you took yesterday. Typical Brix for this style is 24-25 °Brix. Typical acid levels will be 0.58-0.62%. Adjust as necessary using tartaric acid. If the acid is higher than 0.70%, don’t panic, this recipe calls for a minimum final acidity of 0.55%. Higher acid won’t hurt here.
7. Prepare yeast. Heat about 50 mL distilled water to 104 °F (40 °C). Do not exceed this temperature as you will kill the yeast. Sprinkle the yeast on the surface of the heated water and gently mix so no clumps exist. Let it sit for 15 minutes undisturbed. Measure the temperature of the yeast suspension and the juice. You do not want to add the yeast to your cool juice if the temperature difference exceeds 15 °F (8 °C). Acclimate your yeast by taking about 10 mL of the cold juice and adding it to the yeast suspension. Wait 15 minutes and measure the temperature again. Do this until you are within the specified temperature range.
8. When the yeast is ready, add it to the fermenter and mix.
9. You should see signs of fermentation within one to two days.
10. Push the grapes back into the juice to promote color, and tannin extraction. This is called “punching down” and this should be done three times per day. Beware of the carbon dioxide hazard. Do the fermentation in a well-ventilated area and do not directly in-hale the headspace of the fermentation.
11. At about 19 °Brix, sprinkle in the DAP and punchdown.
12. Monitor the Brix and temperature twice daily during peak fermentation (10-21 °Brix). Mix the must. Wait 15 minutes, mix and check the temperature again. Keep the temperature between 81-86 °F (27-30 °C).
13. When it reaches 0 °Brix (about 5-7 days), transfer the must to your press, and press the cake dry. Keep the free run wine separate from the press portion for now. Be sure to label your vessels to keep the press portion separate!
14. Transfer the wine to your carboys or one-gallon (3.8 L) jugs. Make sure you do not have any headspace. Place an airlock on the vessel(s). Label the vessels.
15. Inoculate with your malolactic (ML) bacteria. Check the manufacturer’s instruction on how to prepare and inoculate. Cover the tops with a breather to allow CO2 to escape.
16. Monitor the ML fermentation using a thin layer chromatography assay. Follow the instructions included in the kit.
17. When the ML is complete, taste the wine for dryness. A dry wine is the stylistic goal here.
18. Add 2 mL of fresh KMBS (10%) solution per gallon (3.8 L) of wine. This is the equivalent to ~40 ppm addition.
19. Measure the pH and titratable acidity (TA). Most importantly, you want a finished TA of about 0.55 to 0.60%. The pH is secondary but should be around 3.7. Add acid to adjust the TA prior to settling.
20. Place the wine in a cool place to settle.
21. After two weeks, test for SO2 and adjust as necessary to attain 0.8 ppm molecular SO2. (There is a simple SO2 calculator on the WineMaker website).
22. Check the SO2 in another two weeks and adjust. Once the free SO2 is adjusted, maintain at this level. You’ll just need to check every two months or so, and before racking.
23. Rack the wine clean twice over a 6-8 month timeframe to clarify.
24. Once the wine is cleared, it is time to move it to the bottle. This will be about eight months after the completion of fermentation.
25. Integrate the press fraction back into the free run. You may not need all of it.
26. It can probably be bottled without filtration if SO2 levels are maintained and there are no surface films or indications of subsequent fermentations. That said, maintain sanitary conditions while bottling.
Notes:
• Yields are assumed based on 5 gallons (19 L) of juice per 100 pounds of grapes using a crusher/destemmer and basket press. Your actual yields may vary based on equipment used.
• This recipe calls for specific additions of sulfur dioxide at specified intervals. Once these scripted additions are made, you must monitor and maintain to 0.8 ppm molecular SO2. Adjust as necessary using the potassium metabisulfite solution. Testing can be done at a qualified laboratory, or in your home cellar using various commercially available kits.