Ruby Cabernet
When I started graduate school at UC-Davis in 1995, one of my first classes was a seminar series. Being the first session of the academic year, a round of introductions started the session. It was the usual “my name is . . ., my specialty is…, and I have been at UC-Davis for … years.” Then came the turn of an elderly man, who literally shuffled into his office everyday, and seemingly was reading or engaged in conversation with faculty and students alike until about mid-afternoon, and then shuffled home for the day. The man stood from his chair, and said, “My name is Harold Olmo, I am a grape breeder, and do you want to know when I came here as a student, or faculty?”
In front of us was Dr. H.P. Olmo, one of the greatest grape breeders of modern times, and it is his first release, Ruby Cabernet, that is the topic of this issue. Much of which is presented here is a summation of Dr. Olmo’s notes on the variety.
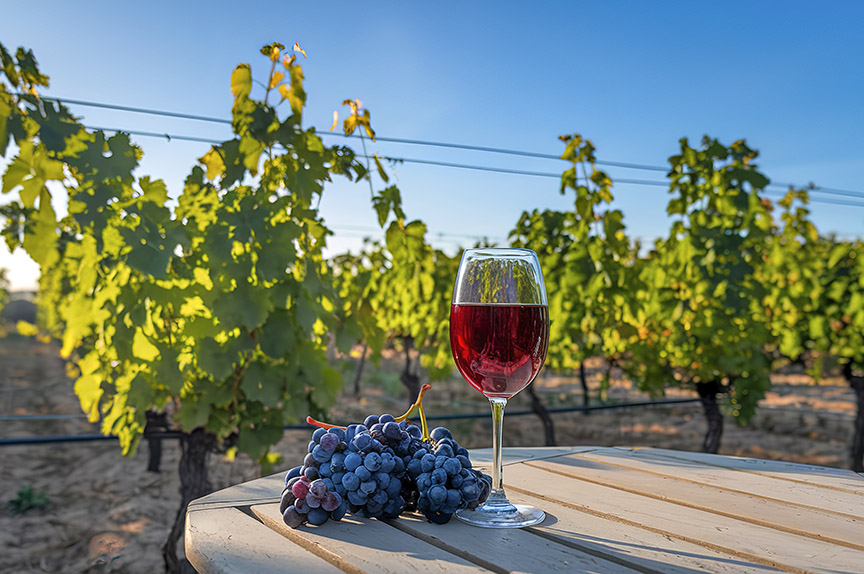
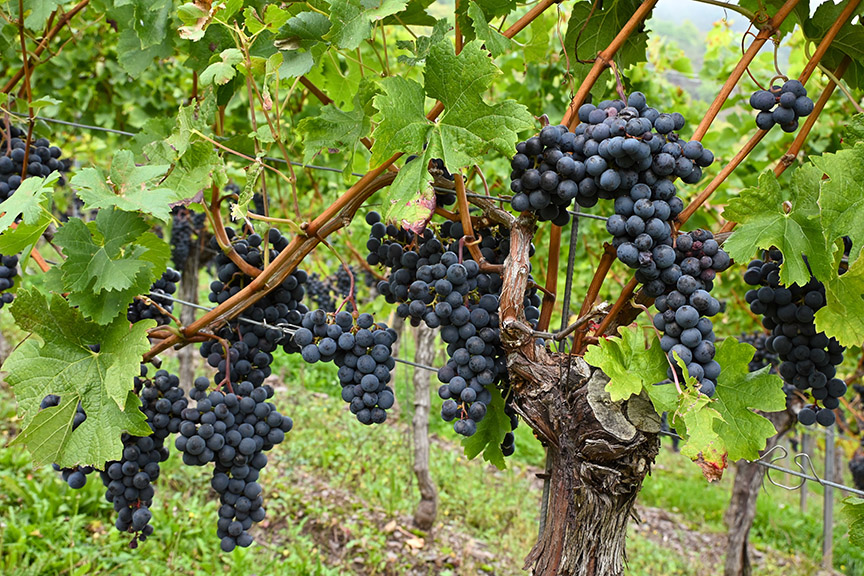
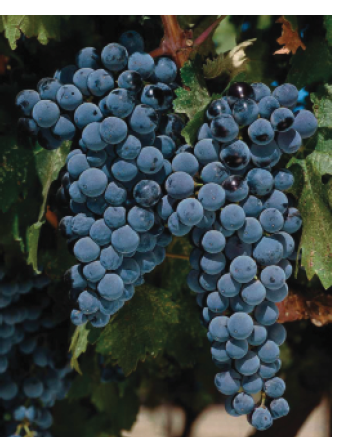
Ruby Cabernet is a red grape and was the first grape Dr. Olmo released, in 1948. It is a cross of the vinifera varieties Carignane and Cabernet Sauvignon. It was bred with the intent of being a Vitis vinifera spp. with growth and adaptability characteristics to the California agricultural environment, but having the high quality fruit characteristics of its vinifera parents. The leaves are large and floppy, like Carignane. One other trait it gets from Carignane is its moderate susceptibility to powdery mildew. The clusters are medium to large, long and conical, with wings. The clusters can be loose or well-filled depending on the season. The berries are round to oval, dark purple, with the distinct flavors of Cabernet Sauvignon. The wine it produces is generally described as black currant, blackberry, cherry, and some vegetal tones such as bell pepper, which it gets by nature from its Cabernet Sauvignon parent. The flavor compound that contributes to the vegetal characters is a class of compounds call methoxypyrazines. The canopy is open and semi-erect. This open type of canopy exposes the fruit to indirect sunlight, which has been shown to decrease the methoxypyrazine concentrations in ripening Cabernet Sauvignon grapes. It is said that the best flavors come with lower crop levels, but this is an often-debated subject between the viticulturists and the winemakers.
The vines, when own-rooted, follow the vigor contour of the soil. While some growers are successful with own-rooted planting, the plant is still susceptible to soil pests such as phylloxera. Shallow, sandy soils, tend to reduce the vigor, and are less favorable to phylloxera. To be safe, the use of rootstocks is encouraged. For sandy soils, the rootstocks Freedom or 101-14 are commonly used, but 110R can be used also. The richer the soil and more vigor the vine displays, the more of a need to pair with a suitable rootstock. The rootstocks 101-14 MGT or Kober 5BB are generally used to reduce the vigor. Growers need to be cognizant of how big this plant will get to reduce overcrowding and possible shading of the fruit. A well-schooled viticulturist or cooperative extension specialist can help you make the right match. Compared to other varieties, onset of budbreak is generally late. It should also be noted that seasonal vine maintenance is usually at the minimum. The practice of shoot thinning or leaf removal does not yield any better quality fruit. A simple T-trellis, also known as the “California sprawl” is generally used. The vines are very productive and yields of 8–12 tons per acre have been reported. Higher yields have been shown to result in less color intensity. Harvest is generally classified as mid-to-late. In California, this means mid-September to mid-October. Hand harvests are difficult due to the thick woody cluster stem and higher yields. Thus machine harvests are the norm.

Ruby Cabernet is usually destined for the bulk blends of the largest wineries in California’s southern Central Valley. And the reality is that this is what Dr. Olmo bred this variety for. The main production is primarily in Fresno County, and smaller amounts in adjacent Madera and Kern Counties. These counties are the home of some of the largest bulk wine producers in the country. Other red vinifera grapes grown in this hot climate need a little bolstering, and Ruby Cabernet was designed by Dr. Olmo to fit this description. The 2016 California Grape Acreage report shows that in 2016, there were 4,955 acres of Ruby Cabernet. Interesting to note is that vineyard acreage increased slightly from 2008 to 2015, but saw a decline in 2016. A total of 54,734 tons were crushed in 2016, down from 67,686 tons in 2015, following the acreage decrease trends. Average tonnage based on these figures is about 11 tons per acre.
Ruby Cabernet suffers the same name recognition fate as many other vinifera varieties and hybrids. While it is a variety suited for the California market on its own, it is used to buoy up other reds. Thus, Ruby Cabernet is considered a blending wine grape in the commercial market. What doesn’t make it to blending, sometimes winds up in the grape juice concentrate market. Its function as a concentrate is the same, improving color and mouthfeel, and perhaps adding a little sweetness to fighting varietal grapes like its Cabernet parent, and Merlot. It is this side market as a concentrate that offers opportunity to the home winemakers all across the country. You will find multiple sources for Ruby Cabernet grape juice concentrate by doing an Internet search. Whether available as a concentrate or within your favorite wine kit vendor, this is one of the best opportunities to explore a new variety if you haven’t done so already.
Given the color, versatility, and overall positive aroma profiles to Ruby Cabernet, did it or could it ever have a life outside the “blender’s box?” Jancis Robinson reports that outside of California, it can be found in Virginia, North Carolina, and Wisconsin. Other locations found were the Texas Hill Country and also in Missouri. Alas, there are several mentions of its role as a blender and very rarely as a varietal. South Africa and Australia have plantings in their drier, hotter geographic locations, but only a small percentage of the variety make its appearance as such. About the only place you will find this as a varietal is in the Robertson district of South Africa, east of Cape Town.
Dr. Olmo’s expertise in grape breeding over the years led to the creation of many grape varieties, both table and wine grapes, and at his memorial service in 2006, we enjoyed wines made from the fruits of his labor. All very enjoyable, but all really extolling the difficult job grape breeders have to market these new varieties to a public that does not want to change their wine tasting habits. In closing, the following line from Appellation America really sums up this struggle.
“You may be the King’s daughter, but your conduct is anything but stately. Hanging out at the Central Valley Mall and getting baked with your Fresno pals is certainly not behavior becoming a princess. While you may have inherited your father’s fruity character, you rebel against the structure of noble life. You don the family title of ‘Cabernet’ to put on heirs, but you are really nothing more than a raspy wench named Ruby.”

Sad, but true. Now it’s your time to be adventurous.
Ruby Cabernet Recipe (5 gallons/19 L)
This is a simple way to make Ruby Cabernet from juice concentrate. Kits are also available for this variety, in which case you should consult the manufacturer’s specifications included with the kit for specific directions. If using juice concentrate, this recipe is a good guideline.
Ingredients
(5) 46-oz. cans of Ruby Cabernet juice concentrate, ~68-70 °Brix
3.5 gallons (13 L) distilled/de-ionized water
5 grams EC-1118 yeast
10% potassium metabisulfite (KMBS) solution. Weigh 10 grams of KMBS, dissolve into about 50 milliliters (mL) of distilled water. When completely dissolved, make up to 100 mL total with distilled water.
5 grams Go-Ferm (or equivalent yeast starter)
10 grams Fermaid K (or equivalent yeast nutrient)
5 grams Di-ammonium Phosphate (DAP)
Malolactic starter culture. Freeze dried or equivalent
Other equipment or needs
6-gallon (23-L) food-grade plastic bucket
5-gallon (19-L) carboy,
Racking hoses
Inert gas (nitrogen, argon, or carbon dioxide)
Ability to warm about 4 gallons (15 L) of water to 60–65 °F (15–18 °C)
Ability to maintain a fermentation temperature of ~75 °F (24 °C).
Ability to hold wine at 38-40 °F (3–4 °C) while settling.
Thermometer capable of measuring between 40–110 °F (4–43 °C) in one degree increments.
Pipettes with the ability to add in increments of 1 milliliter (mL)
Step by step
1. Clean and sanitize your winemaking tools, supplies and equipment.
2. Warm water to about 65 °F (18 °C). Add the water to your bucket. You will use ~3.5 gallons (13 L) of water to dilute the concentrate. You are targeting 23-24 °Brix so have your hydrometer handy. Sometimes this is not an exact science.
3. Add five cans of juice concentrate, using the warmed water to completely dissolve remaining concentrate in the can. Mix well. This can be done in the bucket or a pot on the stove. In the end, you will have about 5.5 gallons (21 L) of juice in the bucket at about 23 °Brix.
4. Layer the headspace with inert gas and mix Fermaid K or equivalent yeast nutrient into the juice.
5. Prepare yeast. Heat about 50 mL distilled water to 108 °F (42 °C). Mix the Go-Ferm into the water to make a suspension. Measure the temperature. Pitch the yeast when the suspension is 104 °F (40 °C). Sprinkle the yeast on the surface and gently mix so that no clumps exist. Let sit for 15 minutes undisturbed. Measure the temperature of the yeast suspension and the juice. You do not want to add the yeast to your cool juice if the difference in temperature of the yeast and must exceeds 15 °F (8 °C). To avoid temperature shock, acclimate your yeast by taking about 10 mL of the juice and adding it to the yeast suspension. Wait 15 minutes and measure the temperature again. Do this until you are within the specified temperature range. Do not let the yeast sit in the original water suspension for longer than 20 minutes. When the yeast is ready, add it to the fermenter.
6. Initiate the fermentation at room temperature (~75 °F/24 °C) and once fermentation is noticed, (~24–48 hours) move to a location where the temperature can be maintained at 75–80 °F (24–27 °C). You should see signs of fermentation within one to two days. This will appear as some foaming on the juice.
7. Two days after fermentation starts, dissolve the DAP in as little distilled water required to completely go into solution (usually ~20 mL). Add directly to the carboy and stir thoroughly.
8. Leave alone until bubbles in the airlock are about one bubble per minute. This is usually about two to three weeks. Start measuring the Brix every 2-3 days.
9. The wine is considered dry, or nearly dry, when the Brix reaches -1.5 °Brix or less.
10. When a stable Brix reading is found, and in a normal situation this is about 10 days post inoculation, it can be assumed that you can initiate the malolactic fermentation. Use the freeze-dried culture or equivalent. Add directly to the wine.
11. Observe the carboy for bubbles evolution in the neck daily. This is an indication of the malolactic conversion (MLC). When the bubbles cease, that is the end of the MLC (although doing a paper chromatography test is a more accurate way to measure this, as bubbles can be difficult to see at the tail end).
12. At this point, add 3 mL of fresh KMBS (10%) solution per gallon of wine. This is the equivalent to ~40 ppm addition. Transfer the wine to the 5-gallon (19-L) carboy. After two weeks, test for pH and SO2, adjusting as necessary to attain 0.8 ppm molecular SO2. (There is a simple SO2 calculator at www.winemakermag.com/guide/sulfite). Check the SO2 in another two weeks, prior to the next racking, and adjust while racking. HINT: Rack to another sanitized 5-gallon (19-L) carboy, or your bucket. In the case of the latter, clean the original carboy and transfer the wine back to it. This is done at about 4–6 weeks after the first SO2 addition. Once the free SO2 is adjusted, maintain at the target level by monitoring every 3-4 weeks.
13. At about three months fine or filter if desired, and then bottle. Maintain sanitary conditions while bottling. Once bottled, periodically check your work by opening a bottle to enjoy with friends.