Force-Carbonating Wine to Sparkle: Counter pressure bottle method
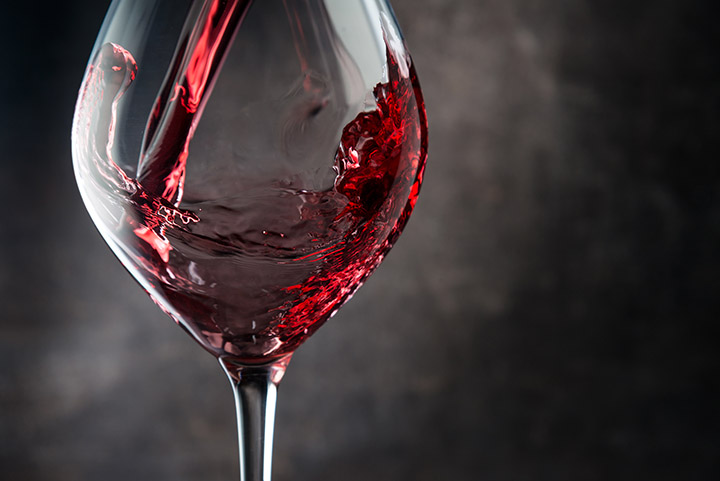
Ah! There’s nothing like a nice bottle of chilled bubbly to sip as an aperitif while preparing dinner, or for those of you who already cannot wait for summer, to sip on the patio or around the pool on a hot summer day.
But what is a home winemaker to do if there is none in the cellar. As a home winemaker, you may never have taken the leap into sparkling wine production thinking that it was too much hassle or too difficult to make.
Fear no more! Making sparkling wine (a.k.a. bubbly) can be quite easy with the proper equipment, and you can have a batch of bubbly ready just in time for the holiday season or for those hot summer days – no second fermentation, no aging, no lees to rack or disgorge, just a simple refreshing bubbly made from your favorite batch wine in your cellar waiting to be carbonated.
Carbonation is quite simply a method of injecting carbon dioxide (CO2) gas into a beverage, as done in soft drink production. There are various carbonation methods for making bubbly at home including the use of a carbonating stone or specialized equipment such as a counter-pressure bottler. Alternatively, you can search for a home winemaking retailer that provides this service.

This guide will step you through the procedure for making approximately 26 bottles of sparkling wine from a 5-gallon (19-L) batch of homemade wine using a counter-pressure bottler.
WARNING: You will be working with highly pressurized equipment and wine. Be sure to wear protective clothing, particularly eye and face protection.
Required Equipment
Some home winemaking supply shops either provide carbonation service or rent out the necessary equipment for carbonating wine at home; all you need to pay for is rental or service cost and CO2 gas. If you plan on carbonating wine on a regular basis, you should consider investing in the equipment.
Here is the list of equipment you will need:
- Counter-pressure bottler equipped with a pressure gauge
- 5-gallon (19-L) stainless steel pressure resistant container or keg-rated for 130 PSI (9 bars), such as a Cornelius keg
- CO2 tank
- Gas regulator
- Hoses and fittings
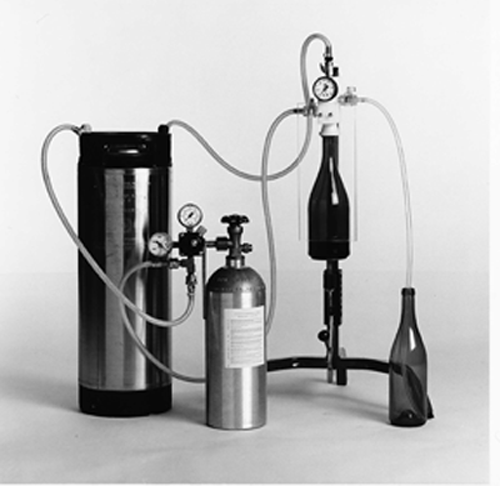
The figure above illustrates the setup for carbonating wine using a counter-pressure bottler. In this figure and in the accompanying instructions, a counter-pressure bottler is used. Other types of counter-pressure bottlers exist, however, the basic set-up and procedure are similar.

Note that the keg is equipped with an “in” post for gassing and an “out” post to draw out wine and into a bottle. The out post is connected to a feed tube on the inside that extends to the bottom of the keg.
Remember that when using kegs and keg fittings, gray fittings are used on the gas line while black fittings are used on the wine line. Test your keg, or have it tested, for any leakage. If the seal on the keg lid or posts are not airtight, carbonation will not work. Winemaking supply shops selling Cornelius kegs most often carry spare replacement parts.
The CO2 tank is equipped with a regulator to monitor and control bottle pressure. Equal volumes of wine and CO2 will be required.
The counter-pressure bottler consists of a bottle stand apparatus with a 3- or 4-valve assembly to control the flow of gas and wine, and a pressure gauge mounted on a manifold. The gas valve is connected to the CO2 tank and regulates the flow of gas. The wine valve is connected to the out post on the keg, and regulates the flow of wine into the bottle to be carbonated.
The control valve regulates bottle pressure. An overflow tube from the control valve should be placed in a bottle to collect any wine that may overflow during bottling. Lastly, the CO2 tank is connected to the in post on the keg. The manifold assembly is also equipped with a rubber seal to provide an airtight seal during bottling.
Carbonating Your Wine
Your base wine, or cuvée, should be cold stabilized, can be dry or sweet at your desired alcohol level — this will not be altered with this method — and have a total acidity balanced with the residual sugar content. It can be sweetened as desired before gassing and will most likely not require dosage adjustments. You should still taste the first bottle of carbonated wine to make sure it is balanced and to your liking.
Note that carbonation will increase the perception of acidity, so you may want to add a dosage or slightly over-sweeten the cuvée. Once the wine has been injected with CO2 gas, be sure to seal the bottles with a plastic stopper as quickly as possible to prevent loss of precious gas.
Clean and sanitize 27 sparkling wine bottles; one bottle will not quite fill up if using a 5-gallon (19-L) batch, and it can therefore be used as the overflow bottle. You should only use sparkling wine bottles as they will be subjected to high pressure. This is VERY IMPORTANT; otherwise, you can get seriously injured if a bottle explodes.
To clean the keg and counter-pressure bottler apparatus, first rinse the keg with water and then fill it midway with a soft sulfite solution. Assemble the setup as shown in the figure. Open the control valve completely.
With a bottle properly seated under the manifold, open the wine valve to let the sulfite solution flow through the overflow tube and collect the solution in an empty carboy. Rinse the keg with water and repeat the cleaning operation with the keg filled midway with water.
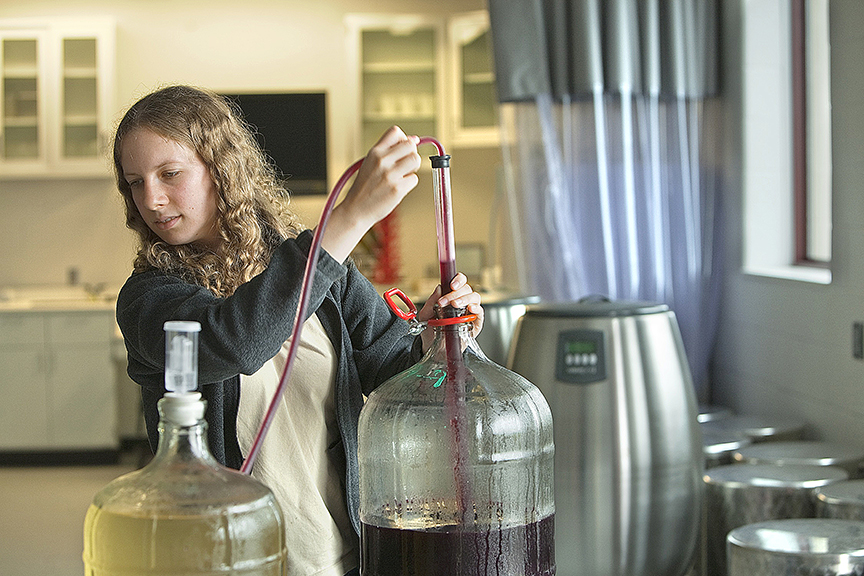
Rack the wine into the keg and place the keg in a very cold refrigerator or freezer until it reaches a temperature of approximately 32 °F (0° C). Do NOT let the wine freeze. When ready to carbonate and the setup is ready to go, disconnect the wine valve tube from the out post on the keg. All valves, including the main control knob on the gas tank, should be in the “closed” position.
Invert the keg and then open the main control knob on the gas tank valve. Adjust the gas tank pressure to 40–50 psi (2.5–3.5 bars). Do not exceed the recommended maximum pressure; otherwise, bottles may explode.
Shake the keg until the hissing sound from the gas tank subsides and then return the keg to the upright position. This procedure saturates the wine with CO2 gas, and takes approximately 8 to 10 minutes for a 5-gallon (19-L) keg. Connect the wine valve tube to the out post on the keg, and insert the overflow tube from the control valve into the overflow bottle.
Take one sparkling wine bottle — remember, these can only be pressure-resistant bottles — and place it on the stand making sure that it is properly seated against the manifold seal (the bottle should be completely airtight).
Open the gas valve to let pressure build up inside the bottle. Open the wine valve and then close the gas valve. Wine will not flow until the control valve is opened since the pressure in the bottle and the keg are equal.
Then, open the control valve slowly to lower the pressure inside the bottle to allow wine to flow into the bottle. If the control valve is opened too much or too quickly, foam will build up in the bottle. After the control valve is adjusted correctly with the first bottle, it will require no further adjustment for the duration of the bottling operation, as long as same-size bottles are used.
Fill the bottle to allow a gap of approximately 0.5 inch (2 cm) when the plastic bottle stopper is inserted. Lastly, close the wine valve completely whilst letting the pressure drop to 10 psi (less than 0.5 bar). Allow the foam in the bottle to stabilize before removing it from the pressure bottler apparatus.
Remove the bottle, insert a plastic stopper immediately and secure it with a wire cage using the special tool purposely designed for this purpose. Insert the tool in the wire cage and pull tight on it ensuring that the cage is properly seated under the lip of the bottle.
While pulling, twist the wire 5 turns to secure it — this should leave a small loop to help unwind the wire when ready to open and serve the bottle. Repeat the procedure for the complete batch of wine, and voila, your first couple of cases of homemade bubbly.
Enjoying Your Wine
Carbonated sparkling wines will not benefit or improve with further aging, so chill a bottle or two, invite some friends over, fire up the BBQ, and enjoy your homemade bubbly. Life doesn’t get any better!