Just the pHacts
Understanding, testing, and adjusting pH
Acidity is critical to both the taste and the stability of wine. Sometimes, though, experienced winemakers talk about its two main aspects — pH and titratable acidity — in ways that are hard to follow. Titratable acidity (TA) is a mass/volume number that expresses all of the acid in wine that will react with a sodium hydroxide titration solution. It is reported as if all of that acid is in the form of tartaric acid, although that is not generally the case. pH expresses the activity of free hydrogen ions, often shown as H+ (or combined with water as H3O+), in terms of their availability to participate in other chemical reactions in the wine. Life processes in living systems are strongly pH dependent, often taking place in only a narrow range of values.
TA values tend to match intuition, with numbers getting larger with a higher concentration of acid in the wine. pH values are just the opposite. Water dissociates naturally from H2O into H+ and OH–. When these occur in water (aqueous solution) at exactly equal values, the pH is 7.0 and the solution is described as neutral. When H+ is more abundant, the resulting acidic solution has a pH less than 7.0. Alkaline solutions are those above 7.0. The scale is considered to run from 0.0 to 14.0, although pH values below zero are physically possible with strong acids and values above 14 can be reached with strong bases. In wine, the entire range is from about 2.8 to 4.2 and all wines are acidic. pH is the aspect of wine acidity that takes center stage in today’s column.
While agreed upon among scientists worldwide, the pH scale is not just an arbitrary construct. It originates in the natural condition that the dissociation of water occurs to a very, very small extent and is entirely reproducible. It varies with temperature, so the agreed-upon temperature for the conventional scale is 77 °F (25 °C). In the early twentieth century Danish chemist Soren Sorensen proposed using a base-ten logarithmic scale to express hydrogen ion concentration. That is, each lower pH number is ten times the concentration of the next higher one. He expressed those numbers by using the logarithmic value as the pH number. So a solution at pH 3 contains ten times as many free hydrogen ions as one at pH 4, and so on for the whole scale. Specifically, the pH value is the negative logarithm of the hydrogen ion concentration. The value can be derived from the equilibrium equation between hydrogen ions and hydroxide ions in pure water. At 25 °C, the equilibrium value is 10-14 molar or 10-14 = [H+] x [OH–]/[H2O]
Since the hydrogen ion concentration [H+] is exactly equal to the hydroxide ion concentration [OH–] at neutrality, each of them is 10-7 M and the exponent of the hydrogen ion concentration, -7, shows us a pH value of 7. All the other numerical values of the pH scale follow mathematically. The dissociation constants of specific acids use similar notation, with the negative logarithm expressed as pKa. The most important practical aspect of pH measurement in wine has to do with stability. Free sulfur dioxide (FSO2 or free sulfite) is much more effective at lower pH. As you can observe with the sulfite calculator at winemakermag.com/sulfitecalculator, lowering the pH from near four to closer to three dramatically increases the proportion of molecular sulfur dioxide in the wine. Since the molecular form is effective against spoilage, a lower pH wine is significantly more stable.

The most important practical aspect of pH measurement in wine has to do with stability.
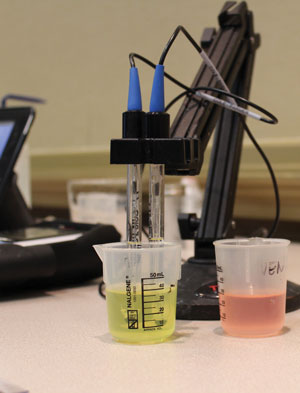
Color changes with pH in natural materials first defined measurement of pH. Scientists noted that certain materials change from one color to another at specific and repeatable pH levels. Red wine is one such natural product, as can be seen with adding ammonia to a bit of wine, then vinegar. Called indicators, such materials can be used to show the endpoint of an acid-base titration or the pH of a sample. If you group several indicators over a range of interest, you can come closer to the true pH value by trying them successively on your sample. That principle is still in use today in the simplest pH measurements for home winemakers: pH sticks and strips.
One style of sticks uses four or five squares of different dyes applied to a plastic strip. You dip all the pads into a wine sample, then compare the colors that develop with reference patterns printed on the box. For winemaking use, these sticks have several drawbacks. First, they are often graduated in only 0.5 pH units. That means if you interpret the color reading as pH 3.5, you can only really be confident the pH is from pH 3.25 to 3.75. We already know most wines fall in that range without even doing a test! Another limitation is that the ink used to print reference colors on the box is not exactly the same as the dyes on the stick, so the colors do not always match well. Finally, if you dip a stick in red wine, it is likely to give a pink or purple tint to the squares, making matching even more difficult.
Fortunately for scientists and winemakers everywhere, Sunkist Growers had a problem in the early part of the twentieth century. As they processed lemons into various products at their Southern California packing plant, they needed to monitor the pH of the lemon juice for quality control. Indicators are messy and not very precise, so they looked for other methods. There were research-grade instruments that could measure the potential (voltage) of a solution and calculate the pH, but the signal was weak and measurement was cumbersome.
Sunkist scientists were put in touch with Dr. Arnold Beckman at the California Institute of Technology (Caltech). Beckman was a chemist who also had experience with electronic devices of the 1930s. His proposal was to use a vacuum-tube voltmeter to amplify the signal from a hydrogen electrode, ultimately leading to a rugged, reliable, and rapid pH meter. That meter was also the foundational instrument for Beckman Instruments, the forerunner of the $3B Beckman Coulter instrument manufacturer still operating today.

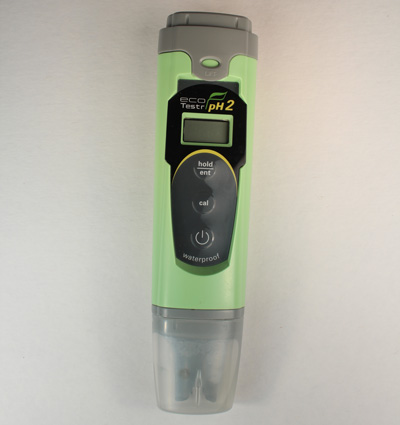
While Beckman’s early meters (and the first ones I used in college) used an analog needle display, virtually all modern meters have a digital readout. They still use a high-impedance voltmeter, but that is now solid state instead of using vacuum tubes. If you own a pH meter, it probably appears to have just one probe. Just as with the original, though, it has two electrodes. For home winemakers, such a “combination electrode” is usually mounted in an epoxy or plastic body. The glass electrode — the one that responds to pH of the wine — runs down the middle of this body and terminates in a glass bulb at the tip.
Surrounding the body of the glass electrode is a cylindrical pool filled with a potassium chloride gel. In that gel is a silver wire and some kind of frit, wick, or porous ring that allows an electrical connection between the gel and the wine sample. The gel is at a constant pH and the meter detects the millivolts of electrical potential between the embedded wire and the glass bulb of the exposed glass electrode (look closely at yours and you will probably see all these features). The surface of the glass bulb is a glass-and-water gel a couple of molecules thick. Maintaining that condition is why you store the pH electrode in storage solution or pH 4 buffer.
When the electrode is immersed in a sample, hydrogen ions exchange with sodium ions in the glass gel until equilibrium is reached between it and the sample. The ratio of hydrogen ions to sodium ions dictates the millivolt signal between the glass electrode and the reference electrode. Some fancy software built into your meter displays the millivolt signal as pH.
Because electrodes vary and their response is not ideal, it is customary to first calibrate the pH electrode before using it. Do this at least once a week during the active winemaking season each year. Use a pH 4 or 4.01 buffer and a pH 7 buffer. Follow the instructions included with your meter. If your meter will calibrate properly, it is performing as intended and the results can be trusted. If it will not calibrate, you may need a new electrode. Some small portable meters do not have interchangeable electrodes, in which case you need a new meter. Since the electronic meter rarely fails, it is productive in the long run to buy a more sophisticated meter that will allow you to replace the electrode once every few years.
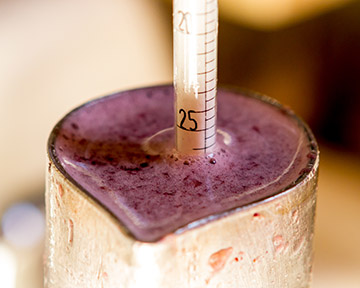
With your calibrated pH meter in hand, you are ready to use it in your winemaking. First job — measure the pH of the juice or must on harvest day to plan your fermentation. White juice is usually in the range of about 2.9 to 3.6 and red must is usually about 3.3 to 3.8. If you are seriously outside those ranges, begin planning right away for what you will do. If your pH is too high, the rule of thumb is that about 1 g/L of tartaric acid addition will lower it by about 0.1 pH. Since that addition will also raise your TA by 1 g/L, the acid taste of the juice (and resulting wine) will be strengthened.
Do not just keep adding tartaric acid to chase a particular pH number — keep TA and taste in mind also. If your pH is too low, adding 0.43 g/L of potassium bicarbonate will raise the pH by about 0.1 unit. Once again, keep an eye on TA and your senses focused on taste. For chemical acidification or deacidification, run bench trials of about 100 mL each so you have a clear idea of what will happen to your juice if you adjust the whole lot.
You can also raise a too-low pH wine microbially with malolactic fermentation (MLF). While tartaric acid is dominant in grape juice, significant malic acid is also usually present. Near the end of primary fermentation, inoculate with malolactic bacteria culture. If MLF goes to completion, it will drop the TA by about half the original malic acid value. That is because malic acid has two active hydrogen ions per molecule while the fermentation product, lactic acid, has only one. When the TA drops, a corresponding rise in pH should also occur.
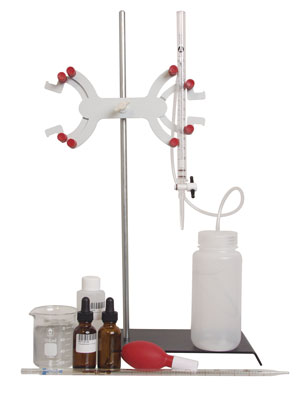
For all the TA testing, you can also use your pH meter to detect the titration endpoint of pH 8.2. Some small portable meters have a thick, rugged glass electrode. They are sufficiently accurate to measure pH, but the electrode response is too slow to monitor a titration. Meters with a separate combination electrode at the end of a cable should be used for titrations.
After your wine is finished, measure the pH again. This value is the one that will be critical as you use the sulfite calculator at the website. After that, rinse the electrode, store it in pH electrode storage solution, and put the meter away in a secure location until harvest comes around again.