Maintaining a Home Wine Cellar
Here are some tips and suggestions on cellaring your homemade wine and maintaining the cellar itself.
The cellar
“The cellar” has a wide range of interpretations for home winemakers. If you have the chance to build or install a wine cellar, experts in the field offer guidance. The conditions that are typically recommended may be found, for instance, in Daniel Pambianchi’s Techniques in Home Winemaking. He recommends a temperature of 55 °F (13 °C) and a relative humidity of 55% to 75%. Extreme vibration and the presence of excessive sunlight (or other ultraviolet light) should be avoided. In some climates, these conditions can be reached passively in a facility that is partially or completely underground. In other places, or if the facility must be above ground, some form of temperature control is required. A cellar may need to be cooled in the summer months and may need to be heated in the winter months. Humidity may need to be added during dry weather or removed in humid conditions.
Considering limitations of space and budget, even a special-purpose wine cellar may need to double as the home winery. If that is the case, additional considerations of space allocation, plumbing, and utilities may come into play. While dreamed about by many, purpose-built wine cellars are impractical for lots of home winemakers. Instead, you may need to make do with the best storage conditions you can find for your bulk wine and your bottled goods. Makeshift storage conditions include the family garage, a little-used closet, a cranny under the stairs, or the crawl space under the house. All of these represent significant compromises from the ideal. The garage is often particularly difficult because in addition to the slow annual cycle of temperature change — which is relatively less harmful to wine — it undergoes wide daily variations in heat.
Those rapid cycles can lead to excessively rapid aging or even damage to stored wine.

A well-insulated closet makes one of the better makeshift cellars. If it is opened infrequently and is well away from heavy foot traffic, a closet may give reasonable protection from light and from rapid temperature shifts. If the air becomes excessively dry, barrels may dry out and leak or similar leakage may occur around dried-out corks in stored bottles. Storage in the crawl space often manifests the opposite problem: High humidity. If conditions stay much above 75% relative humidity, mold growth is strongly encouraged. Mold spores are ubiquitous, so when conditions allow, any carbon source may serve as food for the fungi. Cartons, bottle labels, corks, wooden shelves, and barrels themselves may become moldy under damp conditions.
Temperature
Whatever your bulk wine or bottle goods storage place is, what can you do to maintain it at its best? You need to work at maintaining conditions that are best for the wine and, at the same time, suitable for your needs when you work in the room. First, do what you can to stabilize the temperature. Since long, slow swings of temperature are less detrimental to the wine than quick changes, insulation may be enough in some climates. If insulating the closet or storage area will prevent sharp daily rise or fall of temperature; that is the most economical way to go. If you live in a climate that is rarely too hot but is sometimes too cold, you need to add heat. A simple oil-filled radiator-style space heater supplies the little bit of occasional heat needed in my cellar in the mild climate of Sonoma County. Hot summer days, however, can be a problem for me. For that, a through-the-wall cellar-cooling unit is recommended. Home-style room air conditioners are not intended to operate consistently in the range of 55 °F (13 °C) and will tend to ice up on the coils. They also remove humidity from the air, a potential problem in a dry climate.
Humidity
Once you have temperature under control, you need to manage humidity. In humid locations or wet seasons, you must guard against mold. If all or part of your cellar is underground, you will need to carefully address the risk of water intrusion. If the space was properly constructed with appropriate moisture barriers, there may be nothing you need to do. On the other hand, if water or even excessive levels of water vapor can enter, you need to take care of it. The first line of defense is to place a small digital hygrometer (humidity meter) in your cellar. Portable battery-powered meters are available for less than $30, usually include a temperature readout as well as humidity, and may include a calibration feature for superior accuracy. If you encounter readings above 75%, it is time to consider steps to reduce the humidity in your cellar. Remove any standing water, and then address the residual water vapor. An easy solution with no capital cost is to place an open tub of calcium chloride desiccant (sold under names like DampRid) in the moist space. The crystals or flakes of anhydrous calcium chloride pick up moisture from the air, reducing humidity. The number and size of desiccant tubs needed will depend on the scope of your problem; monitor your hygrometer while you experiment. Although no capital cost is involved, the product is consumable and will need to be replaced as its dehumidifying capacity is exhausted. If that is frequent or burdensome in your situation, consider an electric dehumidifier. These may cost in the range of $200, but will not need replacement of consumable supplies. Room air is drawn across a chilled coil where water condenses. It is collected in a tank that requires periodic emptying. Some units may be connected directly to a suitable drain if one is available. For a below-grade cellar, you may be able to buy an automatic condensate removal pump to move the collected water up and out of the room. Whole-house dehumidifiers are fully automatic but cost up to $2,000.
There are also passive and active solutions for the opposite problem — air that is too dry. If your humidity is below 50%, you can try putting a bucket of clean water on a shelf or stand and another bucket below that. Then soak one end of a cloth towel in the bucket full of water and hang the other end over the empty bucket. Capillary action within the wet towel pulls water up and over the rim of the bucket, wetting the hanging part of the towel as it runs down (the empty bucket will catch any excess drips). As the water siphons out of the top container, the large surface area of the towel allows evaporation into the room air and raises the humidity. Of course, frequent checking and refilling will be required with such a system. On the other hand, you can install an electric humidifier. Most of these use ultrasonic aerosol to help evaporate moisture into the air.
Small portable units with a 1- or 2-gallon (4- or 8-L) reservoir can be plugged in anywhere and will require periodic refilling with water and can be purchased for less than $50. Larger automatic units that can be attached to a water line cost in the range of $1,000.
Light
Fortunately, both you and your wine will find the optimum temperature and humidity to be reasonably comfortable (wear a sweater). For light, it is best excluded for the sake of the wine, but you will need it to work in the cellar or even just to retrieve a bottle or two for a dinner party. Some authorities discourage use of fluorescent lights because they may release more ultraviolet light than incandescent bulbs. Others point out that incandescent bulbs release more heat and tend to defeat your attempts at temperature control. In my own cellar, I started with fluorescent, but found that they were sometimes slow to start at 55 °F (13 °C) or below. I replaced them with low-wattage halogen lamps on a track light system and only turn them on when I am in the cellar.
Keeping it clean
The final cellar maintenance step is the same one we find throughout home winemaking: Keep it clean. It helps if you have a smooth, impervious floor like concrete or tile. Floor drains are a plus. Mop up spills and deal promptly with any barrel leaks to minimize the risk of mold getting started. One caution about cleaning: You may want to avoid chlorine-containing products if there is wood in your cellar. If there is (or has been) mold present, chlorine bleach can contribute to development of TCA (trichloroanisole) — the dreaded source of “cork taint” aroma. It can penetrate the corks of bottled wines or the wood of barrels and spoil otherwise sound wine. Correspondingly, do not treat any cellar wood with chlorinated wood preservative. Also avoid painting or varnishing with strongly odorous products.
The wine
Once overall cellar conditions are well in hand, you can turn your attention to the wine itself. In Knowing and Making Wine, Emile Peynaud makes the distinction that wine maturation occurs in the tank (or barrel) and wine aging takes place in the bottle. With typical limited resources as a home winemaker, I view “wine cellaring” as the whole period from the end of primary fermentation through bottling and subsequent bottle storage. As noted above, good cellar conditions lend themselves to a variety of processes.
One exception to the cellar conditions described above is the completion of malolactic fermentation (MLF). Of course, if you wish to put your wine through that process, you will inoculate with a sufficient dose of vigorous malolactic bacteria. While co-fermentation is sometimes practiced, it is also very common to wait and inoculate newly pressed wine for MLF. Most commercial strains recommend a temperature of at least 65 °F (18 °C). That, of course, conflicts with the cellar recommendations cited above. So, for vigorous MLF, you will need to put your wine in a space other than your ideal cellar or you will need to allow the temperature to deviate up from the norm. Some winemakers using barrels will install a thermostat-controlled aquarium heater through the bung opening, allowing the room to remain cool while the wine for MLF is kept warm. When fermentation is complete, the heater is removed and the barrel sealed with a silicone bung.
The first order of business after verifying the completion of MLF (or after completion of primary fermentation, if MLF is not intended) is to start your sulfite program. Depending on the wine’s pH value, you can consult references like the one at winemakermag.com/sulfitecalculator to guide you for the appropriate level of free sulfur dioxide (FSO2) to maintain. For many wines, about 30 mg/L (ppm) will be a good starting point. Add that to your wine, top up barrels, carboys, and tanks with the same (or compatible) wine, and put the wine to wait in the cellar. Protect the wine from light. You may do this by using only low-level lighting and only when you need to be in the cellar. If that is not feasible and the wine is in glass or plastic containers, you will need to arrange some sort of light barrier. For carboys a quick trick is to keep the box the carboy came in, tape the flaps straight out to lengthen the box by about 6 inches (15 cm) and slide it down over the full carboy. The added length allows the use of a conventional airlock in case there is residual release of carbon dioxide at the beginning of aging.
During maturation, you want to avoid oxidation or the development of volatile acidity. Keeping containers topped up and maintaining your sulfite levels will address both conditions. Regular additions of 10 to 20 ppm sulfite every few weeks will keep the level from dropping too low while avoiding any very high dose that might harm the wine. Measure FSO2 once every month or two and continue the necessary additions to stay at your target level. You can have that test done by a commercial or university laboratory if there is one in your area. To measure it yourself, the simplest technique is the Ripper method. While it has some limitations, the method has recently been improved with such instruments as the Vinmetrica — far superior to the little Titrets. Aeration oxidation is the reference method for the test and home-use kits can be purchased for a bit over $100. However you choose to do it, maintaining and monitoring the sulfite level is the most important step in bulk cellaring of wine!
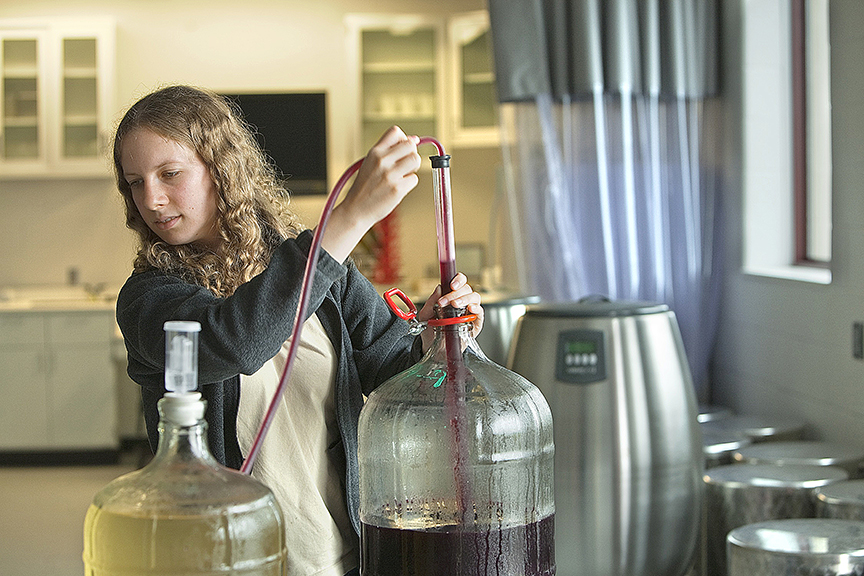
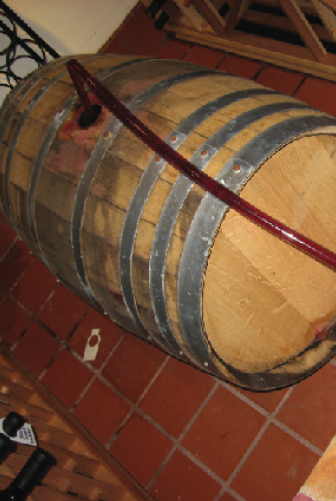
You will also want to rack your wine, probably somewhere around two and four times between primary fermentation and eventual bottling. Keep everything clean and sanitize your equipment just before racking. Since exposure to air is inevitable, make a sulfite addition immediately after each racking. Rackings provide excellent opportunities to smell and taste the wine as it matures, allowing you to treat or head off any problems that may arise. Of course, you can always use a thief to take out and evaluate a sample at any time. I encourage barrel tasting with friends and family, but don’t forget to sanitize the thief first and remember to top up the barrel after you take a sample out!
Finally, you come to bottling day and moving your wine from maturation to aging, in Peynaud’s terms. After racking to a bottling tank, sulfite the wine one more time as dictated by your most recent analytical results. Use clean, sanitary bottles and corks. Put the bottles back in their cases to keep them in the dark. Even if they go back into the cellar right away (or never left it, if it is also your winery), store the bottles right side up for a few days to allow the corks to completely conform to the bottle neck before you turn them upside down or lay them on their sides. Although commercial wineries have experimented with various techniques for “accelerated aging” and dubious-sounding products for the same purpose abound on the Internet, there is no real value in trying to hurry things along. Well-made, sound wine with desirable flavors and aromas when young (and properly sulfited) will continue to age in a favorable manner for years to come. Peynaud, translated from the French, puts it like this: “The best way of growing old, which also holds true for wine, is to keep one’s qualities of youth for a long time.”