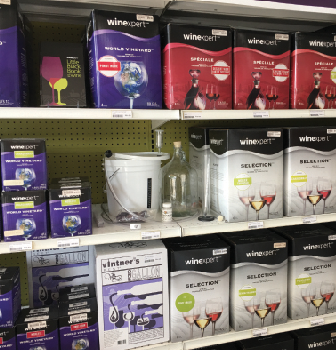
If you follow your wine kit instructions exactly, with no changes or additions, you are assured a very high likelihood of delicious, stable wine. Especially if you are new to kit winemaking, or winemaking in general, just follow the instructions and success will be yours. Some of us, though, like to experiment a little to put our own stamp on a project. If, like me, you enjoy playing with your food (or beverages) maybe you want to make some changes. Do recognize that you increase your risk of something going wrong and the kit maker or your retailer may not be able to help you fix it. If that doesn’t scare you off, though, here are some process modifications and additions that you can think about applying to a future wine kit.
Fermentation Temperature
One process where you can make some changes is temperature control. Kit instructions will variously advise mixing and fermenting in a range like 72–75 °F (22–24 °C) or perhaps 77–86 °F (25–30 °C) in kits where a faster fermentation is desired. These are, indeed, good temperature ranges for wine yeast to work. However, as you will see in other articles in this magazine, just having the yeast work well may not be the only consideration. In white wines, much of the desirable aroma profile is made up of volatile compounds contained in the grapes and juice. To keep those aromas from being lost to the air during fermentation, white wines are usually fermented cool (even if the yeast is a bit less happy). On the other hand, many desirable red wine aromas are produced as esters during yeast metabolism and develop in higher concentrations at somewhat warmer temperatures. So if your white wine kit recommends 72–75 °F (22–24 °C), maybe you want to ferment a bit cooler to go for a stronger aroma profile. Go ahead and start at 72 °F (22 °C) for the first day, but then put the fermenter in a cooler environment and let it come down to, say, 58–62 °F (14–17 °C) for the remainder of the fermentation. This will slow down the process, so you will need to rely on measuring the final gravity and not just the number of days in the instructions. Check to be sure the yeast in your kit will work in this range or replace it with one that will (more on that later). For a red wine fermentation, consider starting and fermenting 3 to 5 °F (1.5 to 2.5 °C) warmer than recommended; the yeast will have no problem up to at least 86° F (30° C) and you may get more aromatic esters.
The Aging Process
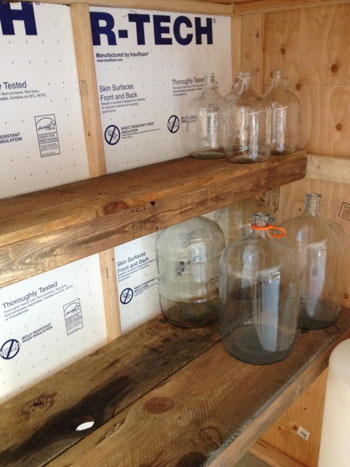
While on the subject of changing the fermentation time, we can move on to aging time. Just about every time I have made wine from a kit, I have extended the aging time in bulk and in bottle beyond the time required in the instructions. While following the rules exactly will produce a very good wine, I think there are a few advantages to making the timeline more like it would be with wine from grapes. Aging a white wine in a carboy for four or five months and racking it a couple of times (always topping up the new carboy with a compatible wine!) can develop natural clarity and may mellow and round-out flavors. A red kit wine can go even longer, perhaps eight or ten months, with a couple of rackings.
Some of us, though, like to experiment a little to put our own stamp on a project.
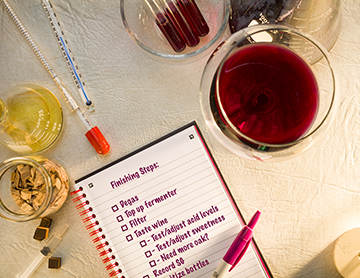
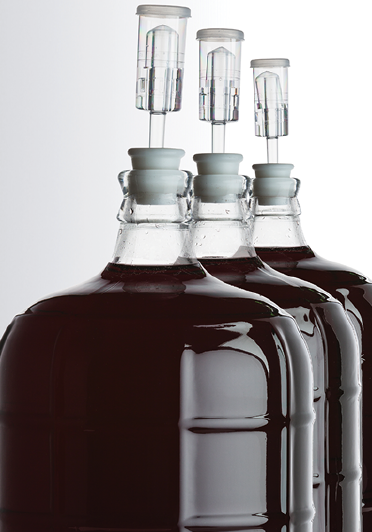
Keep in mind that if you do this, you are making the wine in a more traditional manner and you need to insert some steps in the middle of your process. At the end of primary fermentation, rack to a topped up carboy. Add sulfites as included in your kit, but do not add sorbate, do not whip to degas, and do not add fining agents. Put those somewhere you can find them in a few months and begin a program of adding sulfite at least once a month. Ideally, you will test for sulfite from time to time and adjust according to the wine type, pH, and WineMaker magazine’s online sulfite calculator (www.winemakermag.com/sulfite calculator). As a rule of thumb, I consider that free sulfite will drop about one-half part per million (ppm) per day, so I add 15 mg/L (ppm) once a month. I also test every other month and make additions as needed. Near the end of your extended aging period, if gas has not completely dissipated through rackings, you may want to whip the wine. If it is not as clear as you would like, apply your fining agents. If you are sweetening, this is when you will use your sorbate (in addition to a final sulfite addition for bottling). You wait longer for your reward, but you will also learn most of the steps of making wine from grapes.
A temperature-controlled fermentation space, whether an old refrigerator with an external thermostat or building your own insulated air-conditioned box, can be one of the keys to retaining the aromatics of a white wine or coaxing out the fruity esters of a red wine.
Oaking Options
Some kits, especially for bold red wines, include some oak powder to add during primary fermentation. If you like that oak-y character but your kit does not include oak, you can always add your own oak chips. They are available from your fermentation supplies retailer in light, medium, and dark toast and in French or American oak. Use up to three ounces (85 g) in five gallons (19 L) of wine. Taste your wine after fermentation. If it is not yet oak-y enough for you, you can add additional chips during aging. Put them in a nylon mesh bag if you like, but I just put them directly in the carboy. Later, during that extended aging period, I rack off the chips and leave them behind. Similarly, you can buy solid oak sticks, spirals, beads, or cubes that will fit through a carboy neck. For quicker development of wood-aged character, there are a number of tannin addition powders that can be added during aging. Some, like Scott’Tan Tannin Riche, can be applied as late as three weeks before bottling. Made entirely from toasted French oak, a product like this imparts coconut and vanilla aromas with a slight perception of sweetness. It can be used in white, rosé, and red wines at rates from about 0.5 g in 5 gallons (19 L) for whites and rosés to as much as 3 g in 5 gallons (19 L) of a big red.
Exploring Yeast
In further consideration of ingredient changes, we can go back to the beginning and think about the yeast strain choice. Undoubtedly, the yeast included with your kit will do a good job and make tasty wine. Would you like to know more and make some choices? The packet will almost certainly be from one of the major wine yeast producers and it will include the strain name or number. For instance, if it says Lalvin EC-1118, it was produced by Lallemand and is also known as “prise de mousse” from its original isolation from Champagne fermentation in France. If you look it up online, you will find that it is very rugged, tolerates a wide range of fermentation temperatures, completes quickly, and is fairly neutral in its impact on the wine’s aromas and flavors. It might well show up in a Merlot kit with the expectation of making a dry Bordeaux-style wine. Suppose you would like to shape your Merlot toward a younger, fresher profile and maybe even soften the acid profile a bit. Your retailer might recommend Lalvin 71B, commonly used for young reds plus blush (rosé) and semi-sweet white wines. It even has the characteristic of metabolizing some of the malic acid native to the kit’s juice to help soften the profile. Same kit and same juice, but potentially a different wine just by substituting the yeast packet.
MLF Decisions
Before we dive in here, I need to state a few cautionary words about this section. First off, no wine kit company recommends ever performing malolactic fermentation (MLF) on their wine kits. Among other things, it can throw off the carefully formulated acid balance while also possibly creating an unstable wine by raising the pH too high. You may be stabilizing the wine in one area, only to be destabilizing it in another. Second, do not perform MLF on a kit that uses sorbate because off-aromas may develop.
. . . the sky’s the limit for putting your own spin on a kit wine.
With that said, many kit winemakers will still take their kit wines through MLF. Most red wines made from grapes, as well as many Chardonnays, undergo this secondary bacterial metabolic process that lowers the malic acid level, leaving milder lactic acid in its place, and stabilizing the wine against future spontaneous MLF during the aging process. You may consider adding a MLF step to your kit wine as cost-prohibitive, but it does not need to be. While most freeze-dried MLF bacteria strains from wine product companies are packed for a minimum of one hectoliter (26 gal) of wine and cost about $20 to $30, that is not your only choice. At least two brewing yeast companies can help you out here with Wyeast and White Labs both packing liquid malolactic bacteria cultures for carboy-sized batches of wine. If your fermentation products store sells beer yeast from either of those producers, they can order a package of MLF strains for you and you can try it on your kit. At the end of primary fermentation, do not add sulfite or fining agents. Instead, add the package of MLF and maintain the temperature in the recommended range, usually above 65 °F (18 °C). In about three to six weeks, you will have a more mature tasting wine with a softer profile. But if you plan to age this wine, you probably should measure the pH for quality assurance.
Could Blending Be Key?
Another way to play with your kit wine is to look at blending. You can ferment wines separately and blend after the fact, or try co-fermenting. Suppose you have made a kit Chardonnay and a kit Viognier, finished out to just before bottling. Thief out 100 mL of each, blend tasting samples at different proportions, and have a friend taste the blends with you. Whatever blend you like, you can bottle some of that, some of another, or some of each wine straight. You can potentially have four different wines from just two kits. If you want to get more adventuresome, consider a co-fermentation. For instance, most famous Bordeaux wine blends include Cabernet Sauvignon, Merlot, and Cabernet Franc — and sometimes Malbec, Petit Verdot, or Carménère — often co-fermented. To try your hand at such a wine, you could buy a blended kit. Or, you could strike out on your own and do it yourself. Suppose you buy 6-gallon (23 L) kits from the same producer (to make processing more consistent) for Cabernet Sauvignon, Merlot, and Malbec. You might try, then, three different Bordeux-style blends. Make one of them Cabernet-heavy using 4 gallons (15 L) of prepared Cabernet Sauvignon juice blended with one gallon (3.8 L) each of prepared juice of Merlot and Malbec. Make another with Merlot in the lead spot at 4 gallons (15 L), then a third with Malbec in that role. Three wines from three kits, but potentially very different wines from what they would have been without blending. And, of course, you can use any of the other tricks discussed earlier on your blends to try yeast choices, oak additions, MLF . . . the sky’s the limit for putting your own spin on a kit wine.