Split Batch Wine Kit Experiments
When we tackle a big project it isn’t the immediate effort that pays off, but all of our work combined into one glorious enterprise. It’s the same with winemaking: A single effort to make better wine isn’t likely to pay big dividends, but persisting on a path of careful repeated efforts will yield big gains. That’s why this column is on the logistics of doing small batch trials, and suggestions for modifications you can make to learn more about how you can improve kits to suit your taste.
Previous “Wine Kits” columns have been about modification trials (yeast, tannin, oak, etc.) but they tended to focus on a single change, and were mostly about the outcomes rather than the actual equipment and mechanics of the trials. The top kit request in WineMaker’s recent reader survey was for an article on how to do split batch trials, specifically on doing 1-gallon (3.8-L) batches side-by-side.
We’ll break the trials down into three sections — Equipment, Experiments, and Evaluation — covering the gear you’ll need, the things you can try, and how to determine your successes. Remember though, you won’t have any actual failures, per se. As my uncle Fred used to say, “A thinker sees his own actions as experiments, and questions as attempts to find out something. Success and failure are for him answers above all.”
Equipment
I have previously advocated for using metric units, specifically liters, when doing experiments because it makes the math vastly easier when doing small additions of various additives.

The problem is, there aren’t a lot of 1-liter fermenting vessels out there.
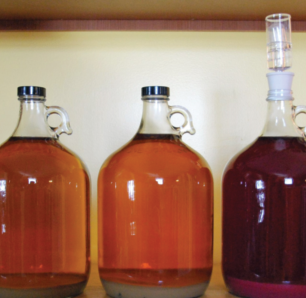
On the other hand, 1-gallon (3.8-L) and 1⁄2-gallon (1.9-L) jugs are plentiful and available in clear glass, and most fit existing #6 or #6.5 bungs and airlocks or 38 millimeter screw caps that are available with holes that fit an airlock or quarter-inch vinyl tubing for a blow-off hose. A recent and very useful innovation in home winemaking is the wide-mouth fermenters now available. Wide-mouth fermenters have a capacity of 1.4 gallons (5.3 L) and have tight fitting lids that are ported for airlocks, so they’re really easy to use and clean, and are a pretty convenient size.
Doing small batch trials means you’ll need a decent scale and measuring tools. While older hobby winemaking books are fairly cavalier about teaspoons and such, many of the things you’ll be experimenting with such as tannins are extremely powerful for their weight and require careful measurement. Even winemaking stabilizers, used in much larger amounts than tannin, are finicky to measure when you’re using only a few grams per batch. Most winemaking suppliers carry a good scale that goes down to 0.10 grams, and they’re not even very expensive.
Grams? Yes, we need to break our imperial rule for measurements of mass. Working in fractions of an ounce is out of the question. Not only does the math get completely hinky, almost every company supplying wine additives uses kilos and grams in their dosage guidelines, and your scale will take it in stride.
For volumetric measurements (liquid additions), the best solution I’ve come up with is a few syringes of various sizes and a decent graduated cylinder. Syringes are excellent because they’re not only very accurate and precise, but the smaller ones can handle very small volumes of liquid with the bonus that they can suck it right up from the source and deposit into your jug with no pouring or spilling. They’re also available from most suppliers.

Graduated cylinders look a lot like a hydrometer test jar, but with a pouring lip and volume markings down the side. While they look quite impressive, they’re actually cheap — a set of four plastic ones, ranging from 10 mL to 100 mL can usually be found online for less than $10. While the inexpensive Internet versions aren’t absolutely accurate, they’re much better than a home measuring cup, which are typically off by as much as 10% in either direction (startling fact, but if you calibrate your home measuring cups with a proper graduated cylinder you might just get more consistent results in your baking!).
Start
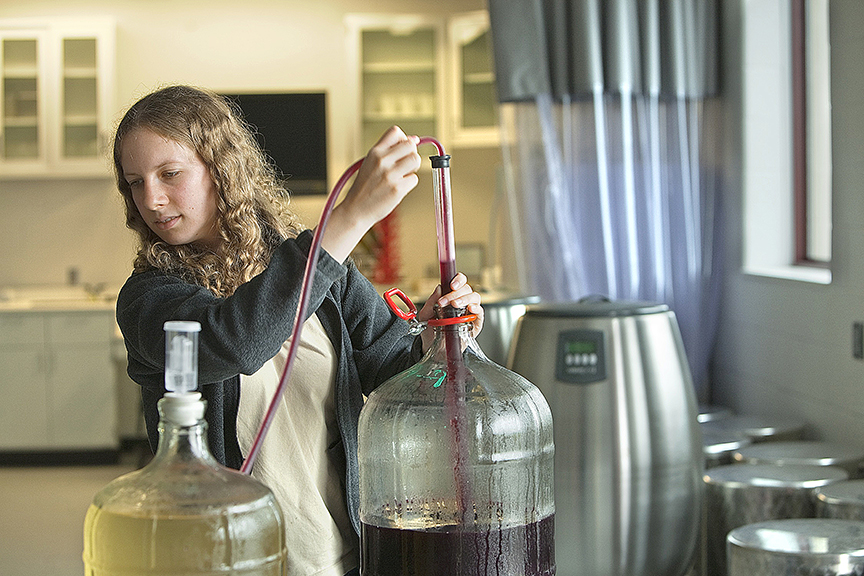
Since the goal of experimental winemaking is to change a single variable and observe the results, you’ll need to make up the wine to the full 6-gallon (23-L) volume in a primary fermenting pail. Many kits require the addition of bentonite into the primary: Make sure you follow the instructions for adding and stirring, measure both your specific gravity (SG) and temperature and divvy up the wine into your 1-gallon (3.8 L) jugs.
Some kits use grape skins to boost character, which presents a series of challenges. Adding a grape pack to the full volume and then dividing it into jugs will most likely result in inconsistency: It’s difficult to get all the grape material evenly divided when you’re using a racking hose, and scooping out the grape skins is problematic. Also, the grape packs are usually added after the kit has been made up, resulting in volumes greater than 6 gallons. Imperial jugs or wide-mouth fermenters make it much easier to deal with the extra volume.
For kits that use a dried skin pack it’s easiest to weigh the material and then divide it up into sixths using your scale. Wet grape packs are trickier. The skin/seed mass is suspended in grape concentrate, making it a sticky mess. You can either weigh the pack and then scoop out one-sixth of it at a time for your containers, or you can place the grape skins into a strainer or a muslin bag, gently rinse the concentrate off in the primary fermenter, squeeze the skins as dry as possible, and then take care of divvying it up with the help of your scale.
Experiments
Once you’ve got your equipment lined up, and your wine prepared, it’s time to choose the variables you want to modify. The three most useful fermentation modifications for wine kits are yeast, alcohol, and oak.
Sweetness, acid, and tannin are common modifications as well, but since they’re best handled post-fermentation (they don’t need to go through fermentation or a long contact time with the wine to show results) they’re actually better handled through small bench trials that can be done simply and then scaled up to the main batch. Sweetness is modified easily with a dose of wine conditioner, acidity can be carefully finessed to bring out fruit character or sharpen the finish by hitting the wine with a quarter-gram per liter of tartaric or malic acid at a time.
One last detail: Because you’re dividing your wine into six parts, you’re going to be able to conduct five trials at a time. Where’s the sixth? It’s the control, made exactly to the instructions, with the standard kit yeast and no other additions or omissions. You need to be able to tell where you’ve come from so you can tell when you’ve gone beyond that in improvements.
Yeast
The technical departments at wine kit companies (i.e., me) used to suppress any talk of yeast substitution. This was partly a holdover of a time when concentrates were heavily Pasteurized, which could leave some yeast unable to ferment all of the sugars out of them, and partly to help prevent consumer dissatisfaction — we did a lot of yeast trials and already knew which ones would work best — but that was just, like our opinion, man. Modern concentrates are almost all easily fermented by common yeast strains, and just because we like the wine with a certain yeast doesn’t mean it won’t suit you better with another.
Since every strain of yeast has different internal processes, they each produce different compounds during metabolic activity. Some yeast are more robust and hungry than others and can consume more of the complex sugars in the juice, making the wine drier. Others are less tolerant of alcohol and other limiting factors and stop at lower alcohol levels, leaving the wine slightly sweeter. And each strain produces different flavors and aromas in the finished wine.
Most of the major yeast companies will all have downloadable resources and extensive descriptions of the characteristics of their yeast. While I’m not in a position to endorse any of their strains specifically, they’re all very good companies that produce excellent yeast. You’ll want to use five different strains, plus the one that came with the kit as the control yeast. Pay careful attention to the manufacturer’s temperature recommendation.
Alcohol
It’s notable that alcohol levels in commercial wine have climbed over the last four decades, with reds in particular going from 12–12.5% ABV all the way to 15–16% and even beyond. This is partly blamed on warmer growing conditions in most of the world, but it’s mainly a choice by winegrowers to allow their grapes to hang on the vine for extended periods, increasing both in ripeness and in sugar content.
The extra sugar doesn’t stay in the wine — the yeast consumes it during fermentation and it becomes alcohol and CO2. But the extra alcohol has a potent effect on the finished wine. Contrary to conventional wisdom, alcohol tastes sweet below 18%.
You can confirm this yourself with a simple test: Pour a quarter-cup of cool water and add a couple of teaspoons of vodka (any plain brand will do). Taste it against plain water (you may need to add a little more vodka, depending on your flavor perception). All you’ll notice is sweetness. It’s a different sort of sweet than sugar. The sweetness of alcohol is perceived on the middle and sides of the tongue, while the sweetness of sucrose (table sugar) is more intense and prominent on the tip of the tongue.
This sweetness can intensify the fruit character of the finished wine. With a boost of extra alcohol to drive it, your Cabernet can emulate the big, bold California cult-wine styles, and your Chardonnay can take on a lushness of fruit that stands up to any Aussie version.
When it comes to manipulating the alcohol level of your kit, you shouldn’t increase any wine’s alcohol level by more than 25% of its original level (i.e., not more than going from 10% to 12.5%) and even the biggest wines shouldn’t get a boost of more than 3% ABV in total. Very high alcohol levels can quickly make a wine taste clumsy and unbalanced.
Prepare your kit as per the instructions, measure the specific gravity and calculate the potential alcohol. The best way to get a reasonable potential alcohol value is to calculate the difference between the expected finishing gravity from the starting gravity and multiply that number by 131. If your instructions don’t include a predicted final gravity, you can usually count on it being around 0.995.
For example, if the starting SG of the juice is 1.085, and your finishing gravity is 0.995, the difference between the two is 0.090. So: 0.090 x 131 = 11.8% ABV. Do your calculation and write your number down. You can refine it when the fermentation is finished and you have your control wine to test.
Pitch yeast into your control, and then adjust the sugar levels in the remaining five jugs in 1⁄2 percent stages. This will give you a broad range to determine the alcohol “sweet spot.” You can use sucrose (table sugar) but dextrose (corn sugar) is much easier to dissolve and performs very well.
Add 32 grams (1.15 ounces) to yield 0.5% ABV in the first jug. The second gets 64 grams for 1%, the third 96 for 1.5%, the fourth 128 for 2%, and the fifth 160 for a total increase of 2.5% ABV. Pitch yeast, ferment normally, and be careful to label the jugs.
Oak
Wine kits have traditionally used oak during fermentation, partly for the convenience of leaving it behind in primary fermentation, partly because it gives a much mellower profile and allows for younger drinking. When the same levels of oak are used post-fermentation in a wine kit it typically takes a full year before all of the flavors integrate. That’s because during fermentation yeast modify some of the more astringent and puckering oak characters.
We can use this mellowing effect of the yeast. Even when you add significantly more oak to a wine kit pre-fermentation there’s far less chance of turning it into Château Plywood.
If you’re not interested in increasing the oak character, you can modify it by changing the toast, origin, or type of oak you use. You’ll mainly be dealing with oak powders, shavings, and chips. Cubes, beans, and staves are normally used for post-fermentation oaking, which while a good technique, requires both extended contact times and aging to come to complete fruition.
The usual minimum amount of oak used in kit wines is 30 grams (one ounce) per 6-gallon (23-L) kit. If you want to increase that amount in the same type and toast of oak your kit came with, you’ll need to find out what that is before you start and get an extra couple of packages.
Fire up your gram scale and put 5 grams in your control gallon, 10 in the second, 15 in the third, 20 in the fourth, 25 in the fifth, and 30 in the sixth. That will mean a total of 105 grams, or 3.5 ounces, so you’ll need another three 1 oz. packs to complete your experiment.
If you’re substituting oak toast or origin, you should do straight-up one for one substitutions before moving on to increasing those doses along the same scheme.
Processing
With all of your experiments, proceed with the fermentation as per the manufacturer’s instructions through the fining and stabilizing process and get it ready for bottling. These steps are where the graduated cylinders and syringes come in. Many wine kits contain less than 5 grams of sulfite powder, 6 grams of sorbate, and some liquid volume of fining agents, usually less than 5 oz. (150 mL).
Rather than trying to sprinkle out 5 grams of sulfite into six containers, it’s much easier to dissolve the sulfite powder into 6 mL of water in a syringe, ensure it’s thoroughly mixed, and dose each container with 1 mL of the liquid — very little fuss and easy portioning. Do the same with the sorbate (if any).
For liquid fining agents, measure out into an appropriate graduated cylinder, divide the volume by six, and share that between each vessel. Be sure to stir to degas fully.
When the wine is clear and stable and fully finished all of the winemaking processes (hopefully including filtering!), go ahead and bottle four 750 mL bottles of each gallon jug and put them away for aging. Be sure to label the bottles carefully! If there’s a little bit left over, you can hold an impromptu bottling day tasting and make some preliminary notes, but you won’t start tasting the results until the wine has had at least a month to calm down from bottling.

Evaluation
You’ll find a little groundwork goes a long way. The first thing you need to do is have a written descriptor of the control wine. You can get this from the manufacturer’s literature or point-of-sale material, and it’s the best place to start.
Next, make up a tasting sheet for each of the wines and score them objectively for flavor and aroma. Sort them out to see which ones made the best showing and then see how you did against the manufacturer’s description. The UC-Davis wine-scoring sheet is the standard, and if you want to really search for good wine descriptors, Ann Noble’s Aroma Wheel is very useful.
Remember, good notes mean that you’ll have the ability to replicate your successes and avoid repeating your failures. I’m in favor of keeping them on a spreadsheet, which allows you to access the data and move it around to see what worked and what didn’t.
Repeat your tasting trials again, every three months. This is extremely useful, because while some modifications, such as yeast substitution, can give quite distinctive characters to wine, many of them are not stable, and diminish over time. Charting your tasting notes over time will ensure that the changes stood up to the aging process.
With a little research and some careful experimentation, you could come up with an interesting and potentially different-tasting wine kit!