Elderberry Wine: Taming the Wild Elderberry
Sometimes referred to as the “Englishman’s grape,” the common elderberry has been used to make wine for hundreds — possibly thousands — of years. By themselves, elderberries make a rich, flavorful wine, but they have long been added to other fruit and berry wines, including grape, to add color, tannin and complexity. Indeed, over the years, several “scandals” occurred when commercial wineries were discovered to have adulterated their grape wines by adding elderberry to improve their color. Home winemakers, of course, can use them for this purpose, if they so desire.
The elderberry has a long history of use for food, drink and medicinal purposes. Elderberry pie, jam and jelly, tarts, flavored drinks, and of course wine are a few of its better known uses.
Elderberry wine has a unique flavor that changes considerably over time. When too few berries are used, the wine is thin and unlikely to improve. When too many berries are used, the tannins and other flavor constituents may overpower the palate and require dilution, blending or prolonged aging to mellow. Between these extremes are wines that often offer exceptional enjoyment. These wines accept oak well and small amounts (3–7%) blended into lesser grape wines often improves them considerably.
Species of Sambucus
The Sambucus or elder genus consists of up to 30 species, depending on who is counting, with many subspecies and varieties. Combined, they inhabit much of the landmass of the world from sea level into the Himalayas, but tend to avoid the equator.

Two species account for the majority of elderberry wine made in Europe and America. The European Elder (S. nigra) grows in Britain and from Scandinavia south to North Africa and east into Asia. It has become naturalized in North America and almost everywhere it has been planted, birds quickly spread the seed.
The American Elder (S. Canadensis) grows throughout most of the United States and the eastern half of Canada. These species have black and blue-black berries, respectively.
Other important species include the Blue Elder (S. cerulea), Mexican Elder (S. mexicana), Black Elder (S. melanocarpa), the Pacific Coast Red Elder (S. callicarpa), and the Florida Elder (S. simpsonii). Two other European elders hold minor importance — the European Red Elder (S. racemosa) and the European Dwarf Elder (S. ebulus). In Australia (and New Guinea) the Yellow Elder (S. australasica) and White Elder (S. gaudichaudiana) are important. In South America the Southern Elder (S. australis) and Andean Elder (S. peruviana) are important. Nearly a dozen species inhabit parts of Asia, including the Chinese Elder (S. javanica), Chinese Red Elder (S. chinensis), North China Red Elder (S. williamsii), Japanese Red Elder (S. sieboldiana), Korean Red Elder (S. latipinna), Caucasus Red Elder (S. tigranii) and Asian Dwarf Elder (S. adnata).
Additionally, dozens of varietal cultivars have been isolated or bred for different purposes. Increased berry size is an obvious goal, and berries with up to a 1⁄2 inch (1.3 cm) diameter have been achieved.
The varieties Adams No. 1 and Adams No. 2 are two long-established types with good growth characteristics and large berries. A newer variety, York, is even more vigorous and yields bigger berries. Other popular varieties include Johns, Kent, Nova and Scotia. Some cultivars depress tannins and increase sugar content, while others are bred to increase constituents that may be medicinally beneficial.

All commercial sources of elderberry plants offer various cultivars and can provide information on their reported advantages.
Growing Elderberries at Home
If you live in USDA Hardiness Zone 4, or any warmer zone, you can grow elderberries at home. Some of the hardier varieties will even thrive in Zone 3.
Elderberries can be planted from seed in the fall or spring, and grow best in well-drained soil with a pH between 5.5 and 6.5. You will need to plant at least two plants, as elderberries do not self-fertilize well. Elderberries are perennial and will spread over time, so plant them at least 6.0 feet (1.8 m) apart. They are often planted along fence rows or as a hedge at the edge of one’s property. These hedges will grow up to 13 feet (4.0 m) high.
Weeds are the biggest threat to newly-planted elderberries. Because the plant’s root system is fairly shallow, other plants growing near it will compete for water and nutrients. Spread mulch around the base of the plants or handpick weeds in the first couple years. Once well-established, shade from the elderberry will suppress weed growth. The shallow rooting also necessitate frequent watering, especially when the plant is young.
Elderberries will become more vigorous and productive when treated with fertilizer. Established plants will benefit from a yearly addition of one pound of a 10-10-10 granular fertilizer per plant. Newly planted elderberries should be fertilized at about half this rate.
Each year, the plant will send up new canes. These canes usually reach full height in their first year. In the second year, they will send out lateral growth. Second year canes are the most productive and the plant should be pruned to remove canes beyond 3 years in age. Canes that are dead or infested with cane borer — one of the few insect pests that plague elderberries — should also be pruned and disposed of. Pruning is best done in the winter, when the plant is dormant. When you have finished pruning, the plant should contain roughly equal numbers of first, second and third-year canes.
In general, elderberries are not very prone to insect infestation or disease. (In wet years, powdery mildew can be a problem.) With proper soil and fertilization, they will be hardy and productive. Most varieties flower in June, so losing fruit to late frosts is almost unheard of. The berries ripen from mid-August to early September. Bird netting can keep the loss of berries to a minimum.
Composition
The composition of elderberries is complex. They contain 7.5% sugars, mostly sucrose, glucose and fructose. Citric acid is the most abundant acid, but they also contain malic, shikimic and fumaric acids. They also contain 3% tannins, at least three flavonoid glycosides and several anthocyanin glycosides and diglycosides. Elderberries exhibit up to 34 identified aroma compounds.
The berries are rich in vitamin C, and contain lots of anthocyanins, which are antioxidants. They are also a good source of vitamins B1, B2 and B6 and contain the anti-inflammatory agents ursolic and oleanolic acids.
Cautions
In all species, the stems, leaves, bark and especially the roots are toxic; the latter are known to have caused death to rooting animals such as swine. All immature (green) berries are considered toxic, and one American species, the American Red, or Scarlet, Elder (S. pubens) produces a mature toxic berry. While the berries of many species induce stomach upset if eaten raw or in excess, the American Red Elder is excessively toxic and should be avoided. Its mature berries are very small — about 1⁄5 inch in diameter — obviously red and its juice yellowish. The identified toxin is a cyanogenic glycoside (releases cyanide) called sambunigrin. Indeed, it is this toxin that is partially responsible for many of the beneficial medicinal effects of other elderberries, as many toxins used in controlled amounts are medicinally useful without harmful effects to the patients.
For winemaking purposes, simply avoid the America Red Elder and you will be fine, as not enough berries are used to create a health problem. If you want to be absolutely sure, cook the berries for 20 minutes over low heat before adding them to your must.
The Dreaded Goo
Additionally, some but not all elderberries may emit a greenish substance during fermentation. This goo coats the walls of your primary vessel and defies conventional clean-up strategies. It is referred to by various unkind names, but “elderberry goo” or “gunk” are the commonly used names we can print here. It is believed this substance originates from the stems of the berries, but this author has encountered it when no stems were present. This leads to the second theory that the goo is really the bluish waxy coating found on several species, but especially the Blue Elder. The jury, however, is still out on this theory.
The goo cannot be cleaned with water or soap or cleansers or solvents or spirits. However, it is easily cut with vegetable oil and cleanly wiped from the primary. The oil is then washed away with a liquid soap containing a degreaser. Rinse well and then sanitize with sulfite solution.
Harvesting and Cleaning Elderberries
Elderflowers form in huge umbrella shaped clusters and the berries develop likewise. As the fruit matures, it begins to droop, and when inverted they are absolutely ready to harvest. However, you may have to harvest a bit earlier if you don’t have the plants netted and birds begin claiming the crop.
A couple of pointers are in order. First, wear rubber or latex gloves when handling elderberries. Their natural desire is to stain everything within reach a wonderfully deep purple. Second, if you can affix a strap of some sort to a food-grade plastic bucket and hang this around your neck so the bucket is against your chest, you will greatly simplify the harvesting of the berries.
Experienced harvesters pull a cluster over the bucket and use a wide-toothed comb to pull the berries off the stems. Only comb a few at a time or you will end up pulling the stems off as well, and you really want to avoid that, if possible. In general, harvesting is fairly easy and the rewards great. If some of the branches supporting the berry clusters break in the process, don’t feel bad. Elderberry plants can be pruned all the way to the ground and will re-generate every year.
After harvesting, you can use one of several strategies to cull any immature berries and all the stems. About the best is to construct a simple wooden frame and staple 1⁄4-inch hardware cloth to it and sift the berries though this. Both Mexican and Blue Elders can produce berries larger than 1⁄4-inch, in which case you will need a slightly larger mesh. Most of the stems will be caught by the screen but a few will align vertically and fall through. Either repeat or move on to the next step.
Fill a washtub or pail with 6 inches (15 cm) of water and slowly pour the berries in it in a scattering motion. Mature berries will sink and stems, immature berries, leafy matter and bugs will float. Use a scoop of some sort or an aquarium net to remove everything that floats. Carefully drain off the water and, unless you are going to use them immediately, put the berries in gallon-size ZipLoc freezer bags and store them accordingly until needed. Freezing them delivers an additional benefit of releasing more juice with less work when they are thawed and crushed. Or, you may want to thaw and cook them prior to making your must.
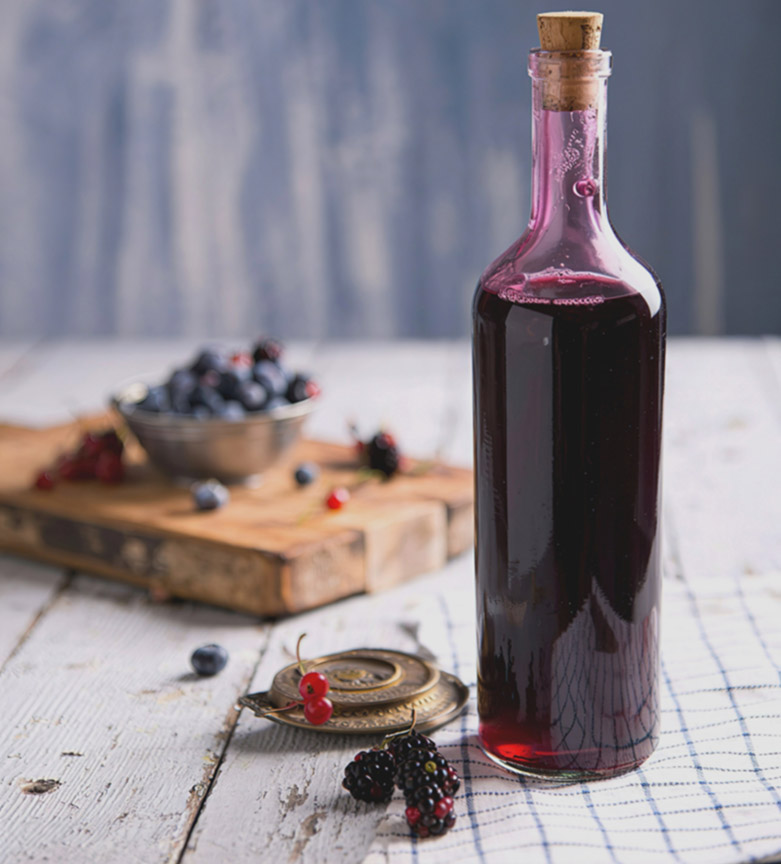
A Basic Elderberry Wine Recipe
This is a tried and true basic recipe for making a gallon (3.8 L) of elderberry wine. It will have good body and color and will not be too tannic unless you exceed the amount of berries specified or use very small berries – 1⁄8 to 1⁄6 inch (0.3–0.4 cm) in diameter.
Ingredients
3.5 lbs. (1.6 kg) elderberries
3.0 quarts (~3 L) boiling water
2.0 lbs. (0.91 kg) granulated sugar
12-oz. (355-mL) can red grape concentrate (Welch’s, Old Orchard)
juice of 1 medium lemon
juice of 2 small oranges
1 tsp. yeast nutrient
2 Campden tablets
1⁄2 tsp. potassium sorbate
oak beans (optional)
1 sachet Red Star Pasteur Red, Lalvin R2 or Gervin No. 1 Green Label wine yeast
Step by Step
Wearing rubber gloves, pour berries into a nylon straining bag in a primary fermentation vessel and tie the bag closed. If fresh or thawed berries, use the flat bottom of a wine bottle or a sanitized piece of hardwood to crush them; do not press hard enough to crush the seeds. Add grape concentrate, juice of the lemon and oranges, the yeast nutrient and sugar. Pour boiling water over everything and stir to dissolve the sugar. Cover the primary. Make a yeast starter solution and hydrate the yeast while the water in the primary cools to below 90 °F (32 °C). Add activated yeast starter and re-cover the primary. Stir daily for three days, deflating straining bag if necessary. Lift bag, squeeze lightly (remember those rubber gloves) and discard pulp or save for a second run wine. Re-cover the primary and set aside one more day, then transfer liquid to a secondary. Liquid will be shy a full gallon. Affix an airlock and wait for vigorous fermentation to subside. If you intend to add oak beans, this would be a good time to do it. Add a finely crushed and dissolved Campden tablet, top up if needed and wait three weeks. Rack, transfer the oak beans if used, top up, and reattach the airlock. Wait for the wine to fall clear and then wait an additional month — or until oaking is finished. Rack, stabilize wine with potassium sorbate and finely crushed and dissolved Campden tablet, sweeten to taste if desired and reattach airlock. Wait 30 days and if no new fermentation or new sediment is evident go ahead and bottle. Wait a minimum of 6 months before drinking. Wine will continue to improve for several years.
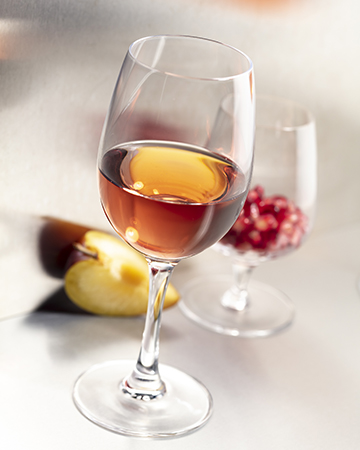
Making a Second Run Elderberry Rosé
If you kept the pulp from the wine above, you can make a gallon (3.8 L) of second run wine in a dry rosé style. After this wine matures, drink it within two years.
Ingredients
Elderberry pulp from first wine
1.0 lb. (0.45 kg) fully ripe bananas
12-oz. (355-mL) can white grape concentrate (Welch’s, Old Orchard, etc.)
2.0 lbs. (0.91 kg) granulated sugar
2 Campden tablets
1⁄2 tsp. potassium sorbate
1 tsp. yeast nutrient
2 tsp. citric acid
Lalvin RC212 or any Burgundy wine yeast
Step by Step
Bring 2 quarts (2 L) of water to boil. Meanwhile, place elderberry pulp (in nylon straining bag) in the primary fermentation vessel and add sugar and grape concentrate in primary. Pour boiling water over contents of primary and stir until sugar is dissolved. Cover primary. Put another quart plus one pint of water on to boil. Cut bananas, skins and all, into 1⁄2 inch slices and add to boiling water. Cover pot and boil for 25 minutes. Skim any scum off water and strain to remove fruit. Add banana liquid to primary and re-cover primary. When cooled to room temperature, stir in citric acid and yeast nutrients and activated yeast, re-cover primary, and set aside. Stir twice daily for 2 days – 3 if additional color requires it. Remove straining bag, squeeze lightly, transfer to secondary, add one finely crushed and dissolved Campden tablet, top up if required, and fit airlock. Rack every 60 days until wine falls clear and no sediments form during 30-day period. Stabilize with potassium sorbate and one finely crushed and dissolved Campden tablet and bottle this wine dry. Allow to age one year.
Dried Elderberry Wine
There are two times when dried elderberries are welcome – when wild elderberries do not grow locally and when wild elderberries are out of season. In both cases, dried elderberries can be used for winemaking. You can buy dried elderberries from most winemaking shops or pick plenty of wild ones and dry them in a dehydrator. This recipe makes one gallon (3.8 L) of wine.
Ingredients
4–5.25 ounces (110–150 g) dried elderberries
2.5 pounds (1.1 kg) sugar
7 pts. (3.3 L) water
12-oz. (355-mL) can of red grape concentrate (Welch’s, Old Orchard, etc.)
2 tsp. acid blend
1 tsp. yeast nutrient
1 crushed Campden tablet
Montrachet yeast (or other general purpose yeast)
Step by Step
Bring water to a boil and add sugar. Stir until the sugar is dissolved and water clear. Wash the dried elderberries and put in a nylon straining bag with several marbles for weight. Tie the bag closed and put in the primary fermentation vessel. Pour the boiling sugar-water over elderberries and cover the primary. When cool, stir in one finely crushed and dissolved Campden tablet, yeast nutrient and acid blend until dissolved. Re-cover the primary and set aside for 12 hours. Add activated wine yeast in a starter solution and ferment until the specific gravity drops to 1.010, stirring and squeezing the bag daily. (Remember the rubber gloves, to protect your hands from the pigments.) Transfer liquid to a secondary, attach an airlock and ferment to dryness. Rack every 30 days until wine clears and doesn’t drop even a dusting of lees over a 30-day period. Bottle and wait at least 3 months to enjoy. This wine will improve with age.
Elderflower Wine
The white or whitish-yellow flowers of all species and varieties of elder are pleasantly fragrant and impart a Muscat-like flavor. They are also edible and can be fried in fritter batter, added to pancake or muffin batter, cooked into pies and tarts, and added fresh to salads or many other food dishes. However, many would say they are best made into wine.
Elderflower wine is an acquired taste and not appreciated by everyone. Too many flowers will yield an almost undrinkable wine, so do not exceed the amount in the one-gallon (3.8-L) recipe below. This wine is great served chilled on a hot afternoon.
Ingredients
1.25 pt. (0.56 L) fresh elderflowers
12-oz. (355-mL) can white grape juice concentrate (Welch’s, Old Orchard, etc.)
2.0 lbs. (0.91 kg) granulated sugar
2 tsp. acid blend
7 pts. (3.3 L) water
2 Campden tablets
1⁄2 tsp. potassium sorbate
1 tsp. yeast nutrient
your favorite white wine yeast
Step by Step
Thaw grape juice concentrate and put water on to boil. While water rises to a boil, separate flowers from stalks and wash to remove insects and dust. Put flowers, sugar and grape juice concentrate in the primary fermentation vessel and pour boiling water over them. Stir well to dissolve sugar, cover primary, and set aside several hours until cool. Add acid blend, one finely crushed and dissolved Campden tablet and yeast nutrient. Stir briefly. Re-cover the primary and set aside for 12 hours. Add activated yeast in a starter solution. Ferment six days, strain off flowers, pour liquid into secondary, and attach an airlock. Rack when specific gravity is at 1.005, top up and refit the airlock. After additional three months, stabilize with potassium sorbate and finely crushed and dissolved Campden tablet, sweeten to taste, wait 30 days, rack if needed or bottle. Age four to six months before tasting.
Other Uses
The recipes here are proven and basic and easily lend themselves to tweaking or combining with other fruit or berries. Elderberries or elderflowers can also be added to grape wines to add color, tannins or aroma.
The deep color of elderberries suggests that they can be used to improve color in red wines. If you are making wine and you know or suspect that your color is going to be too light for the style, you can add a small amount of elderberries at the crusher. A better approach, however, would be to make some elderberry wine and blend it into your grape wine. A simple bench trial can show you how much elderberry wine to add. You can use the same approach to add a bit of tannin to a wine that is lacking. When using elderberries for color or tannin adjustment, you generally don’t want any elderberry flavor to show through. For this reason, it would benefit you to bottle some of the wine from your bench trials in small, sealable containers — beer bottles, for example — and taste the wine once the flavors have melded. Generally, between 3 and 7% elderberry wine will add color to a grape wine without significantly impacting flavor.
Elderflowers can be used to round out the aroma in white grape wines. Their Muscat-like aroma can be wonderful, if not overdone. As with color adjustments, your best approach is to make some elderflower wine and use it as a blender. As before, run bench trails to gauge how much to add before committing to a blend.
Finally, don’t forget that both the berries and flowers can lend flavor to meads. Only your imagination and skill as a winemaker limit what you can do with the common elderberry.
Jack Keller is a frequent contributor to WineMaker magazine. Check out his Website about home winemaking at http://winemaking.jackkeller.net/.