Inside the Vineyard Toolshed: Backyard Vines
When I was a young winemaker and grape grower I looked at technology as a crutch. I was in my 20s, strong, and healthy and preferred to use muscle over forklifts; hand-labor seemed more traditional and more authentic. I just celebrated my 46th birthday, and while I’m still relatively healthy I can show you plenty of scars and chiropractic invoices that speak to my youthful hubris. I get back spasms, have bruised my spine on tank fittings, ripped ligaments, fought sunburn, am scarred from poison oak, and my hearing has suffered from loud wine equipment and bottling lines.
It is often said that at the end of any project you know how to start. I am certainly not at the end of my winegrowing and winemaking career, but if I had to start again I would certainly do things a bit differently.
If hindsight is 20/20, here’s what I see in my rear-view mirror:
• Utilize and exploit every labor saving tool at your disposal as a grower.

• If you can afford it, get the best tools and super-size them!
• When labor is difficult but easily understood, hire teenagers! The work will help them build character and save our backs!
I define a backyard vineyard as an acre or less, or under 2,000 vines. At this level of production, most of the labor can be handled by an active couple working 5–10 hours per week(end). Vines need to be pruned, shoots and suckers thinned, canopy managed, crop adjusted, fruit tested, bunches harvested and wine made. Wine quality is very sensitive to the timing of these cultural practices. Pull leaves too late and you can sunburn your crop and lose a whole year’s wine. Fail to spray the vines in a timely manner and mildew or rot can also steal an entire vintage. Having the proper equipment is no substitute for vigilance in timing our vineyard work. Keeping a stocked vineyard shed can make the work quick and hassle-free. But it may cost some money.
In my vineyard consultations I have seen three types of home growers: Folks of modest means that grow their own wine to save money, growers of moderate affluence who generally spend as much money on the vineyard as their significant other will allow, and fully affluent growers who want the best equipment regardless of cost.
In researching this article, I wanted to consider all three economic subtypes of backyard wine-warriors. So let’s look at the basic equipment everyone needs in the vineyard shed and offer “economy,” “moderate,” and “high-end” options.
Pruning
Proper pruning is the foundation for the entire vintage. There is nothing else we do to our vines that gives a greater potential for balance, and nothing can minimize unnecessary labor in canopy management better than competent and careful pruning. If you are confused about the basics of pruning, call your favorite local vineyard and ask to watch the crew prune for a morning in winter. After seeing a few dozen vines pruned properly, you will be in a much better position to know how to do it right in your own backyard vineyard. I suggest spur pruning for most vineyards, and the major considerations are getting good spacing between spurs (about the width of a hand), using a two-bud spur for low/moderate vigor, a three-bud spur for medium-high vigor, and keeping your spurs cut as short as possible each year. The main mistake I see in my consultations is allowing spurs to get taller and taller each year. Spurs should never be higher than 2–5 feet (0.6–1.5 m) from the cordon.
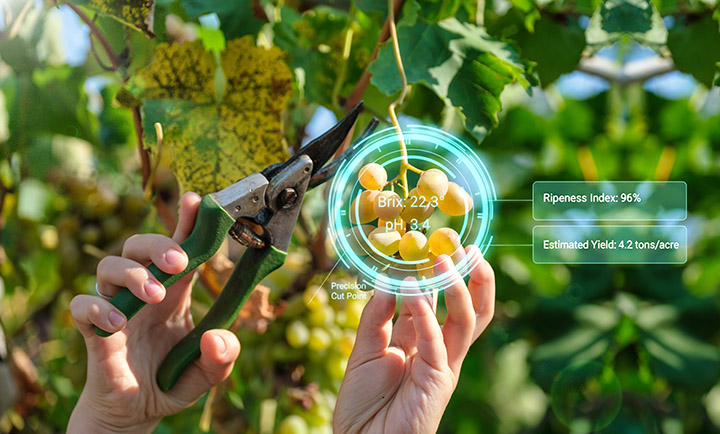
Pruning Shears
• Economy: Buying cheap bypass pruners each year may seem like a good idea, but clean and well-oiled (WD-40 and a towel) moderately priced shears may offer better value when they last for four to five vintages. But for the cheaper side of pruners, I just go to Home Depot and buy the Fiskars brand, low-end Corona or Blue Hawk. These brands are available at almost any hardware store for under $20.
• Moderate: Good bypass pruners are $30-$50, and if well maintained can last up to a decade. I prefer the Felco and Corona brands. The Felco Model 2 is a fine choice, but my favorite pruning shear is likely the Corona BP 6360 Forged Bypass Pruner. Anything from Felco or Corona will be good quality and will last as long as they are maintained, oiled, and have a blade left to sharpen.
• High-end: Too tired to manually squeeze the handles and cut those thicker canes? There’s equipment for that! Electric pruners have become far better and safer over the years. Tales of lost fingers and emergency room trips are becoming far more rare as companies like Felco and Zenport have increased safety features and battery life. At $2,000 for a single unit, it doesn’t make a lot of sense for small vineyards, but if you suffer from arthritis or fibromyalgia and still want to get the work done yourself, and the AmEx Platinum is getting itchy in your pocket, the Felco 801 power-assisted pruner will certainly impress anyone who watches you prune with a touch of a trigger. Still, pay attention to where your fingers are. The safety features are good, but nothing fixes stupid (or a missing digit).
Loppers
When I prune I like to have a good pair of loppers within a few yards of me to take care of the thick, bull canes or if I find a vine that needs to have a full cordon arm removed and replaced with a fresh cane. Loppers use longer handles and leverage to easily snip thicker canes, missed suckers from last year, and anything else that doesn’t respond quickly and easily to the attention of a pruning shear. If your rows are short, plant some loppers near an end post for when you need them, next to your sharpening file and maybe a radio.
• Economy/Moderate: You can find cheap Fiskars or other brands at big box stores for about $20, but I’d recommend you go for a Corona lopper like the FL3470 that has telescopic, adjustable handles for about $35.
• High-end: The Corona AL 8482 has nice long handles, high quality blades and can cut through 2-inch (5-cm) bull canes and young cordons like butter for about $60.
Pruning Accessories
A 4–6-inch (10–15-cm) bastard file for sharpening in the field is a must. Every week my crew used a wheel grinder to put a serious edge on the pruners or loppers. Of course, this takes a little metal away each time, and the blades will eventually get smaller and smaller until the blades or entire unit needs to be replaced. Good pruning shears have replaceable blades as well. A foldable saw is useful for thick cordon arms beyond 2.5 inches (7.5 cm).
Weed control
Weeds in the vine row are a blessing and a curse. It is industry standard to have a bare strip under the vine row with zero weeds, but this is more about aesthetics than wine quality. Once your vines are five years old, vines are not competing at the same soil depth with weeds, so leaving a reasonable amount of weed growth in the vineyard won’t matter much. Weeds will compete with irrigation water and some fertilizers, so applying either in a weed-choked area will reduce their efficiency.
Some weeds/natives can attract beneficial insects and some can even fix nitrogen. I like to keep the vine row clear enough that the weeds do not grow over a foot in height or are readily noticeable while looking at the vineyard. A clean vine row is always preferable, but don’t knock yourself out unless it makes you happy. A few weeds are really not a big deal in a vineyard as they would be in a garden. Efficient weed control starts and stops with getting those weeds removed before they go to seed. A two foot bare under-vine swath (one foot on either side of the vine) should be plenty of clearing/weeding/hoeing.
• Economy/Moderate: Get yourself a hoe and get out there and work. I like a hoe with padded foam at my hand levels. I also switch my lead hand a few times an hour to assure I get a balanced workout. Any hoe will do — the heavier the weeds, the heavier the hoe. With light weeds I prefer the “action hoe” or “hula hoe” that scrapes rather than digs. But for heavy hoe projects, I like a heavy head that does the work for me, like a Seymour 2E-AE2 Eye Hoe for about $30-$40 depending on the handle. Expect to pay around $20 at Home Depot or Lowe’s for a good standard or Hula-Hoe. In a very small vineyard, weed-cloth or mulch under the vines (or white stones like in the Rhone) will do an excellent job keeping the weeds away.
• High-end: If you have a small tractor or an ATV with a power take off (PTO), there’s some cool, high end toys for weed removal. For the tractor, a unit like a Weed Badger works very well. There are also ATV-mounted units that have infrared “eyes” that locate weeds on the ground and carefully spritz just that area with weed-killer. For the home vineyard, even in Bel-Air, these are overkill. Find a kid that needs to work and give them a hoe. It’ll only take a few hours and it’s good for them to take a break from killing aliens on a screen.
What about using chemical weed-killers? My philosophy follows the old saying: “Tickle the Earth with a hoe and she laughs with a harvest.” Chemical weed killers have never been safer and less toxic to humans, but timing is problematic. If you miss spraying that weed and hit a live, green leaf on a vine, that vine will likely perish. NEVER spray weed killer during the growing season, ONLY use it during deep dormancy.
Spray-rigs
Here’s where money really matters. If I see one major problem in home vineyards it’s an underpowered sprayer and mildew/rot issues occurring as a result. Use as many different sprays as you can throughout the growing season and remember that pulling leaves to from one-half to one leaf layer between the sun and the clusters will make your spray applications far more efficacious. If there’s more than one leaf between the spray rig and the clusters, not many sprayers will give you good coverage. Organic/elemental choices for mildew control like sulfur, copper or stylet oil can be used as often as you wish, as fungi cannot develop resistance to elemental products.
• Economy/Moderate: Pull leaves at full canopy (2 inches/5 cm of average growth above clusters) until there’s less than one leaf layer between the sun and the clusters (leave more leaf cover in hot areas, take more leaves in cool areas and be judicious as to not sunburn the fruit) and then use a good backpack sprayer like a Birchmeier 4-gallon (15-L) backpack sprayer for about $250. The 2.5-gallon (10-L) Birchmeier will help those that have smaller vineyards and don’t want the extra weight, but they run about the same $250. I will not recommend anything less expensive because I do not want you to lose your crop due to poor coverage. The pressure on these units can reach 80+ psi and get you the coverage for good fungicide control. I know some of you will still buy cheap sprayers and lose your crop. Remember these words, “I told you so.”
• High-end: If you’ve got the budget and want proper pro coverage on your sprays, you’re going to have to buy an ATV and an ATV-mounted sprayer. You can also use a combination sprayer/generator, but if you have the money to be reading the really expensive option, you likely have a larger property and an ATV will help you do everything in the vineyard from harvesting, moving fruit in buckets, transporting tools and zipping from the vineyard to the house for a cold beer or to check the score of the game. I like the 25-gallon (95-L) Fimco – ATV-25-700 – ATV Sprayer ($500) because it has an adjustable spray boom (so you can drive and spray solo) and it produces 60 psi, enough to give good coverage through a single leaf layer. You can also check with your local John Deere or farm supply store for a professional unit with more pressure, but many of these will require an ATV with a PTO unit. Check out the vineyard sprayer project on page 46 for a cost-saving option.
Transport/tractor
If you have enough land/vineyard and the money, you will never be disappointed in “going big” and getting a small tractor. I recommend a unit with hydraulics, a dirt bucket, forklift attachments and a PTO for other powered agriculture tools. The Kubota small compact tractor BX series or the John Deere “2-family” tractors will make you very comfortable as you do hours worth of work in minutes. A forklift attachment finishes the dream rig as you lift short picking bins of fruit from the vineyard to the door of the winery.
Harvest
• Economy: 5-gallon (19-L) buckets, cotton picking gloves and picking shears is all that it takes to harvest your fruit and bring it into the winery for processing. A few red wagons with larger tires can be helpful to store extra gear (for when those late pickers finally show up), or to drag full buckets back to the garage for crush.
• Moderate: Add to the above list headlamps or floodlights in the vineyard for night harvest. Harvest only happens once a year, and bringing the fruit in at night guarantees the fruit will be cooler and in better condition for winemaking. I strongly recommend picking and crushing at night; especially since fall heat waves are usually what drive us to start picking. Get lots of extra batteries, or rechargeables and a few charging stations.
• High-end: How about a bin-trailer and a few short 500 lb. (227 kg) fruit bins. Most home vineyards can be picked clean into a single 500 lb. (227 kg) macro-bin (Macro-Bin 12, non-vented), and putting them on a trailer and driving that trailer to the crusher will make you a real pro. You can also drive the tractor down the vine row while towing the bin and bin trailer and move it every few minutes in front of the pickers so they can easily dump the fruit into the bins. This is a pipe dream for any but the most affluent of home vineyardists, but it’s nice food for tonight’s dreams!
Conclusion
Great wine can be made from a good backyard vineyard regardless of your budget. Life may be slightly unfair, but the more work you are willing to do with your body, the less money you have to spend on equipment and tools.
My best suggestion is to pick a reasonable amount of tools of high quality (pruning shears and loppers, good work gloves, a solid backpack sprayer, an off-road/gardening wagon, good harvest gear) and then take excellent care of what lives in your shed. Get a few files, shop towels and a big jug of WD-40 and get to work. Vintage waits for no man, and it’s time to get busy in making our 2015 wines something special!