Viticulture Tips
10 steps to grow better wine
If wine is made in the vineyard, why are we so focused on winemaking, chemistry, tools, oak,
solutions, and tasting? I have a simple answer: Wine is more fun than farming. Farming is about getting dirty and tired, having a physical connection to the plants — sore hands, legs, and backs. But in the winery we drink beer and watch the wines develop right before our eyes — and likely sample them all along the way. A vineyard is a slog in the hot sun. Winery work is boozy and a bit more fun in the cool shade. Even in the traditional winemaking cultures, the peasants bring in the fruit and the owners of the chateau might be in the winery crushing the baskets of grapes as they come in.
But who is the real hero of wine? The grower, of course! You can’t have a steak without the steer and you certainly can’t make wine without a vineyard. Heroes always have a journey from safety into danger.
We find something magical in the darkest part of the forest and it often turns to dust as we return back to mundane safety. But, understood correctly, the danger of the hero’s journey informs and strengthens us. Leaving the coziness of the couch on a winter’s day to go prune the vineyard is a heroic act in today’s insulated humanity.
The purpose of this article, then, is two-fold. One: I celebrate your commitment and encourage hard work and observation in this upcoming vintage. Second: Let’s give you some tools to assess your successes and failures in the previous growing season and find measurable ways to improve our wine quality where the vintage is honestly produced: In the vineyard.
The 10 Steps to better Vineyard Success, In Order of Yearly Vineyard Practices
#1: Dormancy
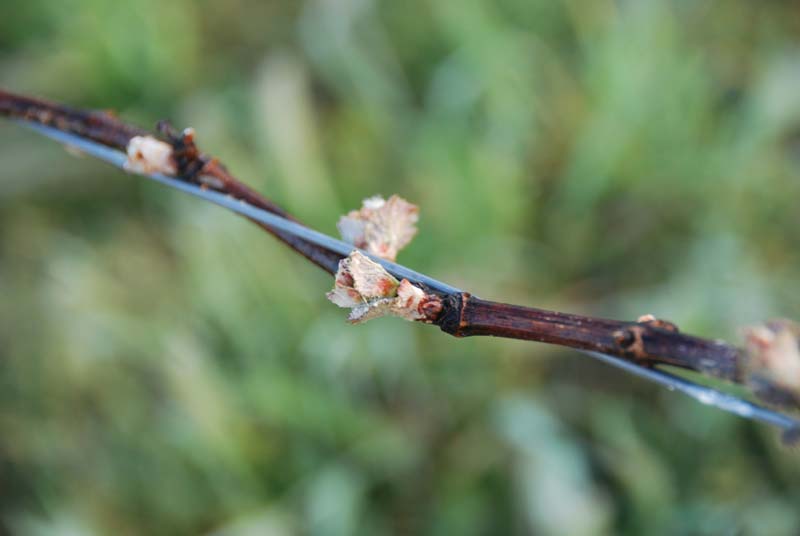
The Eurasian grapevine that most of us use for winemaking, Vitis vinifera, evolved in the forests between the Black and Caspian Seas in Transcaucasia, an area that gets quite cold/frozen in the winter months. Like most trees and shrubs found in this climate, the European grapevine drops its leaves and becomes lignified and hardened/woody in the coldest months to preserve its nutrients/resources.

Do it better! Put the vineyard to sleep clean and seeded. Pros drill or sow a cover crop between rows first thing after the vineyard has been picked clean, nets stored, buckets cleaned and stacked, and the rows walked to look for random tools and trash pickers may have left behind. Cover crop is usually a mix of grasses, clovers, legumes, and wildflowers to stop erosion, add green manure, and attract beneficial insects. Hope for a few moderate rains to get the cover crop established before serious erosion can occur (on hilly vineyards).
#2: Pruning
When the vines have lost all of their leaves, usually between December and January on the West Coast, it’s time to make a few test-cuts for pruning to see if the vines are ready to be trimmed for the next growing season. Try to make the test cut on a warm(ish) winter day at least a few weeks to a month after the last leaf has fallen. Make a few test cuts through the woody canes, and then wait an hour. If the cut on the live vine side stays dry, the vine is ready to be pruned. If the pruning wound “weeps” with watery xylem fluid, the vine is still moving liquid and nutrients around — wait 7–10 days and repeat the process until the wounds stay dry.
Cover crop is usually a mix of grasses, clovers, legumes, and wildflowers to stop erosion, add green
manure and attract beneficial insects.
Do it better! Pruning is the foundation for the entire vintage’s balance and quality in the vineyard. In general, we prune the vineyard to focus the growth on a very specific part of the vine that encourages balance (12–15 leaves per cluster) and smaller amounts of fruit for the vine to ripen for best flavor and intensity. Pruning too much can cause too few clusters and rapid ripening, leaving too much wood on the vine causes rank growth and a vine that struggles to ripen a crop that would produce diluted and uninteresting wine. So how much pruning is the right amount?
Start by pruning traditionally for the first 3–5 years — cutting your spurs to two buds, spaced about a hand apart (spur or cordon training), or by selecting 1–4 canes to lay down and use to produce fruit next year (cane pruned). If these terms are confusing, give them a Google and take a few moments to learn. Then weigh the pruned material taken off each vine and make an average pruning weight. Now we’re ready for some serious lessons in balance.

Dr. Richard Smart, my viticultural guru, makes it clear and scientific:
Golden Rule 1:Pruning to 20 to 30 buds per kilogram (9–14 per lb.) of pruning mass. (This means to weigh how much you prune off your vines on average and leave 9–14 buds on the vine when you prune for each lb. of pruning weight.)
Golden Rule 2: Aim for 15 shoots per meter of canopy (4–5 shoots per foot). Assume you will get one shoot per bud.
#3: Budbreak and First Spray
The vine takes its left over nitrogen from the current year, stores it as arginine for dormancy, and then it shifts back to nitrogen in spring to allow the vine to wake up, pressurize, and push the buds into small leaves during budbreak. Budbreak occurs not due to ambient temperatures, which may swing wildly in spring, but instead uses soil temperature, which is an excellent gauge of the approaching warming. When the soil warms to 50–55 °F (10–13 °C) most vines will begin to force their buds open and expose the vine’s fleshy and vulnerable baby leaves to the elements.
It takes a few weeks for the leaves to start photosynthesizing at a rate that the vine becomes a net exporter of carbohydrates, at which point the vine begins to grow rapidly from the sunshine absorbed.
Do it better! Most vineyardists will suggest the first fungicide spray should be at about 4–6 in. (10–15 cm) of average shoot growth after budbreak (a few weeks, likely). In high-pressure mildew/rot environments, I would start spraying after all buds have broken, and at 3–4 in. (7–10 cm) of average shoot growth. In low-pressure mildew/rot areas, waiting for a full 6 in. (15 cm) of average shoot growth is fine. Remember mildew and rot overwinter under the bud shield, so the young vines may look mildew-free, but trust me that those tender young tissues are swarming with pathogens trying to gain a hold. Pros know to spray using the correct label formulation/mix and to never make their sprays stronger than label recommendations. With a backpack or hand sprayer, you may need to make multiple passes to make sure the young shoots are soaked in material on both sides, and that the clusters are also sprayed when the canopy starts hiding them.
#4: Shoot removal/suckering/weed removal
These are the moments where your practices in the vineyard will begin to become serious and require weekly time in the vineyard getting the new year dialed in to make great wine. We have three goals here: First is to remove one shoot from any double shoots (a bud where two green shoots emerge instead of one) in order to space the shoots out so the fruit won’t be crowded when it ripens. Second is to remove any non-fruitful shoots in the canopy and on the trunk/head to focus the vine’s energy on fruitful shoots in the correct position. And finally, to remove weeds from the vine row that might compete for nutrients or block sun from the vine’s canopy.
Do it better! Vines and common weeds generally don’t compete for water/nutrients after the vines are established. Just-planted vineyards are the exception; I am careful to keep them weed-free. But short weeds in the vine row of an established, producing vineyard don’t bother me unless the weeds get near the fruit/canopy. Remove double shoots and “extra shoots” that are too close. Each shoot and fruit should have its own niche space in the canopy. How much space? Clusters should not nest into one another, or even touch. Shoots without clusters can always be removed. Suckers on the trunk and near the ground can always be removed as well, even if they might have a cluster on them. Extra shoots tend to show up near the head of the vine and on the outer edges, so make sure those areas are tidy and shoots spaced so the fruit can have its own space.
#5: Early canopy management
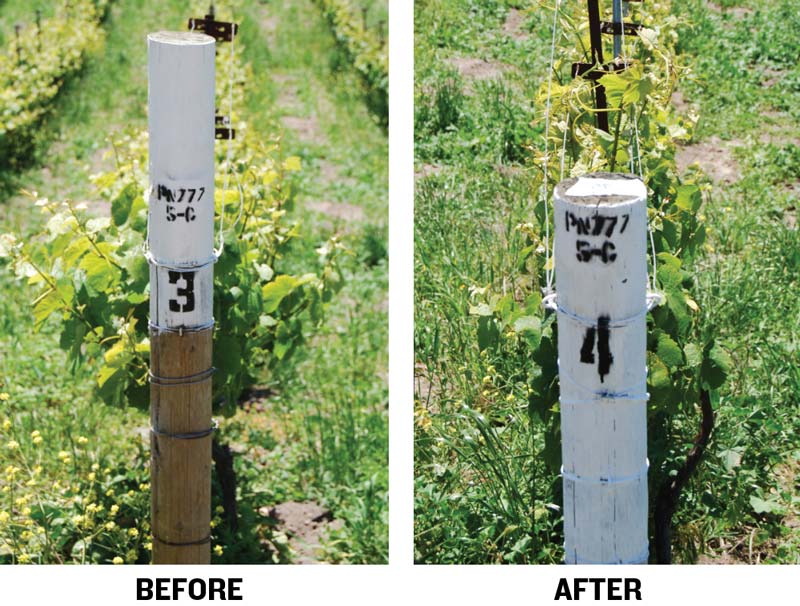
This images on the facing page show vertically tucked shoots that have been picked, have gone dormant, and demonstrate good vertical shoot positioning from the year and we can imagine that each cluster had its own space to absorb sunlight to improve flavor and minimize rot and mildew pressure.
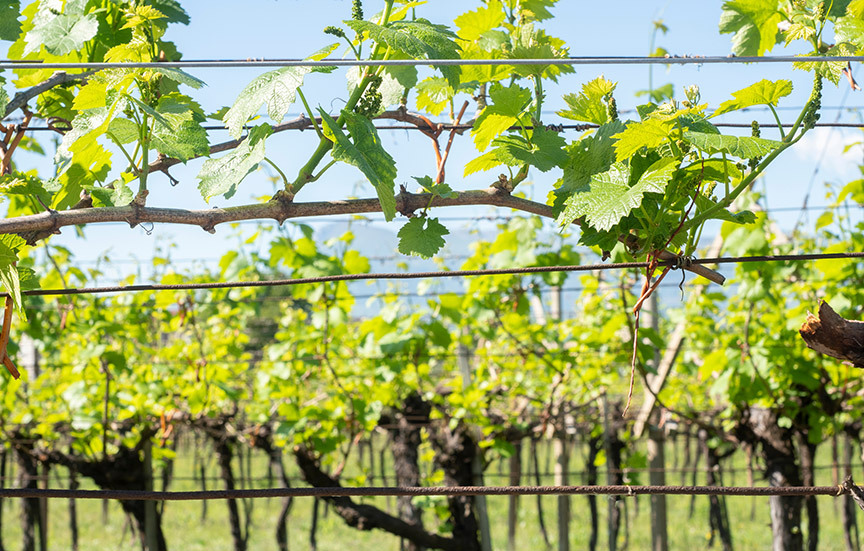
Besides shoot removal and suckering, your first canopy management “pass” will likely be a shoot-tucking exercise, as long as your vineyard trellis has shoot positioning wires. Grapevine shoots want to climb trees and, given a trellis to ascend, they generally will. But vines also tend to droop down from trees and trellises as well, so we use catch wires in the trellis to weave the growing shoots into a vertically oriented position, as we see in the “after” image below. This makes a “solar panel” of leaf area perfectly positioned to capture sunlight and turn it into carbs for growth and sugar for ripening.
Do it better! Shoot positioning can be frustrating when you attempt to wrangle a shoot and it breaks. I find shoot positioning is easier on a warm day, after the morning chill has abated, so the vines are more pliable. There’s no replacement for experience in this — when you learn to shoot position you will break some shoots (they will grow back and heal) until you learn how much touch is enough, and how much is too much.
Leaf plucking: Once you have a full canopy, at least 10 leaves per cluster, go ahead and pluck the leaves (with the stem/petiole!) from the fruiting area to encourage sun and wind movement. In cool, foggy climates you can pull almost all leaves from the fruiting zone. In moderate heat zones you can pull 50%, leaving some leaves to shade the fruit 10 a.m. – 2 p.m. In arid, hot regions you need to be very cautious with leaf plucking to avoid sunburn. Do some experimental work on rows early in the vineyard’s life to see how much leaf area to pull to give the clusters sun exposure with no burn.
#6: Fertilization
If a vineyard is mostly healthy, even struggling a tiny bit, fertilization is NOT necessary. Fertilization tends to increase vigor and decrease wine quality, so let’s be overly cautious. If your vineyard produces at least 12 leaves per cluster and 3- to 4-ft. (0.9- to 1.2-m) canes on each position, your vineyard is dialed in. If the shoots are stunted, and are less than 2–3 ft. (0.6–0.9 m), you will want to add some nitrogen early in the season, before flowering. A 15-15-15 fertilizer with chelated micronutrients would be my choice. You can also use an organic fertilizer but it gets expensive and the vines won’t know the difference (but the soil and environment might).
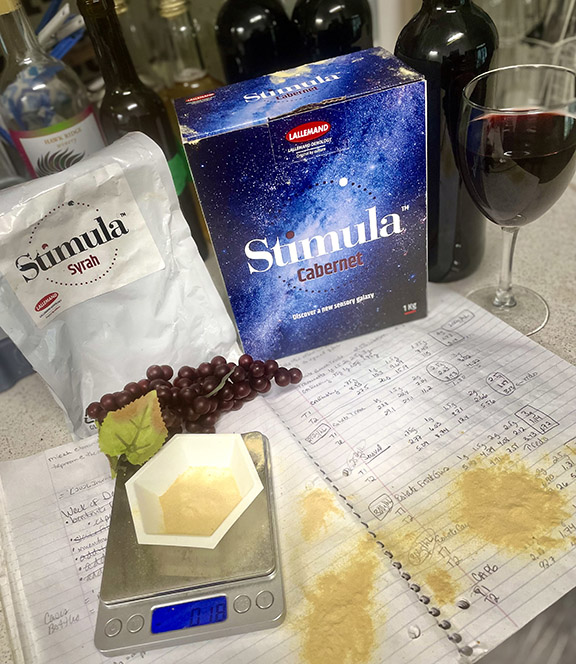
Do it better! Pros use petiole sampling. When flowers emerge, we pick 100–200 leaves from the vineyard (choose leaves adjacent to a flowering cluster), then tear the stems/petiole off, put them in a brown paper bag and send them to an agricultural laboratory. Better yet, contact the lab and ask for their protocol for a petiole sample for varietal winegrape production. I use Fruit Growers Lab in Southern California, and they have always done a good job for me (www.fglinc.com). Your lab report will come back with a range for both macro and micronutrients. Some research on deficiencies on the internet should help you put together a plan, or you can hire me to do it: weswines@gmail.com.
#7: Flowering
By the time your vineyard starts flowering (and yes, they smell wonderful, like jasmine or orange blossoms) your canopy management should be 80–90% finished. This means your shoots should be tucked/positioned to expose the fruit zone, your leaf pulling has given the fruit zone sun flecking and air movement, and when you spray the vineyard, coverage should be excellent with one pass on each side. Keep a journal detailing flowering dates and once you have a history, plan to do your last fungicide spray a week before traditional flowering date. If there are a few flowers when you spray, fine, but spraying a vineyard in full flower will increase shatter and your clusters may suffer in their fullness.
Do it better! A bit of calcium and zinc, either foliar or ground application, before flowering can increase fruit set. This can be done (without nitrogen) every year without increasing vigor. Make sure to fertilize at least 1–2 weeks before the normal flowering date, which is perfect timing for a calcium/zinc foliar application mixed with your fungicide.
#8: Last sprays and timing
I never spray sulfur, wettable or powder, at or after bunch closure, when the small green grapes swell up and the cluster fills out. Trapping sulfur spray inside the cluster may cause stinky aromas in winemaking — you can use stylet oil or a strobe/synthetic fungicide if your local law allows it. Grapes become immune to powdery/downy mildew after veraison, at 19–20 °Brix, so once the fruit has softened and is ripening, you can hold off on fungicide, unless Botrytis is a concern (not much you can spray for Bot in a home vineyard anyway . . .). Most locales can stop fungicide sprays after veraison.
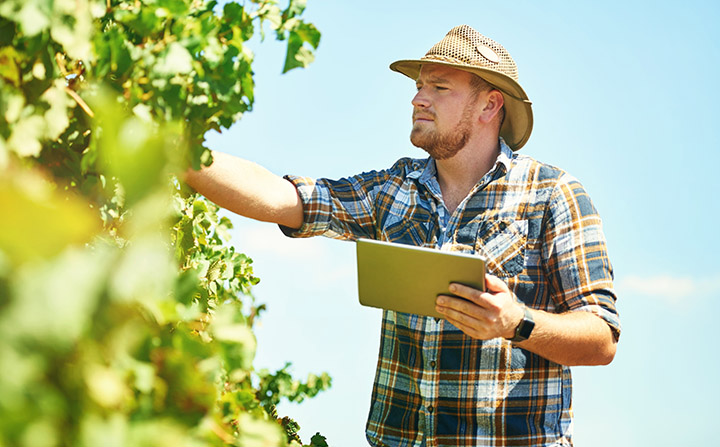
Do it better! Keeping a yearly calendar of important vineyard milestones is quite valuable: Budbreak, canopy, first leaf thinning, flowering, veraison, field testing numbers, and harvest. Pros make charts and tables as 5–10 years of data will help timing in all of these vineyard practices and will inform you of ripening curves and allows you to correlate dates and practices with wine quality.
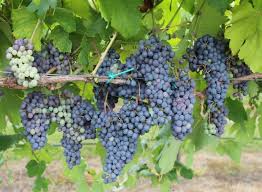
#9: Veraison and cluster thinning
Veraison is when the grapes soften and change color — from hard and green to soft and gold, grey, pink, red, purple, or black. Biologically, veraison summons birds. The color change means the fruit is palatable to grape-eaters and that the seed has enough coating to go through their digestive tract and come out the other end ready to sprout a new vine. Veraison for a winegrower, though, means a few things. You should have all of your barrels and winemaking equipment (including labor, interns, and volunteers) all lined up. Yeast should be in the fridge, fermenters should be cleaned and covered, equipment tested and ready. Harvest could be as quick after veraison as a month, but usually begins around 50–60 days after color appears.
Do it better! Veraison presents one of the hardest decisions in winegrowing: How much (if any) clusters we want to “green thin,” or drop on the ground. There are two things to discuss here. First, I always drop the last 5% of fruit on the ground that is lagging behind after 95% of the vineyard is fully colored up. This includes clusters with green/pink wings (if you’re really cheap you can cut off the green/pink wing of the cluster). This will help every cluster be consistently ripe at harvest — I try to make sure every cluster at harvest is within 1–1.5 °Brix of every other cluster. This is how the finest wines are grown and made. Of course you lose that bit of wine, but the wine you do make will be much higher in quality.
Another awesome hack: Collect all the discarded/dropped green/pink clusters and make verjus. Verjus is what the French used before the introduction of citrus/lemons in the region for acid in their cooking. As many may have already surmised, it is the “green juice” of unripe grapes. Bonus here? You can test your crusher/destemmer and/or wine press before harvest using unripe grapes, press the juice, sulfite it to 30–50 ppm free (for stabilization) and then put it in small bottles for holiday gifts.
#10: Fruit testing and harvest
Testing fruit from a backyard vineyard has some challenges and limitations. Commercially, I like about 20 lbs. (9 kg) of fruit for a proper field ripeness test, taking full clusters from randomized rows, plants, and areas of the plants to avoid “fruitovore bias.” Humans are genetically programmed to pick the ripest fruit in their visual acuity. If you choose grapes or clusters by sight, my experience is that your fruit will come in at least 1–2 °Brix less ripe than if you did a proper random sampling.
Do it better! To choose the perfect moment for harvest, consider tests, weather, and labor availability. First, always harvest at night if you can. The fruit is happier, cooler, and less likely to start fermenting and producing volatile acidity. Second, do field samples where you fill a Ziploc baggie with at least 50 berries from randomized rows, vines, areas of the vine, and sections of the cluster (1st berry comes from bottom of cluster, next from the sunny middle, third from back/shaded middle, one from the top, one from the shoulder, and repeat). Mush up the sample, test white juice right away, leave red macerated samples in the fridge overnight to allow the must to soak up and give a more accurate reading of sugar and pH.
Balance your harvest date with balance of sugar/Brix and pH, and yes, you should test both. I like white wine grapes between 22–24 °Brix and at 3.2–3.6 pH and red wine grapes between 23–26 °Brix and 3.3–3.8 pH. If a terrible rainstorm is coming, that may trigger a slightly early harvest and you can chaptalize the must by adding a calculated amount of sugar for mouthfeel/alcohol. If a light rain is coming, say less than an inch (2.5 cm), I don’t generally worry. Make sure you have enough folks to help you bring all the fruit in quickly and easily, so you can have a late “picker’s dinner” after and celebrate your hardcore hour(s) of vineyard labor with friends, delicious things, and last year’s wine.
Conclusion: If you’ve read my columns for any period of time, you know my firm rules for the vineyard:
- Get vineyard labor done early and often, make a plan and stick to it.
- Keep a journal and write down labor, milestones, ripening curves, harvest dates, etc.
- Take tasting notes on your juice samples and correlate flavors of the grapes with how the resulting wines turn out (e.g., picked Chardonnay had a kiwi flavor and wine was too sharp).
- Exploit local winegrowers/makers for their secrets and schedules and I always recommend to exploit friends, family, and especially teenagers to get their hands dirty and get some real work in for discipline.
The more you study, the less you work. Keep reading and learning and you might find ways to make your vineyard tasks easier and more likely to increase wine quality.
Of course, make sure you choose and plant vine varieties that are well matched to your local terroir.