Wine Tasting 101
Most of us make wine because we like to drink it. The drinking part is easy to master: just tilt your head back and swallow. The tasting part, however, is a little more complicated.
There is a lot of mystic hoo-hah written about wine tasting, with tales of tasters so accomplished that they can not only tell what kind of wine it is, but also the vintage, producer, vineyard, and which side of the hill the grapes were grown on. This is what we technical guys term “hooey.” Sure, if you specialize in one type of wine — say, Bordeaux — and drink nothing but, you can develop a good-enough taste memory to identify some wines by a single taste. However, throw a couple of good California Meritages into the mix and the taster will be lost.
Why to Taste
The real aim of tasting is to identify grape characteristics and techniques used in making a wine. Then you can decide whether these suit your criteria. Analytical tasting will help you to separate the tastes and aromas that make up the complex palette of a wine. Eventually you’ll be able to assess not only your own wine, but also any other wine you drink. This will make you a better winemaker.
How to Taste
Wine tasting breaks down into three separate actions: look, smell, and taste. Each of these individual actions will tell you a little bit more about the wine and together they will supply you with the whole story about what you’re drinking.

First, look at the wine to appreciate color and clarity. Second, carefully smell the wine to appreciate aromas. Third, taste it to evaluate flavor.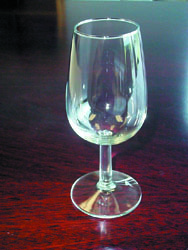
Glassware
The basic tool for wine tasting is a good quality wineglass. The structure of the ideal glass varies, depending on whom you talk to, but in general:
• It should be spotlessly clean, with no haze, spots or dishwasher residue. When in doubt, wash by hand.
• It should have at least 6 ounces (180 mL) in capacity, although some specialty glasses go up to 30 ounces (900 mL) and work very well.
• It should have tall sides that curve inward slightly at the top, to allow the wine inside to be swirled without spilling.
• It should have a stem long enough to be grasped with the hand, so that you don’t have to grip the bowl and get it greasy with fingerprints, or warm the wine inside.
A lot of wineglasses sold for home use are terrible for tasting. They’re too small by far, with wide, flat bowls and sides that curve outwards at the top. Do yourself a favor and get some good tasting glasses. They needn’t be terribly expensive — your retailer should be able to help you get a decent one.
One of my favorite inexpensive tasting glasses is the INAO glass, designed specifically for competition tasting. A quick search on the Internet or in the phone book will find a purveyor near you, although it might be a restaurant supply store or a wholesaler. This could be a case where a wine club could pitch in to purchase the minimum case amount.
Of course, if money is no object, then you can seek out the Riedel Sommellier series of wine tasting glasses. They have different glasses for every wine, and the specialization seems to make a difference. Of course, what kind of idiot spends thousands of dollars for a set of wine tasting glasses? Other than me, I mean.

One more thing about your glass: When you’re tasting, you don’t have to pour more than 1.5 ounces (45 mL) into the glass. Any more and you won’t have enough room to swirl. Remember that this is about tasting, not drinking.
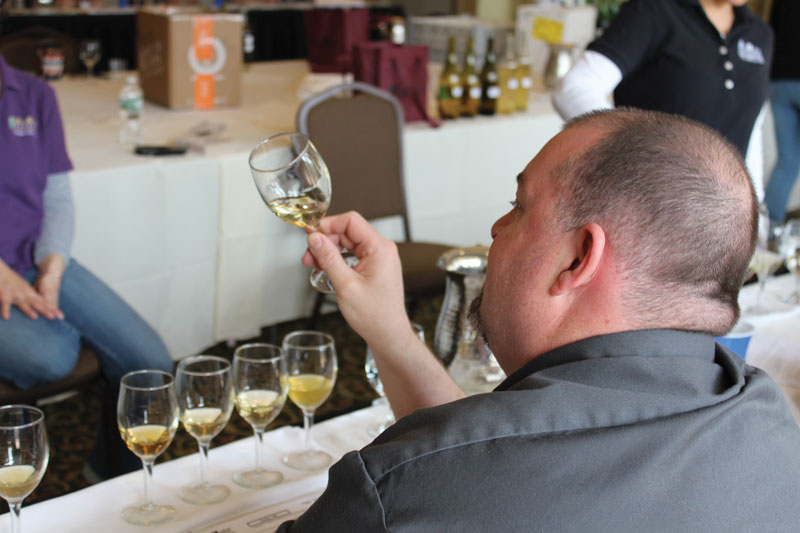
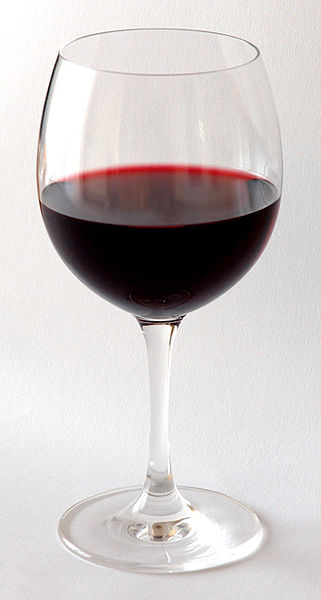
Part One: Look
The appearance of the wine gives you a good start at knowing the type of grape, the age of the wine, and its potential “weight,” a measure of the concentration of flavor.
Clarity: Almost all wines you taste will be perfectly clear. Kit wines come with very effective fining agents, and with a little extra age they almost always achieve “star bright” quality. If your wines are hazy, you may wish to reassess your techniques, or consider filtering as an option.
While a very minor haze in red wines is not terribly distracting, modern fashion dictates that white wine be as clear as water. If you’re assessing wine for competition, haze equals lost points. However, older examples of red wine may have a small deposit in the bottle. This does not detract from their quality. It’s merely a sign they’ve gone through the natural aging process.
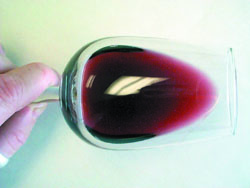

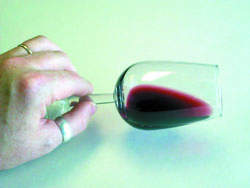 Color and Hue: Assess the wine’s color and hue by tilting the glass over a white background. Don’t hold the glass up and try to peer through the wine. By tilting the glass you’ll expose a thin layer of wine for inspection, and holding it over a white background will give you an accurate idea of the true color.
Look at the thinnest edge of the wine where it meets the glass. White wines range from water-white for light-flavored, young wines, on through to straw and light gold for fuller-flavored wines like Sauvignon Blanc and Chardonnay, to deep golden for oaked and aged Chardonnay, amber for icewine and toasty-brown for sherry. Red wines range from a light pink for blushes and “white” Zinfandel, to garnet or light ruby for Pinot Noir, to deep ruby for Cabernet and Merlot, to inky purple-black for Shiraz and Zinfandel.
As important as the color is the hue. When white wines are very young they tend to have a crisp yellow-white or almost greenish hue. As they age, the pigments change and lend a darker, more golden color. This change isn’t necessarily the sign of decay, or a flaw in the wine. It’s just natural evolution.
Red wines have several different color compounds that contribute to its hue. However, when a red wine is young, some of these compounds are actually blue. We learned from finger painting in kindergarten that red and blue mixed together make purple (the perfect color for mommy’s hair). Therefore, very young red wines, such as Beaujolais Nouveau or any red under two years of age, have a distinctive purple hue. As the wine ages, the blue compounds gradually turn red, and the wine goes from purple to true red, and eventually to a more brick-red color. Again, this is a sign of the wine evolving, not spoiling.
The only time you should be worried about the color being off is when you observe the wine to be an inappropriate, muddy brown, or when the wine has a tinge of gray at the edge of the glass.
Part Two: Look
The next visual assessment requires a bit of physical action that comes in handy when tasting wine: the swirl. You will need to swirl your wine glass in a circular movement to coat the inside of the glass. Once the wine has coated the glass, carefully observe the droplets as they flow down the sides of the glass. Are they fat, sticky drops that run down like oil? This indicates a wine that has either high alcohol, or residual sugar, or a lot of flavor compounds. Any one of these will make the wine heavier and more viscous-seeming, and will contribute to the wine’s “weight” in the mouth.
On the other hand, if the wine looks like fine lines of liquid, like raindrops running down a window, this will indicate a dry wine, perhaps with lower alcohol, and lower levels of flavor compounds. This isn’t necessarily a defect, merely a style variation.
If the wine runs down in a uniform sheet, without leaving a sticky trail, change your detergent. Many modern “no-streak” dishwashing detergents contain surfactants and sequestering agents. These chemicals stay on the surface of the glass, making the wine sheet down as well. If this is the case, wash your glasses by hand in a good, unscented detergent, and start over.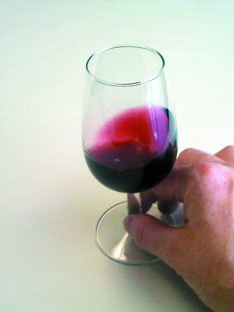

Nose to the Winestone: Smell
Human beings can actually smell tens of thousands of different aroma compounds. While some people are more sensitive than others, everyone can improve his ability to discover smells by using the right technique.
The right technique is a bit indelicate, but rewarding. The first step is to swirl the wine vigorously in the glass, to fully express the aromas. Then stick your nose deep into the glass and give a really sharp, hard sniff, like you would if you were trying to drink a milkshake through your nose.
The purpose of the vigorous sniff is to engage all of your olfactory apparatus. Your nose is a sensitive instrument, but it can’t do its job if you only feed it little bunny sniffs. It needs big, brawny snorts to deliver the smells to the sense receptors. So don’t be embarrassed. You paid for the wine, and you should smell all of it! The difference between a deep whiff and a tentative sniff is the difference between an expert wine taster and a wanna-be.
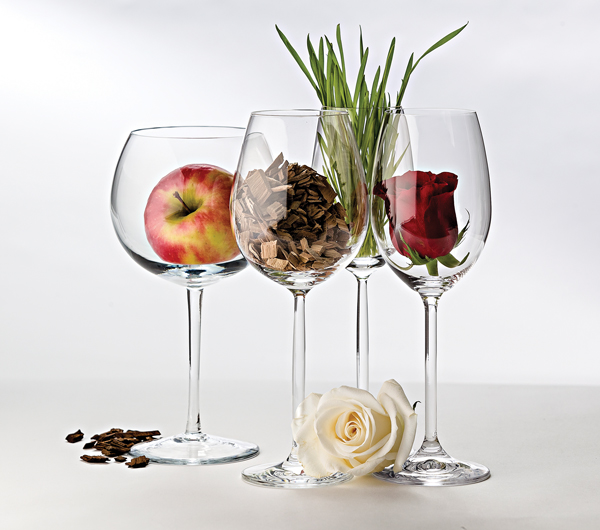
When you sniff, think about all of the smells you encounter. Wine has its own unique smell makeup, but all of those smells relate to familiar aromas. It isn’t necessary to get all airy-fairy with descriptions of “delicate hints of this” or “faint soupçon of that.” Just think about what it smells like to you.
Getting to the Good Part: Tasting
To get the most out of your taste you need to work the wine over in your mouth. Just like letting a piece of chocolate melt in your mouth, wine will cover your palate with flavor if you take your time.
To that end, start by taking a small sip of wine, about two teaspoons worth. Hold it in the front of your mouth, between the tip of your tongue and your front teeth. Purse your lips (like you’re going to whistle), tilt your head forward a bit, and suck in a small amount of air. This is important: Don’t inhale, just take in a little bit of air.
This gurgle of air running through the wine will aerate it, opening up aroma compounds and driving them across your palate to where they can be sensed by the olfactory apparatus in your nose. This will cause a huge burst of flavor — so much so that many people are overwhelmed the first time they try the technique. Don’t be shy about the slurping noise you make doing this.
Don’t swallow the wine yet. Run it around your mouth, across your tongue and your palate. Chew it a little bit for good measure. Most people aren’t aware of it, but you actually have taste receptors not only on your tongue, but also on your hard palate, soft palate, gums, and cheeks. They’ll all tell you something about the wine.
Go ahead and swallow, but don’t think you’re finished: Wait, and think about the character of the wine as it changes after swallowing. It will warm up on your palate, releasing different flavor compounds. This persistence of flavor is known as “finish.” This is usually where tannins and oak flavors show up. It’s also where the perception of alcohol is most notable.
If you’re having trouble coming up with the exact description of the aromas and flavors in your wine, check out the sidebar for typical varietal characteristics. Don’t worry if you can’t pick all of them out, or if you find ones that I haven’t listed. Different people have different sensitivity levels, and there are literally thousands of opinions on the “typical” character of specific wines. Go with what you detect, not with what someone else says.
Finally, on whether to spit or swallow: It depends. If you’re tasting one or two wines, then the ounce or so you’ll get from each shouldn’t impair your judgment. However, if you typically taste twenty to forty wines at once, then those accumulated ounces will make it very hard to stand upright, much less accurately score the last dozen or so wines.
Scoring Wine: Grapes of Math
It’s one thing to go through all the steps to taste your wine properly, but to capitalize on your efforts you need to make a record of your impressions. Get a notebook and write down your impressions of all the wine you taste. Some winemakers add these notes to their cellar book where they keep the details of their fermentations. You may wish to keep a small separate notebook for tasting notes so you can take it with you to wine tastings and restaurants.
To formally codify your impressions, you should use a scoring system. You might be familiar with the 100-point system bandied about by slick commercial wine magazines, but those aren’t particularly useful. (Ever see them name a 38-point wine? What’s the difference between 94 points and 100 points? Okay, about $200 a bottle, but I mean other than that?)
Probably one of the simplest and most meaningful scales is the UC Davis 20-point scale. It assigns scores against typical characteristics, allowing you to compare one wine to another. In modified versions, it’s the one used by most winemakers, and the one I use every day at work for judging wine made from kits. Here’s how I break down my scores.
Now, this isn’t the final-wisdom version of the tasting scale, and a little research will reveal about two dozen variations. This is just the one I find most helpful in evaluating the five thousand kit wines I taste every year.
A Final Exercise for the Curious
Sometimes it’s very difficult to distinguish between the characteristics of oak, tannin, acid and alcohol: After all, where do we encounter the unalloyed flavor of oak in our daily life, much less tannin? Likewise, unless you enjoy the taste of battery terminals you won’t have encountered pure acidity, and most people think they know what alcohol tastes like, but really don’t. Here’s a simple exercise you can do to educate your palate on these flavors.
Materials
• 1 gallon (3.8 liters) distilled water
• 4 one-quart (950 mL) glass jars
• Small saucepan
• Strainer
• 1 ounce (28 grams) oak powder
• Tannin powder
• Tartaric acid
• Small bottle of 80-proof vodka
• Six tasting glasses
• Spit bucket
• Glass of water
• Oaked white wine
(Australian Chardonnay)
• Oaked red wine
(Cabernet Sauvignon or Merlot)
You’ll be preparing four solutions with the distilled water. Each will mimic the characteristics of the single component in the wine, isolated to make it easier to identify and compare it to the flavors in the wine.
1. Bring 4 cups of distilled water to a boil. Toss in the oak powder and take it off the heat. Stir, let it sit until cool, and strain it into a container.
2. Bring another 4 cups of distilled water to a boil. Dissolve 1/4 teaspoon of tannin powder into the water, take off the boil and allow to cool. Pour into second jar.
3. Pour 4 cups of water into another jar and dissolve 1/4 teaspoon of tartaric acid into it. This will take a few moments of stirring.
4. Pour 1 cup of vodka in the jar and add 3 cups of water, stirring well.
Note: These amounts are all set up for convenient measurements, and make enough solution for dozens of tasting sessions. Quarter-teaspoons are also pretty tiny measures to work with, but if you have an accurate eighth-teaspoon measure, you could halve the quantities of water. If using up a cup of vodka runs counter to your thrifty sensibilities, you can use a quarter-cup of 80-proof vodka and three-quarters of a cup of distilled water. (Cheapskate.)
Lining Up the Tasting
Pour an ounce and a half (45 mL) into each of your red and white wine into glasses, and an ounce and a half (45 mL) of each of the prepared solutions. Start by tasting the white wine, and write down your impressions of the flavors. Score it using our scale.
Next, take a sip of the acid solution, spit it out, and after a moment, take a sip of the wine. Try to pick out the acid flavor. Surprise! It’s pretty easy! Feel free to go back and forth between the two if necessary to sort out your perception of acidity.
Take a drink of water to clear your palate, and move on to the oak. Again, start with the wine, and then try the oak, going back and forth as necessary. The woody, slightly drying character of the oak is quite easily distinguishable from the acid.
Clear your palate with more water, and repeat the process with the tannin. This time you will not find as clear a character in the white wine — it won’t have much tannin character.
Finally, clear your palate one more time and move on to the alcohol. The big surprise this time is that alcohol doesn’t “taste” of anything: It mainly seems to sweeten the water, and is perceived very much like sugar in the 10–12% concentration seen in wine.
When you repeat the process with the red wine the acid won’t be quite as easy to perceive, as red wine is less acid than white, and stronger in character as well. The alcohol and oak will be similar, but the tannin will shine through. This is a useful exercise for identifying the subtle difference between the “finish” of tannin and oak.
Exercising Your Taste Muscles
Like any pursuit, tasting gets easier the more you practice it. My advice is to treat the first taste of any wine you encounter as an educational opportunity. You may get a little ribbing for being a wine-nerd (here, come sit on the nerd-bench by me) but more often people will be interested in your pursuit of knowledge, even asking you to help them learn more. Keep your notebook handy and you’ll never miss the chance learn something new.
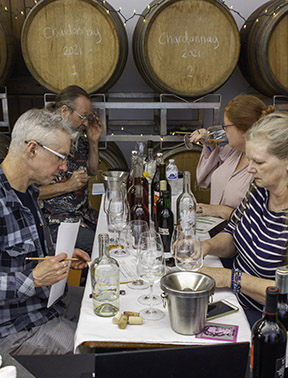
A good route to learning can be wine festivals. Wineries gather together in one convenient venue and display their wares for tasting. There are few other circumstances where you can taste dozens of Cabernet Sauvignons, scores of Rieslings, or forty champagnes for quite reasonable prices.
Keep in mind though that it’s rare that even professional winemakers can score more than a handful of wines accurately before their palates become fatigued. When I’m at a festival in my professional capacity (and believe me, my capacity for wine is truly professional) I concentrate on wines that interest me at the time: One day it might be Sauvignon Blanc, the next white dessert wines.
The Tasting Lifestyle
Good winemaking techniques will provide more value if you can taste wine in an analytical fashion. It’s the best route to becoming a better winemaker, because there’s no more sensitive instrument than your sense of taste and smell.