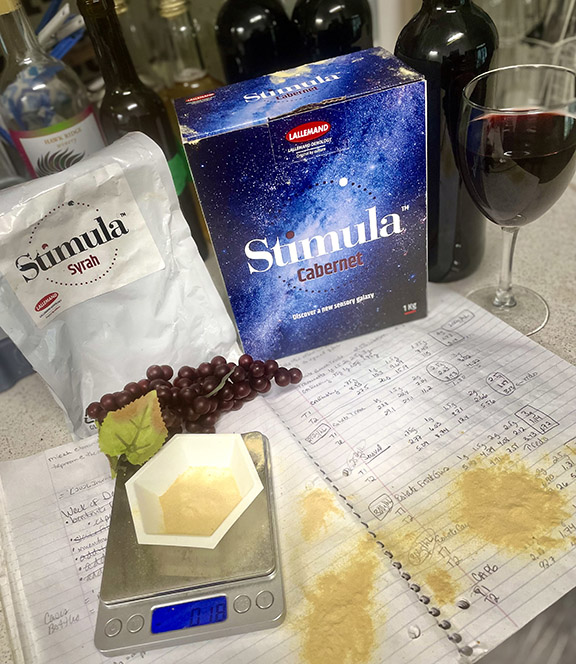
Frequently Asked Questions

Q Post Harvest
Well, the growing season down here was hot and furious and I can’t believe it, but all of my backyard Zinfandel vines survived all the bugs and the heat and made some nice wine this year. We’re done pressing in early September and I can’t help but think there’s got to be something that I need to do to my vineyard after harvest . . . but I have no idea what it is. Does a vineyard need anything post-harvest? There’s a few more leaves than usual, as we picked early. I don’t know if that helps. I have about 60 vines in two rows on a hill in my backyard. The soil seems to have a lot of clay.
A
Post-harvest is a very important and often overlooked time for improving vineyard health. Most home viticulturists don’t know that there is a period of rapid root growth immediately following harvest. Once the vines have been freed from their “crop responsibility,” the vines put a lot of resources into root growth and in storing whatever nutrients are left over from the growing season. The first thing you want to do (right after harvesting fruit) is to turn the water on. Give the vines a very long, deep irrigation. Up to 10–12 gallons (38–45 L) of water per plant is a good start. The idea here is to moisten the root area as deeply as possible so the roots can grow easily, and to give the vines all the moisture they need to finish their season’s growth. Waiting to irrigate in this manner is key — you don’t want to give the vines a deep irrigation while they are supporting a ripe crop.
Another thing you may want to do is to go through the vineyard and cut off any grapes or stems that the pickers or the birds missed. By removing every cluster and stem you will be removing material that will “mummify” with mold and mildew and start disease cycles early in the next season (after “overwintering”). If your vines were very stunted (little growth, not able to support and ripen crop, etc.), you can also add a small amount of nitrogen fertilizer, chicken manure or compost under the vine row. This will allow the vines to soak up a small amount of nitrogen for the next season. Never add nitrogen post-harvest unless your vines are very low vigor, as nitrogen can keep your vines from going completely dormant. Besides a little gopher control, the only other thing you may want to do is hoe out all the weeds and plant some cover crop seeds between your rows. If your vineyard erodes, use deep-rooting, fast-growing grasses. If your vines need some nitrogen, plant legumes, vetches and clovers (such as red clover, crimson clover, winter peas, bell or fava beans) to add some nitrogen to your soil. Planting these seeds before the rains and after weed removal will help you to control what plants share space with the vines. Make sure the soil in the vine row is cultivated to give the cover crop seeds a good chance of surviving and thriving. Good luck.
Q Vine Spacing
I live in upstate New York and have a three year old, cold-climate vineyard of about 85 vines and four varieties: Cabernet Franc, Marechal Foch, Frontenac (MN 1057) and Riesling. Some vines are three years old, some only two. In following suggestions I found in books and research done on the Internet, I decided to plant my grapes at close spacings of 3–4 feet between vines and about five feet between rows. I went with this spacing for a number of reasons. My soil is a fairly heavy and fertile stoney loam-clay, so I wanted to reduce vigor and berry size by increasing competition. I also have limited space and I know that European spacings are close. Many wines I enjoy come from vineyards that use close spacings.

I have never fertilized in three years and my vineyard vigor seems to be excessive. I have followed the recommended practice of allowing about two clusters or no fruit at all on my two year old vines and about 12–18 clusters on my three year old vines. I removed all other clusters on each vine before bloom. I have allowed more shoots to grow with no fruit on them. In all the research I’ve done, it would seem that my vines would have less than normal vigor. However, I’ve had to top the vines of all varieties twice so far this summer. Now I’m noticing that even after removing lateral shoots, the vines are “pushing” new lateral shoots and many have one or two large flower clusters on them. At first I just thought it was just on my hybrid varieties, which I know can be excessively fruitful, but my Cab Franc and Riesling are doing the same thing. My trellis is full of foliage and it’s only July. These vines want to just keep growing and producing more fruit. Is this normal? Is my spacing out of whack? I’ve pinched off all the new flower clusters, but more keep coming. Nothing I can find describes young vines doing this. Should I be concerned or do anything about it?
A
Your situation doesn’t surprise me at all and there’s nothing “wrong” with your vines. The problem is that the book (and Internet site) you read gives poor advice. There’s this belief circulating out there in the novice community that close spacing will reduce vigor to the point that closely spaced vines will show a reduction in vigor and magically transform into a tidy French high-density planting that is struggling to grow and ripen. This is just not true. Spacing might effect vigor +/- 10% or so, but not enough to change trellising options. It is true that close spacing can devigorate a vineyard due to competition for water and nutrients in a small area of soil, but there are many backyard soils that are far too rich and fertile for this type of spacing.
Vigor is difficult to change from high vigor to low or moderate with cultural practice. My professional opinion is that you should yank every other vine out of the ground and give yourself the 7 feet between vines that your vineyard needs. It sounds drastic, but that way the vineyard will be able to spread out to the level of vigor that it wants to. If the vines are as fruitful as they sound, there will be no reduction in crop, and the balance of the vineyard will be more in tune with the climate.
For this type of situation — I have to picture it in my head, which is dangerous — I might have suggested 6–7 feet between plants and 7–10 feet between rows, depending on how much the vines need to “sprawl” as they grow. If you can place some shoot-positioning wires up high on the trellising system, you may be able to make the vineyard a bit more tidy, and if you “hedge” the vines during the growing season, you may not need to give the vines so much space between rows. That way the vine can grow fairly vigorously and will have more room to grow when you remove lateral shoots. Get used to having to go through the vines every few weeks to remove leaves, and then to go back and remove the laterals/new leaves that will grow back. Have faith — your hard work will improve air flow and sun flecks on the fruit, remove vegetal character, and improve color and phenolic ripeness. Obviously, don’t fertilize, and know that the benefit of high vigor means that you can get a heavy crop off those vines with little effort.
Balance means that with all that leaf area, the vines can hang a very nice crop of grapes, so stop cutting the fruit off! The excess vigor will be hastened by a lack of fruit for the vines to ripen. The fact that the vines are throwing new crop in July makes me think that these vines are anxious to ripen grapes and make some wine next year. I like 15–20 leaves per cluster, so next year count the leaves, and allow one cluster for each 15–20 leaves on the plant. With all the vigorous growth, you should be able to get many pounds of fruit from each vine.
Also reduce watering, as that will most likely lessen vigor as well. Early season deficit irrigation is key for keeping vigor under control. In New York, you might not have the ability to stop the spring rain, but that’s OK! Rain water is always better than ground water for plants and is one reason your vines are so vigorous.
One other possibility for devigorating the vineyard is to plant nutrient-hungry cover crop between the rows. Seed some turfgrass (such as fawn fescue or other types of fescue) between rows. This will “soak up” a little of your excess vigor, and may make the vineyard more manageable.
Q Grow Tubes
I’ve been making wine for 25 years. I planted some new vines last year and used grow tubes to cover them as they grew up. As I moved the cylinder up, leaves were exposed on the bottom of the vine. Do I take these leaves off? Once the vine starts to run along the fruiting wire, do I keep the leaves off the vine running to the wire?
A
Ah yes, growtubes . . . for those who may not be familiar with these, growtubes are translucent tubes that you put on young vines (first year) so that they grow faster and are protected against wind and animals that might chew young shoots. The benefits of growtubes are that you get a quick growth spurt that is fairly straight for developing the trunk of the vine. The problem is that the vine is convinced that it’s growing in Hawaii. The weather is always warm and humid in the tube, even though the reality of the climate may be very different. At some point you have to take the tube off (always do this during deep dormancy), and my feeling is that it’s a bit of a shock for the vine to develop and grow in different climates.
My opinion is that if you don’t need growtubes, don’t use them. Let your vines acclimate to the actual environment where they will live and produce fruit in subsequent vintages. I also have a personal belief that you will have more overwintering spores of mold and mildew in a vine that was grown in a grow-tube, as the humid environment is perfect for disease development. It’s fairly difficult to spray fungicides effectively when the vine is “armored.” As you might guess, I am not subsidized by growtube manufacturers, nor am I selling any currently. To be fair, many well-respected vineyardists find growtubes very helpful in cool and windy climates to give the vines an advantage in their first year of growth. Besides protecting the young vines from rabbits and deer, they conserve moisture and protect the young vines and their leaves from herbicide sprays.
Now back to the question. First off, never move a grow tube during the growing season unless you need to lift it momentarily to remove weeds that are growing inside next to the vine. Moving the tube up will shock the lower leaves. You won’t have to remove them because they will die from the shock of going from a sheltered, shady environment to full sun. It’s like taking a fern from your house and putting it outside in full sun — not a happy plant! No leaves equals no growth, so lets keep the leaves healthy and green inside the tubes for the full first year (if you decide to use growtubes that is).
You will notice that when the young grapevine’s shoot reaches the top of the growtube, it will be a bit shocked by the sun at the top, and will slow down for a week or two, adapt, and then start growing quickly again. This is totally normal. My suggestion is that you leave the growtubes on the vines, in the same position all season, let the vine go dormant and drop leaves by itself. Only remove the tube and manipulate the canes on the trellis during mid-winter. It is never wise to remove leaves from a young vine that is not bearing fruit. Those leaves are the “factories” for creating growth in your vines. Remember what Galileo said: “Wine is sunlight held together by water.”
Q Trellis Poles
I am confused about what type of poles, stakes or end-posts to use for my trellis. The Grower’s Supply Center suggests using CCA impregnated poles. Should I be concerned with the arsenate contained in this choice?
A
Wooden end-posts are treated with chemicals to make them last longer in moist soil. I’ve done some research on this subject and it seems that most concerns about CCA (copper chromated arsenate) treated lumber has to deal with production and disposal of stockpiled wood. The copper is added to the pressure treated wood as a fungicide, the chromium as a bactericide and the arsenic as an insecticide. From a purely viticultural standpoint, the amount of “leachate” or chemical that will leak from the wood, is negligible and will not effect vine growth or wine quality. I see two issues here, which are repeated in most chemical and organic farming discussions. How well does the material work, and are there organic equivalents that are economically viable? From this point it’s a matter of personal philosophy. Will untreated posts function? Of course, but they will rot in the soil much more quickly and will need to be replaced more frequently. Is it worth the small amount of toxicity to save further need of wood resources? You can find research that shows handling CCA-treated wood is safe or hazardous, depending on who funded and published the result. The EPA has not been able to prove that CCA-treated wood poses a threat to those who consume the produce, even when used to make small, raised vegetable beds.
You need to weigh the issue yourself and make a decision based on your own needs. You ask for options, and a newly emerging process for pressure treating wood is called “ACQ,” or “alkaline copper quat.” The new formulation, “ACQ Type D” also has a built in water repellent. It’s still difficult to find ACQ treated endposts, but you can try asking for them to be specially ordered from any outlet that regularly sells treated posts. Of course you can always opt for steel or powder-coated stakes or anchored metal endposts, which may actually last longer and offer more economy than any wooden product. Of course nothing lasts forever. Either by rust, rot or what we call “tractor blight,” you will always have to replace a few posts each year.
Q Shoot Growth
My vines (Cabernet Sauvignon, 6 years old) are starting to wake up and budbreak is in full swing. One thing I’ve noticed is that the new shoots along my pruned budwood have varying sizes. Some seem to be healthy and elongated with a healthy growing tip and emerging leaves (about 6” long) and some seem to be sort of stunted and leafy, but with no growing tip (less than 1”). They don’t seem to be growing as quickly. Is this normal and is there anything I can do to fix it this year?
A
Uneven budbreak and shoot growth are very common, and there are a few easy solutions that can be implemented with a single hand-pass through the rows. If there’s a vineyard in North America that has perfect budbreak and uniform shoot growth every year, I’d like to see it, because this may be the single most common quality issue in vineyards from New England to Maui. This seems to be more of an issue in cane-pruned vineyards (spur-pruned vines seem to have a bit more regularity of shoot growth), but shoot removal is a key step for quality in any style of vineyard.
Here’s what to do: Wait until your vineyard has an average of 6 inches of new shoot growth. Work vine by vine and remove the shoots that do not have an actively growing shoot tip, or are less than half the size of the average growing shoot. This will concentrate the vine’s resources into viable and healthy shoots that are capable of producing and ripening grape clusters. If you notice that there are lots of long, healthy shoots near the center (head) of the vine and stunted shoots on the ends of the vine’s cordon arms or fruiting wood, this usually means that there are too many shoots in the middle. Thin out the new growing shoots near the trunk of the vine, and the small shoots on the ends should catch up as the vine reassigns its vigor to the shoots that remain. Make sure to leave enough shoots on the vine to bring in a decent crop, and assess each vine on an individual basis when it comes to average shoot size.
Removing stunted shoots every year will improve fruit quality by producing regular-sized shoots and canes that ripen their crop load evenly. Good luck with your shoot-thinning and while you’re out there, knock off those “sucker” shoots that appear on the trunk and down by the ground. Sucker shoots are a nutrient-sink and need to be removed as soon as they appear.
Q Purchasing Fruit
Why go through the trouble of growing grapes in our backyard when we can purchase fruit or concentrate from a vineyard, store or website?
A
My answer may surprise you. With all the commercial vineyards popping up throughout the country, it may be more economical to purchase fruit from an excellent source. Most home vineyardists are surprised by the amount of time and labor that growing grapes consumes. My suggestion is that you consider how much time and passion you can afford to expend in the process of planning, planting and tending a vineyard — and if you are at all concerned about the hard physical labor, sprays, testing, etc. I suggest you may be better suited as a grape buyer. When I engage a potential vineyard client in our first meeting, I usually spend about a half hour trying to dissuade them from growing a vineyard. No joke. They are usually surprised that a consultant would point out the potential difficulties involved in a process he or she gets paid for, but I would rather give full disclosure than be chided two years later for holding back the truth: vineyards require the full attention of a family to produce usable fruit for wine. Vineyards are terrible landscaping — they need weekly love and attention to keep them from turning into a sprawling, ugly, mildew-laden monstrosity.
So who actually plants a vineyard in their yard? As I’ve mentioned before in this issue, there is only one type of wine lover that should plant a vineyard: you have loved wine for decades, traveled the wine world, attended tasting after tasting, and made your own wine. The end game of wine is the home vineyard, which is a bit counter-intuitive, but thoroughly realistic. Without passion and commitment you will end up with a ghost-vineyard — some rusty stakes supporting skeletal vines . . . or the opposite . . . an unruly and rank hedge that will likely make thin plonk for all your good intentions.
There are plenty of competent commercial vineyard operations looking for good homes for their fruit. Buying grapes by the half ton or ton is surprisingly economical, considering the cost of vineyard establishment and management. But you may find it difficult to convince a vineyard to sell you less than 1,000 pounds (454 kg). Supporting existing vineyards in your locale (if they exist) encourages an emerging wine region and brings winemakers and growers together. Most professional winemakers do not own vineyards — they’ve crunched the numbers and see it as a losing proposition. Here’s a few tips for working with commercial vineyards:
• Choose varietals that excite you as a winemaker, but may be less popular in the market. Right now on the central coast of California there is a sale on Syrah fruit, as it has been widely planted but had its thunder stolen by Pinot Noir. Try to make wine from the varietal that grows best in your state, province or county. I would rather make a killer Norton than a lackluster Cabernet. Be smart and realize that what really matters is what ends up in the bottle, not what’s on the label.
• Call early for fruit . . . at least a year in advance of harvest. Get on the list and if you don’t know the owner, you may want to draft a simple contract. Handshakes are usually enough, but farmers are human and can forget prices and commitments. Call and remind the farmers of their commitment before the fruit softens.
• Ask if you can get fruit from a specific section of the vineyard that looks healthy and well-farmed. If you’re buying a decent amount of fruit, say a ton or more, ask if you can come out and check up on the vineyard a few times during the growing season. Check your block a few months after budbreak (are the shoots evenly spaced and showing uniform vigor?), at flowering (how’s the weather for flowering look?), after fruit set (was there fruit shatter or flowering issues?) and before harvest (will you drop green fruit at 90% veraison?). The best winemakers visit their vineyards and demand solid farming.
• Ask to do your own ripeness testing. If at all possible, test Brix and pH levels with your own equipment. Vineyards are notorious for reporting numbers slightly riper than the actual fruit shows when crushed. Take large samples (at least a dozen clusters from random plants and locations) and let red samples soak crushed for 24 hours to get more accurate numbers.
• Do your own harvesting. Use a large crew, your own picking bins, and pick as early as light allows. Ask the vineyard owner/manager if you can sort in the field, which means you ride the bin(s) and toss out any compromised fruit. If you can field sort, you won’t have to pay for fruit you don’t use for production. If the owners complain about field sorting, remind them that you are saving them money by picking your own fruit. Waiting on their crew, bins, etc. means you will likely not get the fruit at the anticipated time and day. Make sure to put the empty picking bin in the back of a truck if no forklift is available, and fill the bin there. It’s impossible to hand-lift a full 1,000 pound fruit bin.
Bottom Line: Plant a vineyard only if you’re a wine nut with a strong back, a source of labor, lots of time, interest, disposable income and you can’t get a good deal on quality fruit in your area.
Q Site Selection
Is there a protocol for determining if my backyard will support a home vineyard?
A
Absolutely, and it can be followed in almost all wine regions and soil types. Again, I recommend involving local winegrowers and experts on the project as early as possible, as every area has its unique challenges, pests, weather, etc. But here’s what you need to do to see if your dirt can grow some wine:
• Plan the area you wish to plant, measure the plot. You may want to sketch out a rough plan after measuring. I often suggest that my clients live on a property for at least five years before deciding whether or not to plant a vineyard.
• Consider where the water will come from if you need irrigation. Where are the water lines? Will I be taking over usable parts of my backyard, or will the vineyard be tucked into a corner or put on a hill that may have limited utility otherwise? Which direction will the rows run? (North/south is my preference.) Where will you store the farming equipment?
• Test the soil and your water for agricultural suitability. Once you know where the vineyard is going, dig an observation pit right in the middle. One area for soil sampling is usually more than enough (1 pit per 20–100 acres is the rule for commercial vineyards). Dig the pit at least 4 feet (1.2 m) deep, and only wide enough that you can get inside and pull some soils from 36–48 inches (91–122 cm) into a gallon Ziplock bag. Take a sample from 12–24 inches (30–61 cm) (initial rooting depth), and from around 36 inches (91 cm) (subsoil). Take some pictures of the soil profile and note carefully if there is a thick clay or hardpan layer, as it may inhibit deep rooting. If there are areas in the potential vineyard plot where totally different plant life is growing than other spots, you may want to test that area separately, using the same protocol explained above.
Next, triple rinse a 1 or 2-liter plastic bottle with the water you plan on using for irrigation (if irrigation is necessary), fill the bottle, cap it tightly and securely. Label all samples carefully with a permanent marker, note the address, city, state, sample depth, etc. You may want to pay extra to have the results explained to you, and have pre-plant soil amendments provided with the results. Be sure to note somewhere in the package that the samples are to be tested for agricultural suitability for vineyard establishment.
• Interpret the results with the help of the lab or a consultant, and if the reports come back with hopeful results (that vines will grow), you can move on to the next part of the planning phase. Remember that the soil doesn’t have to be perfect or filled with nutrients — sometimes a deficiency of some nutrient may make the resulting wine more interesting. (Of course there are deal-breakers like high boron or excessive salinity.)
• Move on to Phase 2: If the soils and water look good, your family gives you the thumbs up to develop the yard into a vineyard (no archery range for junior!) and there are no terrible pests or blights in the area, you can start planning the actual installation of the vineyard.
Bottom Line: You are better off developing a vineyard in an area that is a proven winner. Starting the first vineyard in a locale is an intrepid undertaking, and one fraught with peril and the unknown. If the soil and water tests come back with encouraging results, the real research and planning begins. Start researching pest management, local bugs, weeds, grapevine diseases and get a good idea of the yearly degree day accumulation in your yard to be able to properly choose a variety of grape.
Try to find a site that shows comparative data, like this site does for the Puget Sound area: http://pswg.org/grapes.htm. With this type of research easily accessible online, you have resources at your fingertips that used to cost a ridiculous amount of consulting fees to get.
Q Task Checklist
Can you describe the basic cultural practices that will need to be completed in a home vineyard in a normal year?
A
Instead of in-depth descriptions of each practice we use to culture the vines and promote wine quality, I will give a succinct summation of most tasks to complete in a given year, starting with budbreak and extending through harvest. Choosing which practices to use is dependent on your locale. Knowing the basic practices, though, gives you a number of ingredients from which to prepare your fruit for wine production each year. A chronological sequence of vineyard practices:
Spraying: Using fungicides to keep the fruit and foliage free from mildew and rot. Follow manufacturer’s instructions exactly — do NOT spray overly concentrated materials and expect them to have a longer impact on the vineyard. The key to fungicide application is to stay on schedule, follow labels, and use protective equipment to keep yourself safe. Clean fruit is the most important step towards quality wine.
Shoot thinning/lateral removal: Remove the smaller shoot on double shoots (where two shoots emerge from the same bud — or remove the less fruitful of the two). Also remove shoots where the shoot density is crowded. I like to see 3–4 inches (8–10 cm) between each shoot on the fruiting wire, which gives each shoot and the clusters hanging their own niche space for wind and sun penetration. If shoots are hosting lateral shoots (shoots with growing tips that emerge from green shoots instead of last year’s wood), remove all laterals to open up the area that will play host to the fruit.
Weeding: Keep the area under the vines clear of weeds, especially for young vines. Mature vineyards aren’t as impacted, and the key is to keep weeds from growing into the vines (which increases mildew pressure, can shade the fruit, and may impact flavor).
Suckering: Remove any growing shoot on the base, emerging from the soil or rootstock, or anywhere else except last year’s wood that was retained for fruiting. This may need to be done 2–3 times through the growing season. Suckers are shoots that emerge from unwanted parts of the vine, and are a sink for nutrients that should be utilized by the fruitful shoots.
Fertilization: Only fertilize vineyards that lack vigor or are heavily deficient in a specific macro or micronutrient. Most vineyards require little or no fertilization. The general rule is: if the vines are growing happy and healthy, with at least moderate vigor, don’t fertilize.
Irrigation: Many locales that get strong winter rains and/or snow and have a saturated soil profile at budbreak will not require supplemental irrigation. Irrigation is a complicated and divisive subject, and needs a lot of space to adequately explain. This is where local growers can help a lot — by giving you a baseline of gallons (or liters) per week to apply in spring, summer and pre-harvest. It’s always wise to dump tons of water on the vineyard after harvest, when the vines need a good root-dousing, and it’s smart to establish some cover crop between rows to keep fall and winter rains from robbing you of your topsoil.
Shoot positioning/canopy manipulation: You want your fruiting zone to be open to wind and sun penetration, but not so much that the fruit burns. If the fruit gets about 10% of the ambient sunlight, that should be enough to improve flavor and eliminate vegetal aromas.
Putting trellis wires above the fruiting wire in order to weave the growing shoots vertically (vertical shoot positioning trellis) may be a good idea in a moderate vigor vineyard, and high-vigor vineyards may have to be hedged a few feet above the trellising, which will require another lateral-removing pass, as the vines will bush out on the bottom when hedged.
Leaf thinning: Remove just as many leaves as necessary to open up the fruit zone to wind and sun, but not so much that the fruit burns. This is a long learning process, and don’t be surprised if your leafing philosophy evolves.
Canopy check: One last pass to get your shoots tucked into the wires, remove late-season suckers, fine-tune leafing and lateral removal and a couple extra hedging clips will make your vines very consistent from plant to plant — which means uniform ripening and ultimately, better wine.
Fruit thinning/green harvest: If there is way too much fruit out there, your wine may be dilute. Try to keep a ratio of about 12–15 leaves per cluster for adequate ripeness and concentration. You may also want to drop the last 5–10% of green fruit on the ground after veraison to increase the uniformity of ripeness.
Hedging: Hedge the vines one last time (if needed) before putting the bird nets on. The vines need to be hedged if they fold over and shade the fruit, or if the leaf to cluster ratio has way too many leaves.
Netting: Google “vineyard bird netting” and use it to your advantage as fruit starts softening or changes color.
Fruit testing: Pay attention to how the fruit is ripening, take Brix (sugar) readings and pH and keep a notebook from year to year to help you understand ripening patterns.
Harvest: After you finish all this work, make some wine. Wake up early on harvest day and crush that fruit cold!
Bottom Line: Learn what your vines need to be in balance, healthy, but not overly vigorous. Keep the fruiting zone open to wind and sun, but don’t let the skins spot, crack or split due to sunburn. Remove shoots that aren’t fruitful, are suckers, doubles or crowd the canopy. Keep the fruit clean, healthy and out of critters’ gullets. Crush the fruit in perfect condition.
Q Basic Mistakes
What are the most common errors you see when visiting home vineyards?
A
• Poor spray scheduling. Missing one spray can wreck a vintage. Keep the fruit and canopy clean. Hand sprayers have almost no canopy-penetration. Consider a powered sprayer pulled behind an ATV.
• Lack of follow through. A few hours a week may be all it takes to get the sprays done, practices finished and to prepare the vines for a good vintage.
• Poor observation and reaction. If you don’t walk your vineyard once a week (minimum), I can almost guarantee problems. Recognizing an issue like mildew infection or an insect population before it becomes catastrophic is key to nipping it in the bud. Walk, observe, react, fix.
• Lack of communication with the local wine community. The more connected you are with local growers and home winemakers, the better you will understand the needs of your vines and the potential of your wines. Start or join a club or tasting group. Take field trips and ask questions. Submit your wines to competitions and learn to properly evaluate wines and distinguish common wine faults.
Bottom Line: Pay attention, be relentless and make wino friends.
Q Harvest Timing
What is the best way to tell if your grapes are ready for harvest and what do you do if some of the grapes are ready and the rest will be in a week or so?
A
Once a viticulturist has been growing his own winegrapes for many years, he or she can usually choose a picking date by tasting grapes and recognizing the flavors that flag harvest-readiness. I taste a lot of fruit and juice, but I also check Brix and pH as soon as the grapes get around 20–22 °Brix. Re-check the grapes every few days in hot weather (80’s+ °F/25+ °C), every week in cool weather (70’s °F/ 20’s °C or cooler). Pay attention to the flavors of the grapes when you harvest. Record the flavors and numbers, and if the wine comes out great, use your notes as a reference on ripeness for future harvests.
Try checking the seeds for uniform nut-brown color, the pulp should not be sticking to the seed. For still wine, I like Brix readings between 23–25, pH between 3.1 and 3.4 for whites and 3.3 to 3.8 for reds. I like to see red wines finished at about 3.5 pH, so if your grapes come in with high pH, I would consider adding tartaric acid to the must to get the pH to 3.4 pre-fermentation. If you like softer wines, you may be perfectly happy with higher pH.
If your vineyard is small enough, you can mark clusters that aren’t coloring up with a twist tie loose around the peduncle (where cluster attaches to cane) and harvest those a few weeks later. Selective picks are a tricky business. Whatever you can do to isolate the clusters that should be omitted from earlier picks will be helpful. Most cluster marking happens at the end of veraison. The other option is to drop the last 10–15% of green fruit at the end of veraison. It’s also traditional in some regions to use the second picks to make rosé wine.
Q Vine Spacing
What are the minimums for vine spacing? I have a typical suburban backyard and want to make optimal use of the space I have.
A
Vine spacing should always be a reflection of anticipated vine vigor. There is a misconception that more vines means more clusters and better fruit, and that is not always true. My usual suggestion on how to space a vineyard is to put a vine in the ground in the middle of the potential site, give it water when it needs it (if the soil is dry 2 feet (60 cm) deep, give the vine a few gallons/liters a week). With no added fertilizer, train the strongest shoot up a simple stake and measure how much growth you get from a dormant bench-grafted vine in that first season. If the vine only grew up to 2 feet (~60 cm), you have a low vigor site. If it grew a few feet to about 5 feet (1.5 m) I would call that medium vigor. If the vine grew 6 feet (1.8 m) or more, you have a high-vigor situation.
Of course measuring the growth of one single vine can be misleading. If you can grow three to five vines in various locations and then make an average, that would be preferable. Low vigor sites are the only kind that will allow tight spacing. Tight spacing will NOT strongly influence vigor. You may see a 10% reduction in vigor from high-density planting (under 4’/122 cm between plants), but high-density planting (say 3’x3’/~90 cm x 90 cm) in a high or even medium vigor site will cause crowding, rank growth, and reduced fruit and wine quality.
So, my recommendation is at least 6’ (1.8 m) between rows in backyard situations. You need as much space in between rows as the anticipated height of the canopy when it is in full growth. So if the canopy is expected to be 7’ (2 m) tall, go 7’ (2 m) between rows. Low vigor sites can go with 3’ (90 cm) between vines, medium vigor should be 4-5’ (90-152 cm) between plants, and high vigor can be up to 6’ (1.8 m) between vines. Allowing the vine to stretch out and use that vigor to put crop on a canopy is important. If you squeeze too much vigor into too tight a space, the vine will grow too much to be managed. If I had to give a baseline for spacing in backyards I would start with 6 feet between rows and 4 feet (122 cm) between plants. In this system I would usually do a bilateral cordon training, which means two permanent “arms,” each going one way on the trellising, with spurs on top to produce fruit, each “arm” two feet long along the fruiting wire.
Q Lawn Chemicals
Are there lawn care products that can potentially damage grapevines? What do you do about neighbors who use these products?
A
As far as lawn care products, I don’t think you have reason to worry. High nitrogen content fertilizers might leach a little into your yard, but I wouldn’t expect to see much effect. Most lawns feed from the top 6” (15 cm) of the soil. Vines, properly grafted and planted, don’t really even notice what’s happening in the top 18” (46 cm) of the soil, so there shouldn’t be much of an issue. I’d be more worried about careless spraying of RoundUp or other herbicides.
If you see evidence of chemical drift hurting your vines, just go knock on the neighbors door and start a healthy and respectful conversation.
Q Cover Crops
My 125-vine vineyard near Seattle is on a very steep and sandy slope and I’d like to overseed with clover to help stabilize the soil. I’d prefer to let the clover grow under the vines as well. Do you see any problems with competition for nutrients or water from the clover?
A
You’re in luck! Clover loves sandy soil, will stay low to the ground, and will actually increase the fertility of the soil (sandy soil could always use a boost) by fixing nitrogen from the atmosphere. Clover’s ability to do this is nothing short of a miracle. The clover (and rye) have shallow roots and will not compete with the vines — in fact they will actually improve your soil’s structure and may even bump your nitrogen levels a tad. Cultivate the soil if necessary and then seed the area at 30 lb./acre (about 1 lb. per 1000 square feet/0.45 kg per 93 square meters) of crimson clover seed. I would recommend crimson or red clover which is also very lush and beautiful when in bloom.
I’d also recommend mixing in a good dose of annual ryegrass seed in the mixture, which will make a great winter cover crop that will improve the texture and organic matter of your soil. The ryegrass seed can be mixed in at the same application rate-30 lb. per acre or a pound for every 1000 square feet (0.45 kg for every 93 square meters). This is a great starter cover crop for all vineyards that are looking for some erosion control and a boost of soil fertility. Both these seeds will thrive in most soil types. They’ll love all that great, pure Seattle rain.
Q Pests: Leafhopper
Why did I and almost all of my nearby backyard vineyard friends get massive infestations of grape leaf hoppers this year, and never before? Will we eventually lose our vineyards to Pierce’s Disease because of it?
A
Consulting the UC-Davis Bible, also known as the 2nd edition of “Grape Pest Management,” we learn that the grape leafhopper is more of a headache than a dagger to the heart of your vineyard. There’s more information in this book about leafhoppers than any other insect species, so let me try to distill the pertinent facts:
•Most vineyards can tolerate fairly large populations of leafhoppers without affecting crop level or quality. If more than 20% of the leaves in your vineyard are being destroyed by hoppers (white spots that will eventually kill the leaf and cause it to drop off), you need to practice some form of control.
•If less than 20% of your leaves are being killed by leafhoppers, don’t sweat the infestation. You may want to wear a surgical mask while doing work unless you need more insect protein in your diet.
•There should be anagrus wasps in your area of Southern California that will provide some natural control of the breeding. Check the underside of the leaves for egg clusters. If any are red that means that the wasps are parasitizing the eggs. That’s a good thing! They don’t need social security numbers to work and they don’t want vacations or benefits.
•July is usually the peak of the leafhopper season. There may be more in your neighborhood because all of you crazy winos are planting vineyards and giving them more habitat.
•Control must be achieved in May and June during the first brood’s reproductive cycle. Horticultural soaps or oils that are listed as being effective for insect control should be a good way to go. Some might also help with powdery mildew, always nice to kill two birds with one spray.
•You will be happy to know that there has never been any evidence showing that common grape leafhoppers are a vector for Xylella fastidiosa, the nasty bacteria that causes Anaheim Disease, also known by the name of the gentleman who isolated the bacteria, N.B. Pierce (who must have had very embarrassing given names, as he is only referred to as N. B. in the dozen references I checked. My guess is that his real name is Nimrod “Bubba” Pierce) Sharpshooters do spread PD, but they are a special breed of leafhoppers.
Q Pests: Birds
What species of birds are the most frightening to a wine grower and what is the best way to keep them at bay. We have a large Audubon bird sanctuary just a few hundred feet away.
A
Nothing is more frightening than a sky blackened by thousands of Starlings. Blackbirds and other kinds of birds, including crows, will take fruit as well, but I’ve seen an acre wiped clean of fruit in only a few passes by a very large flock of starlings.
Starlings have also begun to adapt to bird netting. Ten years ago in Santa Barbara County, the Starlings would avoid netted vineyards entirely. But now that almost every vineyard is netted, they have learned to hang off the nets and probe into the canopy with their beaks. Nets are used in conjunction with propane cannons in commercial vineyards, and we often force the flocks away with the support of a twelve-gauge. Finches and small birds peck the fruit, but starlings load up their gullets with as many whole berries as they can and then fly away. Sparrows, Robins, Pheasants and Quail are some other species that are known to eat grapes. As killing birds is likely not an option next to a sanctuary, I recommend netting the vineyard and tying up the bird nets on the bottom with twist ties to keep the birds from flying underneath. Leaving a few shoots sprawling outside positioning wires can actually be helpful to spread the nets wide enough that birds can’t peck at the fruit from outside the nets.
Q Pests: Japanese Beetle
What tips do you have for someone trying to grow their vines organically/sustainably? How do you deal with Japanese Beetles in an organic/sustainable vineyard?
A
I wish I could give you better news, but the best strategy that I know of is to get a group of friendly, bug-hating friends together and walk the rows and pluck and kill the beetles by hand. The defoliation caused by Japanese Beetles encourages sunburn, and beetles that end up in the grape bins and fermenters can cause an undesired flavor in wine. Although it seems a terrible waste of time, removing these buggers from the vines by hand may be the best strategy. Just be thankful you don’t have to deal with dozens of acres!
Q Organic Growing
What tips do you have for someone trying to grow their vines organically/sustainably?
A
On a very basic level, being organic/sustainable is about promoting healthy soil and a diverse habitat. Healthy soils (those built by compost, mulch and green manure) make the vines healthy enough to stave off infections and diseases that would affect a less healthy vineyard system. A good start is to make your own compost and apply it in a band under the vines at least once every two years. Organic fertilizers such as fish emulsion or kelp extract are also a great way to build soils with healthy microbiology. The starting point for any sustainable vineyard is to see if the vineyard is healthy without adding fertilizer — some soils are rich enough to sustain vines in perpetuity without added nutrients. Grape leaves should be a dull green and smaller than a large human hand. Huge, shiny leaves are a sign of overly vigorous vines. Another aspect of organic production is to allow a level of animal and insect diversity that guarantees that the critters are running around chasing and eating each other (and not the vines). That means allowing some cover crop to host insects in the vine rows, putting up owl and bat boxes for pest control, and sometimes getting into the vineyard and removing pests by hand. The most important aspect of organic viticulture is to walk the rows every day and react before pests of nutrient deficiency become a threat to the vines or the crop.
Q Disinfecting Shears
Is it common practice to disinfect pruning shears when moving from one vine to the next in commercial operations? I do this for my other horticulture activities — dip into 100 ppm bleach or spray iso-alcohol to prevent cross contamination of fungi, molds and bacteria.
A
Every book and reference I checked agrees with this practice — disinfecting shears between vines is a great way of keeping vines safe from cross contamination. But for some reason, I know of no commercial vineyard farming operations that take the time to do this during pruning. So — if you have the time and the patience for it, it really is a very good way to go. Same goes for pruning tar — some texts recommend tarring or painting all cuts for sanitation, but I’ve never seen it done in the California vineyard biz. I remember my Driver’s Ed textbook recommended checking tire pressure before driving your car anywhere — same kind of deal. It would be a better world if everyone did, but few of us have the time.
Q Replacing Vines
My backyard vineyard near Lake Tahoe, California consists of about 500 vines (all Italian varietals), and it seems I lose around twenty vines per year to gophers, a weed whacker and sometimes for no apparent reason at all. Is it unusual to lose that much of a vineyard yearly? Is there any way for me to better protect the vines so I can keep my entire vineyard healthy and the vines of the same age? Also, I’ve read contradicting reports about when is the best time for replanting. Can you offer me some guidance in these areas?
A
My viticultural hero, Jeff Newton once told me that 5% of any vineyard will always look like crap, and it will always be that 5% that you look at every day. Don’t overlook that 95% of your vineyard is balanced, healthy and makes great wine.
We replant at least a few percent of Clos Pepe — the vineyard I tend — every year. There’s gopher damage, a few random vines that aren’t the right variety, some tractor blight. You can always trap, smoke or poison gophers to keep populations down, but you’ll likely never get rid of them all. Be wise, do what you can to take out as many gophers as seems possible, and realize also there are soil types, deficiencies and depths that may not allow grapevines to grow or thrive. If a vine dies in one spot and the next vine dies, and the next, give up on that little piece of dirt and focus your attention on the spots that produce a balanced vine and delicious fruit.
As far as replanting goes, most New World growers replant in late Spring after the potential of frost has passed, but in areas like Oregon, Washington or France, they often replant in Fall to get the benefit of the rainfall to soak the soil, get a bit of growth, and then a full dormancy before their first full year in the ground.
The take home message is that there’s no wrong time to replant during the growing season, although I do think springtime in your area would give the correct results.
Q Vine Spacing
I have six three-year-old Cabernet Sauvignon vines, six two-year-old Cabernet Sauvignon (both are 337 on 5C rootstock) and six two-year-old Cabernet Franc (312 on 110R). They are spaced a mere 18 inches apart. They are trained up to the first wire at 2 inches and bent to the left to form an inverted ‘L.’ I have five wires total, starting at 2 feet above the ground and ending at 6 feet. My problem is, if left unattended, with sufficient but not excessive water, I get vegetative growth on my vines starting the second year that easily exceeds the top wire. Last year, I trimmed them when they hit the top wire to stop them from making so many leaves.
Being greedy, I took a small crop on the second year and am planning on taking a larger crop on the third. My two-year vines had no problem ripening the four to six clusters per vine that I kept on them. Is the growth excessive? Is there a way I can better manage the canopy? I don’t have much room.
A
With regard to the growth being excessive, no. Grapevines can be naturally vigorous. When a grapevine is young it likes to stay in vegetative mode and climb. In the wild, vines climb trees to compete for sunlight, and your vines are doing their best to compete with themselves.
This is also a good example of the fact that tight spacing does not guarantee that vigor will be reduced. With the vigor you describe, I believe six-foot spacing is more appropriate than 18 inches.
As for managing the canopy in a tight situation, sometimes less is more. I hate to kill vines, but you need to spread them out if possible. If you can uproot the vines carefully (dig up as much soil and root mass as possible) and replant them at 4- to 8-foot spacing, I suspect the vines will be much happier. The key is to see how the vines want to grow, and then give them the space to do it. Try cutting the water back early in the season too, which will reduce vigor slightly. Rootstocks like 5C are a bit sensitive to drought, and growth will taper off late in the season without frequent irrigation of the vines.