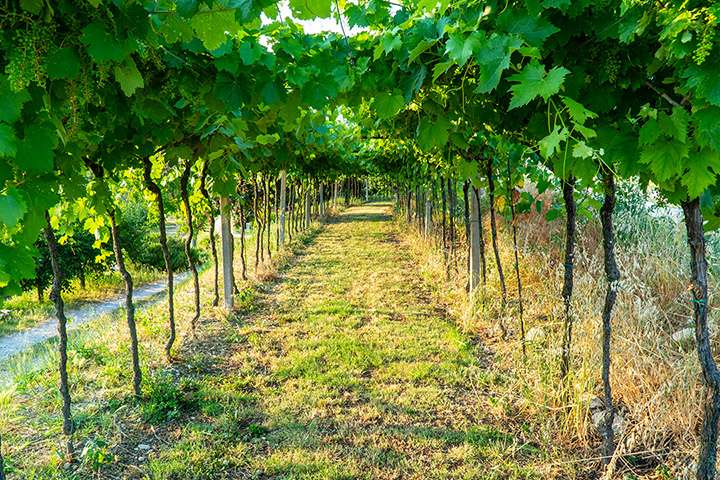
As harvest nears and the grapes are getting ripe, we growers need to start making some decisions concerning the style of wine we want to create. The wine media often gets caught up in the enological debate of ripeness and wine style. So, in this section of this grape growing special issue, I would like to bring the debate into focus. First of all, we need to define winegrape ripeness and discuss how varying levels of physiological maturity affect the resulting wine. Second, I would like to suggest some ways of fine tuning your backyard harvest timing to produce some delicious wines that perfectly suit your specific tastes.
Defining Winegrape Ripeness: How Ripe is Too Ripe?
It is clear that alcohol levels in table wine have risen significantly in the past two decades. Over the years there has been a rise in monstrously alcoholic wines of 16% or higher. Often, a wine that is picked at elevated ripeness shows more “high toned” fruit in the nose and feels heavier on the palate. When tasted blind, without food, it seems that these wines outperform (and outscore) their less-ripe competition.
For me, perfect ripeness lies somewhere between the extremes. My favorite wines (whether Seyval Blanc, Champagne or Pinot Noir) always balance fruit, concentration, pedigree, elegance and acidity. If you grow grapes in an area where you can get them very ripe, there is no reason to ignore the potential concentration and ripeness you can create (as long as the wine maintains balance). If you live in an area where it is a challenge to get your wines above 12% potential alcohol, there are benefits to exploit as well (such as glorious acidity and delicacy). As this article is meant to help winegrowers all over North America, let’s take a look at ripeness decisions at harvest and how they will impact your wine style and quality.
Most winegrowing regions fall into one of two categories: areas where it is a challenge to get grapes to ripen to 13%+ alcohol, and areas where the grapes get as ripe as we would like them. Let’s break down both types of winegrowing locales, and see what we can learn about harvest timing and wine style.
Areas Where Ripeness is Difficult to Achieve
• Early and mid-season vigilance in the vineyard is absolutely imperative. Keeping your vines clean from mildew and rot early in the season will keep your fruit sound longer into the season, allowing you to pick riper. One common mistake made by home vineyardists is being lazy with spray schedules early in the season, and then spraying once they see a mildew or other problem appear on the fruit. Once mildew or rot is visible, your wine quality has been irreversibly contaminated. A squeaky clean vineyard can survive a few summer rains, so you don’t have to let the weather dictate when you pick.
• Keep weeds and grasses from growing into the canopy. Grass and weeds touching the fruit can give off flavors and encourage rot and mildew. Keeping a clean vine row will also reduce competition and may help you get that extra bit of sugar you need to make a bigger and fruitier wine.
• Turn the water off at the end of the growing year, pre-harvest. If you are lucky enough to have dry soil at the end of the growing year, your grapes may be able to dehydrate just a bit, dimple in the skins, and give you that extra sugar you need to get riper flavors.
• Pay careful attention to pH and acid levels in your grapes. In areas where full maturity is difficult to achieve, you may need to use pH and total (or titratable) acidity in your grapes as a method for determining a harvest date. If the sugars “stick” at 21–22 °Brix, and you can’t get them higher, pay attention to the pH and acidity and make sure you aren’t picking the grapes with excessive acidity. Balance in wine is often more a function of acidity than sugar content. I like to see pH levels above 3.3 in red wine and above 3.1 in whites.
• Don’t be afraid to add a little sugar if you need to. I suggest adding sugar to your must to bump the Brix level to a minimum of 22 for table wine and 19 for sparkling wine.
• Let the fruit hang until you are forced to harvest. Watch the weather carefully. A little rain won’t ruin a harvest, but a big storm or hail certainly can. Do your best to balance patience and common sense. If you see that a rainstorm is coming, but it is supposed to be followed by warm weather, you may want to ride the storm out and hope the sunny weather will help your fruit get fully ripe before harvest.
• In areas where full ripeness is difficult to achieve, don’t forget that the goal is to produce balanced, delicate wines with excellent acidity. You won’t likely be producing soft, monster wines with intense color and massive concentration. Look to the low-alcohol wines from British Columbia, Germany and Austria as your template for success.
• Cut out the problem fruit. You may be able to make better wine by allowing the fruit to hang longer. If this means a small portion of your crop begins to rot or have problems, focus on the clean fruit, remove the problem fruit from the vineyard and allow the good fruit to ripen normally. Never let a few bad clusters on the vines dictate your picking date and maximum ripeness.
Areas Where Ripeness is Easy to Achieve
• Don’t let your wines become flabby! Pay attention to the pH of the fruit as it ripens and don’t sacrifice structure for ripeness. Full bodied red wines with elevated pH (above 3.7) lack the acidity necessary to freshen the palate between bites of food.
Don’t be afraid to go ripe as long as the wine has the acidity to balance the richness. My favorite red wines have a pH of 3.3 to 3.6. White wines should be in the 3.1 to 3.3 range to maintain some structure and zingy acidity.
• Use irrigation as a tool. If you are able to irrigate your vineyard, don’t turn the water off too soon. During heat spikes a few extra gallons of water per vine can keep the vines from shutting down and the berries from dehydrating. Keep the vine green and healthy to allow the grapes to mature, not dehydrate. The key is to bring in fully ripe fruit with brown seeds and stems that have begun to become woody.
If you need a bump of ripeness at the end of the season, turn the water off and watch the grapes carefully for signs of rapid dimpling or dehydration.
• Test the fruit a few times a week at the end of the growing season. Rises in sugar content can spike in hot, dry weather. In 2004, I saw a small home vineyard jump from 23 °Brix to 29 °Brix in 48 hours (during an unexpected heat spike). It is always better to carefully choose a picking date with the help of lab data then to go out to the vineyard and see your fruit has raisined.
• Sort out the bad fruit. If your vineyard produces fruit that is not uniformly ripe, be careful to sort out green fruit and fruit that is raisined or too ripe. Green fruit is not a good way to add acidity to your wine — it is better to do that with tartaric acid. Overripe and raisined fruit will continue to leak sugar into the must and can give your wine a port-like flavor.
• “Post-harvest irrigation” is wine-speak for watering down overripe must for wine production. This is a practice that is commonly used in high-end California winemaking, but is definitely a contentious issue. The idea is to pick the fruit very ripe (26–29 ºBrix) to get full concentration, color and phenolic ripeness and then water the must down (to 22.5–25 ºBrix) so the alcohol level is not too crazy. Most wineries use bottled water (spring water or the like) to water their must. Add water a little at a time and then test the sugar content carefully with a hydrometer. Pay attention to how the pH and acid structure of the wine is affected. It is also recommended that you acidulate (add acid to) the water you use: add 10 grams of tartaric acid per liter of water before adding it to the must. This will keep the wine from becoming flat and uninteresting.
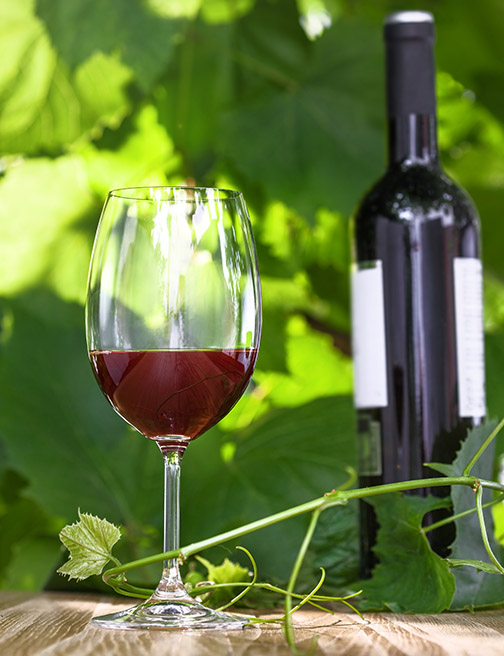
I don’t water my musts down or acidulate my wines. I believe the best wines are those that are carefully farmed, picked at optimal ripeness and fermented without manipulation.
As a vineyardist and home winemaker your first priority should be to grow and make wines that suit your stylistic preference. In other words, make wines that are delicious to you. Pay careful attention to the levels of alcohol, ripeness, concentration, elegance and acidity in the wines you buy and love. Make notes, rate the wines using your own system and find out which elements (fruit, acidity, richness, etc.) consistently appear in your favorite wines. If you want more concentration and richness, try to get a little more ripeness out of your vineyard using the previously detailed practices. If you want more elegance, acidity and structure out of your wines try to pick a little less ripe.
Regardless of style, the key is to take notes during the growing season, during harvest and during the winemaking process so that you can look over them and correlate your decisions with the quality and style of the resulting wine. Taste the fruit at harvest and make notes on the flavors — sometimes the taste of the fruit will tell you more than any lab test can. That way you can carefully tweak a practice or two each year, change the Brix and the pH a bit in order to find the magic numbers and flavors that make all your hard work pay off. Understanding ripeness in your own vineyard will allow you to make the wine that is perfectly suited for your palate.
Harvest On The Vine
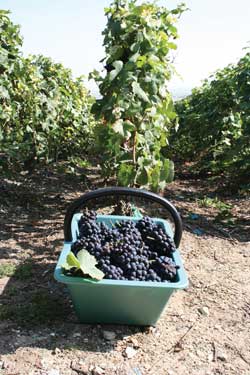
Late summer and fall is a busy time for the backyard viticulturist. By September and October, those who make wine are experiencing “crunch time” in vineyards and the cellar. We call friends and ask if they are interested in taking a day off from work to help pick and crush because the fruit just can’t wait the weekend. And of course, we test our fruit for sugar and acidity on a regular basis, waiting for the perfect combination of chemistry and flavor that sets off that mysterious alarm inside our heads that says, “Tomorrow is the day to pick grapes and make wine.”
Then the magic begins. Fermenters of bubbling grapes warm as if by magic — as if they have stored the sunshine from the summer and are releasing it into the liquid. Fermentation locks bubble out a rhythm. The sound summons the ancient spirit of Dionysus to do his alchemical magic of turning juice into a magical potion of health and pleasure.
But before we allow the product of our passion to consume us and cause poetic ramblings, let’s not forget the hard work and structured timetable that allowed us to bring in good, clean fruit for fermentation. In this section, I will discuss pre-harvest, harvest and post-harvest in the vineyard.
We will examine the best ways to protect your crop until it is ready to be picked and ways to test your fruit to make sure the chemistry of your wine will be acceptable. We will find methods for deciding the “perfect” day to pick your crop and observe picking protocol.
By the time we’ve finished, you should know what to expect from the winegrape harvest and have a good understanding of Brix/pH balance in wine, as well as some strategies on how to make the vines happy and healthy before they take their long winter’s nap.
Protecting Your Crop
Your neighbors, friends and family are not the only ones who know that you grow the best grapes in the area. There are also hundreds of birds, raccoons, deer, goats and others that would love to get your crop into their gullet. I worked for a Santa Barbara County winemaker who warned a local ostrich farmer (more than once) to keep his hulking birds out of his Pinot Noir vineyard.
I came to work early one morning to find the winemaker holding a smoking shotgun and mumbling about ostriches and barbecue. The massive bird (dead between the rows) was a testament to the golden rule of living next to a Pinot Noir grower: DON’T MESS WITH THE CROP! Forgetting that slightly deranged episode, there are some important things to remember to keep your grapes from going the way of the dodo.
First of all, let’s acknowledge the fact that we are fortunate ostriches are not common around most American vineyard sites. But starlings, blackbirds and many other types of birds are. If I did not protect my vineyard against bird damage, I would be lucky to bring in a single undamaged cluster from 28 acres.
Even though my vineyard is (to date) ostrich free, bird damage is the single greatest threat to my crop late in the growing season. Not only will birds reduce yield (and perhaps eat every berry you have on your vines), but they also enjoy piercing the grapes after berry-softening to see if they are ready to eat. If the grape is still too unripe for consumption, the fruit is left on the cluster with its skin pierced. A punctured grape has an even sweeter fragrance than usual, and will hence attract more bees, wasps and fruit flies. Pierced fruit is also more susceptible to bunch rot.
Here in the Santa Rita Hills of northern Santa Barbara County, we have a serious population of starlings that start circling the vineyard in early August. Unchecked, they will descend into a few rows of the vineyard by the hundreds, grab a number of berries in their mouths and fly away quickly. Entire rows can be wiped out instantaneously.
Grape-thieving birds have a “modus operandi” that, if understood, can help you combat them successfully. First, they prefer to attack the edges of a vineyard. This means if you can’t afford to net an entire vineyard, make sure to at least net the outer rows. However, for best results and ultimate protection, it is recomended and safest to net every single vine row. We use “Lightweight, Premium Grade Bird Netting.” This can be viewed at www.wildlife-control.com/agricul-ture.html.
We use the 14 foot-wide (4.3-m) variety, cut to lengths that match our row length. We hand roll them over the top of the vine so they drape down over the canopy. As a further precaution, we then fasten the two loose ends at the bottom using wire twist-ties (every 10 feet/3 m or so). This prevents birds from gaining access underneath the nets. Some larger vineyards net the outside rows of their vineyard and then use propane cannons, mylar “flash” tape, and kites that look like owls to try to scare the birds away from the interior.
Even though netting your vineyard seems to be costly and labor-intensive, there is no better feeling in the vineyard experience than removing the bird nets on harvest day and seeing perfect, lustrous clusters on every vine with absolutely no damage. Reducing bird damage will also reduce time spent sorting the fruit as well as volatile acidity in the wine because less berries will have been pecked and rotted. Also, expect to see fewer wasps and bees on your fruit.
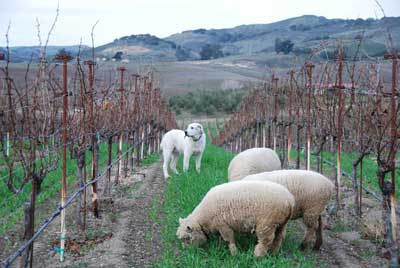
Netting may reduce deer (and other large mammal) damage, but only on interior clusters. Deer, goats, sheep, and horses won’t be easily swayed from nibbling through the nets. A few large dogs or a high fence is your best bet for large mammal control.
Testing Fruit for Ripeness
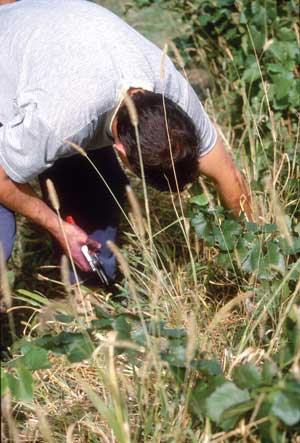
Even though we’ve discussed fruit chemistry in the previous section, a few important concepts bear repeating. First, trust your palate. You should be able to determine the correct week to pick your fruit by taste. When the fruit tastes too delicious and ripe to let hang another day, confirm your feeling with some swift lab work.
You can set up an excellent station for testing grape ripeness for between $150 and $500, depending on how elaborate you want your setup. I recommend at least two hydrometers (one 0–35 °Brix, and one 19–31 °Brix), a tube to float your hydrometer and a reliable pH meter. Some winegrowers also like to have a refractometer, which is a portable device that you can drip a bit of juice on in the field, point it at the sun, and get an immediate (and fairly accurate) Brix reading. Once the fruit passes 20 °Brix, plan on testing the fruit at least once a week in your little kitchen laboratory or a few times a week (even every day) if the weather is warm or when the fruit is nearly ready to pick.
In a small vineyard where taking full cluster samples would seriously decrease the crop you harvest, remove single berries from various parts of the clusters (in different rows and vines each time) to get a representative sample. Only take as much fruit as needed to make juice to float a hydrometer and cover the pH meter’s electrode. Of course you can use the same juice for both tests, and even save the juice — be sure to sulfite and refrigerate the juice if you choose to save it — to throw into the fermenter when you finally pick the rest of your fruit.
Determining a Picking Date
If you are looking for me to give you the universal numbers for perfectly ripe winegrapes, the next paragraphs will no doubt disappoint you. There are no exact specifications that suit all vineyards around the world. What is growing in your backyard is probably unique to your climate, with its own Brix and pH levels. Ripe Zinfandel in Amador County, California can often be 27 °Brix at 3.6 pH, while ripe Riesling in the Finger Lakes region of New York might be 22.3 °Brix at 3.2 pH.
I suppose we can use these two extreme examples as a rough guide for a picking window. (Remember that sparkling wine grapes can be picked as low as 18–19 °Brix, and that the chemistry of red grape varietals changes as the grapes soak after crushing.) Remember also that it is common for red grapes to “soak up” a Brix or two in the first 24–48 hours after being crushed and the pH climbs a tenth of a percent or so.
Don’t let the numbers take reign over your winemaking though. Your taste buds should be the number one indicator of ripeness — you are the winemaker, not your hydrometer! Do you prefer softer, richer, riper wines? If so, it is recommended that you pick later. Or if you prefer the delicate, austere, elegant European style of wine that is less ripe but has firmer acidity and tannin you should pick earlier.
It is also a possibility that you will like a wine in the middle of these two styles. An excellent suggestion is to pick on two dates, take extensive notes on the Brix and pH numbers at harvest for both lots, and make two separate wines. When the wines are bottled, do blind tastings with your friends to determine which style you prefer. Most vineyardists know by the fourth or fifth harvest what lab numbers make the best style of wine for their locale and taste.
But then again, don’t forget to taste the fruit and let the “deliciousness” play an important role. Of course hot weather may expedite your anticipated picking date. (Heat spikes will cause the fruit to gain sugar and lose acidity quite fast.) Or you may have to bring in the crop in front of an impending storm.
A little rain shouldn’t hurt a crop (it may reduce sugar a bit), but a deluge can swell the berries, reduce sweetness and even split the berries’ skins, potentially starting rot problems. Use common sense, a trained palate and a bit of science to determine the best time to harvest.
Picking Day
When a picking day has been determined, there are a few more things that need to be addressed in preparation of the harvest. First make sure your buckets are rinsed and ready and your picking shears are clean and sharp.
You should spend some time with your winemaking equipment. Make sure it is tested and tuned up. Your barrels for white wine should be swelled, rinsed and sanitary and your labor should be secured. Don’t worry if you are low on funds; wine from the previous year should serve as salary for your picking friends. (It is best to pick your friends and grapes wisely!)
If the vineyard has tall grass between the rows, it’s good form to mow a few days before harvest to make the vineyard floor navigable. Your pickers will not be happy trudging through two-foot long grass soaking their legs with morning dew — nobody likes wet feet.
Grab a flashlight and remove the bird nets after the sun goes down the night before harvest to make it easy to get to the fruit. Explain to your pickers that you’d like to have the picking done before the sun touches a single cluster. Provide strong coffee and donuts. Set your alarm and make sure all of your flashlights have batteries.
Look at it this way: You’ve spent an entire year farming this fruit, protecting it from pests, spraying, weeding and doing canopy management. You might as well wake up really early (it’s only one morning!) to get the grapes into the winery cold and fresh.
Crushing your fruit cold will improve the quality of your wine. Warm or hot fruit produces volatile acidity and will increase the chance that the native yeasts on the grape skins will start fermenting your juice spontaneously.
Pickers should know that leaves or M.O.G. (material other than grapes) need to be picked out of the buckets as they fall in. Picking shears should never be placed into a picking bucket, even during a break. (They don’t do good things to crusher-destemmers or presses.) After buckets are picked, move them into a cool, shady spot. Again, remember to crush or press the fruit as quickly as possible after harvesting for best results.
Post-Harvest in the Vineyard
After the fruit has been picked and crushed, there are a few more details that need to be attended to in the vineyard. Make sure all fruit, even bird-pecked clusters and stems, is totally removed from the vines. Fruit and stems that are allowed to stay on the vine will increase rot and mildew pressure the following year. Make sure to do a vineyard walkthrough after your day of winemaking to determine all fruit has been harvested, a row has not been missed, equipment has been gathered, buckets and picking shears are collected and pickers aren’t passed out between rows. Give the vines a deep irrigation if rainfall hasn’t already saturated the ground.
After being freed from their burden of fruit, the vines go into a stage of root growth. Your vines will also continue to activate next year’s fruit buds and turn their stores of nitrogen and carbohydrates into a form that can be saved for the following growing season.
For these processes to succeed, the vines need to keep some leaves for photosynthesis. What you do not want to do is induce active vine growth with fertilization — this is neither the time nor place for fertilizer.
Harvest is a magical time in the vineyard. Take time from your hard labor to enjoy the sights, smells and tastes of the crush. After the fruit is crushed and the vineyard is irrigated, don’t forget the post-harvest irrigation/feeding of your crew. Reward them with a plate stacked with cheeses (and maybe some tidbits of BBQ ostrich). And of course, remember to keep their glasses filled with wine.
Dormancy
After a long period of hard work, we all like some down time. The problem is, our job in the vineyard doesn’t end at harvest. While we’re cleaning equipment, loading the press, racking the juice and adding yeast, the vineyard is still in need of our attention and care. It’s easy to forget about tucking the vineyard in, but the last few weeks of the vines’ growth cycle is vital to getting good fruit next year, so let’s talk about how to put a vineyard to bed for the year.
First let’s talk about the physiology of a vine as it’s going into dormancy. The purpose of dormancy is to allow the vine to drop its leaves, store what’s left of its nutrients into the trunk and root system, and to “reset” its fruitfulness by virtue of a chilling requirement. Yes, that’s right — a vine needs about 150 hours under 45 °F (7 °C) (during dormancy) for the vine to become properly readied for a new vintage of growth and fruit production.
Evolution has provided grapevines with the ability to protect themselves against the chill of winter by becoming impervious to all but the deepest winters. As the leaves drop and the vine becomes skeletal and woody, it is protected and ready for a cold winter. As grape canes mature, their buds enter a type of dormancy in which their growth is suppressed despite otherwise favorable conditions. But before the vine is completely asleep, it has a few more tricks up its sleeve. Vines have two periods of swift root growth and development. The first period of root growth occurs as the shoot growth slows in late spring or early summer, and the second period of root growth occurs when the fruit has been harvested and the vines have a moment to use their leftover energy and nutrients to extend the root system. Dormancy is, of course, the period in which we prune the grapevines as well, and timing the cuts of pruning can have a big effect on when the vines awaken in spring.
So now we know that the grapevine goes dormant to protect its succulent leaves and shoots against the freeze of winter, that the vines require chilling during dormancy, that the vines have a swift period of root growth after harvest, and that timing pruning is important. I’m sure you were just starting to relax and take deep breaths after harvest, but it’s time to get back out in the vineyard and get to work on making dormancy beneficial for the next harvest.
The fruit was harvested today and the vines are relieved of their fruity responsibility. Now what? First thing we want to do is turn on the water if the soil is dry. Giving the vines a deep irrigation (at least 10–20 gallons/38–76 L per plant) after harvest is key for promoting a good root flush. Roots move through moist soil much easier than hard, concrete-like soil. Giving the soil profile a good soaking will make the vines’ job of root growth much easier and efficacious. If for some reason harvest occurs after the leaves have all turned dead or dropped, there is no use in irrigating. The period of root growth only occurs while the vine is still active and has green leaf area — the green leaves are the engine for pushing the roots out into the soil.
What else is there to do the day after harvest in the vineyard? It’s always wise to walk the rows and tidy up. Pick up orphaned buckets, clippers, tools, etc. Also start the irrigation and bring a notebook with you and note any row numbers with irrigation problems — leaking emitters, leaks in pipes, missing drippers, areas that appear to be getting inconsistent amounts of water. It’s also a good time (while the vines are still alive and growing) to mark dead or stunted/virused vines for removal and replanting in spring. Take this time to walk the rows and ask yourself, “What can I do during dormancy to make this vineyard produce more consistent growth and crop next year?”
It will also be very beneficial to your management practices to know how many pounds of fruit you harvested out of your vineyard. Most home winemakers get 140–150 gallons (530–568 L) per ton (2,000 lb./907 kg) of fruit, a little less in whites, a little more in reds. Use 150 gallons/ton to approximate your vineyard yield. If you made one carboy, 5 gallons (19 L) came from about 70 pounds (32 kg) of fruit. If you had twenty vines, that’s 3.5 pounds (1.6 kg) of fruit per vine. Pretty good yield, good work! Keep that average pounds/kg per vine written down somewhere — you’re going to use it!
Day After Harvest
• Deep post-harvest irrigation of 10+ gallons (38 L) per vine.
• Clean all equipment and trash out of the vine rows.
• Make notes on parts of the vineyard that need attention — leaks, busted wires and trellising, etc.
• Mark dead/virused/underper-forming vines for spring replanting.
• Record your fruit yield in an average pounds/plant format. Now that you have finished this checklist, take a deep breath and open a bottle of wine. The vineyard will take care of itself until all the leaves have fallen.
After Leaf Fall
When the vines are completely skeletal with no leaves left, dormancy has begun in earnest. Choose ten vines from throughout the vineyard, prune each vine and weigh the cuttings. Remember the average yield weight? Now you can use it and make a ratio of vine yield to pruning weight.
• Weigh all the pruned canes from ten early pruned vines. Divide the total weight by ten. The quotient is your average pruning weight from your vineyard.
• Recall your average per-plant grape yield and make a ratio of fruit yield per vine to pruning weight.
• The optimal value for low vigor is 12:1, Medium vigor is 5–10:1, and for high vigor 3:1
• To use the ratios: if your ratios are lower than those listed, you can leave a bit more fruiting wood on the vine at harvest, if they are higher than what is listed, you may need to prune a bit more severely for proper balance.
• Three to four foot (1–1.2 m) cane growth per season is a nice length to shoot for. If your canes are longer than that, you can cut down on water and fertilizer early in the season. If they are stunted, under 3’ (1 m) on average, you can increase early season watering and add some more nitrogen-based fertilizer.
Another consideration after harvest is to cultivate your vine rows and plant cover crop. A cover crop can provides many benefits.
First, it protects the soil against erosion. Raindrops stir the soil and cause soil particles to move downhill. Cover crops, specifically grasses, have evolved with the purpose of holding onto soil by virtue of breaking a raindrop’s speed and destructive splash, and holding the soil in place with their roots.
If your cover crop is properly chosen, the seeds you choose can provide plants that will add nutrients to your soil when they become integrated into the soil by cultivation or by dying and naturally breaking down into the soil profile. For instance, legumes and clovers can add nitrogen to your soils, and even grasses will give the soil microbes something to munch on and provide health and vigor to your soil.
Advanced Pro Tip
Time the cover crop to compete with weeds and unwanted native species. Not all home vineyardists have the capacity to cultivate (disk or otherwise work the soil so that it is bare and fluffy) their vine rows before planting a cover crop. But there’s no harm in knowing that proper timing of cultivation occurs after the first light fall/winter rain. If you can cultivate the soil after it’s been moistened, it will likely cause all native and weed seeds to be destroyed after they have been activated/sprouted by the moisture. In this way, you start with a clean slate and can plant your cover crop in ground that will have no competition from weeds and native plants. If your native plant species are beneficial, you may have no reason to plant a cover crop, one may grow naturally each year for you. A local nursery or some weed identification books can help you identify what local plant species are good for your vineyard and which can be classified as weeds and removed.
Timing Pruning
There are aspects of pruning that require a lifetime to master. Understanding the complex relationship between vine growth and pruning severity is almost impossible to teach in a magazine issue. Pruning is a craft that must be studied, and most importantly, practiced each year. The basic idea of pruning is to remove about 90% of last year’s cane growth and leave the 10% in positions that will promote balanced and staggered growth that allows sun flecking and wind movement through the fruiting zone to improve fruit flavors and retard mildew and rot growth.
One aspect of pruning that’s fairly easy to master is deciding when to make the first cuts. Most pruning in commercial vineyards in the Northern Hemisphere is done starting in early January. With dozens, sometimes hundreds, of acres to finish, the crews must start early to finish by budbreak — usually March or April on the West Coast. But how lucky you are with a small backyard vineyard and an amazing ability to prune as late as you want! The later the vines are pruned, the later they will wake up. Vines can be pruned as early as they can be cut and not bleed clear fluid, or as late as when the buds on the tips of last year’s canes begin to swell.
If frost is no concern in your locale, prune as early as you’d like. But for those that worry through frost season, prune as late as makes sense. This may give you an extra couple weeks of dormancy during the coldest weeks of early spring.
Common Issues in Dormancy
• Excessive weed growth: Grab a neighborly teenager, a grandson or a nephew and pay them to mow, weed-whack, hoe out and weed the vineyard. Be careful not to girdle the base of the vine with an errant hoe or weed whacker.
• Vines don’t go completely dormant: You are likely in a region that doesn’t get the proper chilling requirement for grape-vines. Unfortunately, if the vines don’t go dormant, there’s no way to get around it. You will likely have spotty fruit production and the vines may not survive more than a few years.
• Vines go through budbreak too soon: Early budbreak may be delayed by later pruning. Wait a few extra weeks next year, as late as when the buds at the tips of last year’s canes begin to burst.
• Vine prunings get in the way of walking through the vine rows: Leaving cut canes in the vineyards can cause problems. Extra rot, mildew and pest pressure can occur as the insects and spores overwinter in the vineyard. Burn the cuttings safely and according to local laws and common sense. You can also chip the pruned wood into mulch, but I don’t recommend putting the mulch back in the vineyard.
• Vines bleed clear fluid when cut: The vines aren’t fully dormant yet, or they are waking up. Test cuts on vines to be pruned should stay dry.
Dormancy can be a very relaxing period if you put your backyard vineyard to bed with care and proper attention to detail. Too often vineyard owners break out the Champagne a little early — with just a few extra days work, the vineyard will go into dormancy after a glorious period of root growth and will be ready to produce even better fruit next year.
Hybrids & Non-Vinifera
When most people think of wine, they think of a fermented alcoholic beverage made from grapes, although other fruits can be made into wine.
Almost all commercial wine is made from a few varieties of grapes belonging to the species Vitis vinifera. However, there are many species of grape, and some non-vinifera species are grown for winemaking — often in areas where vinifera grapes do not thrive. Likewise, there are hybrid grapes that have been bred for winegrowing in environments that would be challenging for vinifera. If you live in an area where growing vinifera grapes would be problematic, there may be a grape well-suited to your location. Here are some of the major non-vinifera and hybrid grapes:
Non-vinifera Winegrapes
The grape species V. aestivalis includes one variety that has historically been used in winemaking, Norton. (Norton may be a hybrid, but is thought to be mostly aestivalis.) Norton is a deeply-pigmented red grape that is grown extensively in the Midwest and Middle Atlantic States. The variety Cynthiana is either a closely-related variety or perhaps the same variety of Norton.
Muscadine grapes, members of the species V. rotundifolia, are grown in the American South and are resistant to Pierce’s disease and phylloxera. They are largely used to produce sweet wines, although the scuppernong (a type of muscadine) is frequently made into a dry table wine.
The species V. labrusca contains a number of grapes that can be made into wine. The red varieties Concord and Catawba are grown primarily in Eastern United States. The wine they produce is frequently described as “foxy.” Catawba is lightly-pigmented and is sometimes used to make a “pink” wine. The white variety Niagara can be made into a wine with an aroma that resembles Riesling. Labrusca grapes are also resistant to phylloxera.
Hybrid Winegrapes
Numerous hybrid grapes have been developed by grape breeders for winemaking. These hybrids may be between grapes of different species, or between different cultivars of the same species. Frequently, the purpose of the hybrid was to cross a good winemaking variety with another grape that conferred disease resistance or better growing characteristics. Here are some hybrid grapes that are popular with US growers:
Marechal Foch was developed in France, but is now mostly grown in the Northern United States as it is more capable of surviving the cold winters. This small-berried, red grape can be made into a variety of wine styles. It is related to the hybrid Léon Millot, another red.
Baco Noir is another red grape bred in France and now mostly grown in the United States. It is a cross between a French vinifera and an American V. riparia grape. It is resistant to many common fungal vineyard diseases, including black rot, powdery mildew and downy mildew.
Cornell University breeders have recently released three hybrids for wine growers in the Eastern United States — Corot Noir, Noiret and Valvin Muscat. The first two are red grapes, and Valvin Muscat is a white grape. All three are said to produce higher-quality wine than similar cold-hardy hybrids. Previous hybrids developed by Cornell include Traminette and GR7.
Finally, grape breeder Elmer Swenson released several cold-hardy hybrids for Midwest growers, including St. Croix, St. Pepin, LaCrosse, Edelweiss and Swenson Red.