Oak-Aging Advice and Strategies for a Chaptalization Mistake
Q I have a medium toast 20-gallon (76-L) American oak barrel and I just put wine in it three weeks ago. How often should I check it to top off, taste, and measure free SO2? Also, how long can I expect to keep the wine in there (this is a brand new barrel)?
Larry White
Austin, Texas
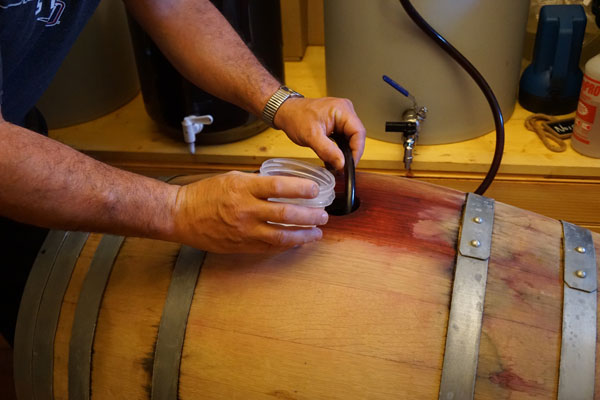
A Hi Larry, congrats on your new piece of equipment! I’m sure you’ll find it adds to the kinds of wine you can make. Since you just filled your barrel and it’s brand new, you might want to open the bung and check the wine level now, since it’s been three weeks. Sometimes new barrels are slightly dry and, even if you soaked it with hot water before filling, can sometimes “drink” a little of your wine as they saturate over time. Be sure to completely top up the barrel at this time.
You can certainly check in on the taste as well after three weeks, but it’d maybe be a bit of a waste of wine at this stage, because three weeks isn’t nearly enough to really move the needle on flavor or aroma development.

How long to leave it in the new barrel? Since I don’t know what kind of wine you have or what kind of style you’re shooting for, check out these guidelines, but note that these are for commercial-
sized 59-gal. (225-L) barrels. Smaller barrels have more oak wood exposure per gallon of wine and therefore will gain flavors faster. This means the smaller the barrel the shorter the time spent on oak.
Contact time for wine — the Wiz’s general guidelines:
3–6 months: “Light oak” style white wine like a medium-oaked Chardonnay or Sauvignon Blanc.
6–8 months: Medium-heavy style white wine like a traditional Chardonnay or a lighter-bodied red like a Pinot Noir.
8–12 months: This would be good for a medium-bodied red wine like a Paso Robles Cabernet, a Sonoma Merlot, or a Rhône-style red.

14–18 months: This would be considered a heavy approach for something like a big Napa Cabernet or Bordeaux-style red blend.
In the future you might want to consider experimenting with a mix of new and used barrels, because sometimes 100% new oak on a wine can be overwhelming. The first use of any new barrel is always the most extracted and sometimes that can be a little too harsh, especially for those lighter styles.
For whites and rosés be aware that you may pick up some darker color and, again, this might not be a good match with the kind of wine you’re trying to make. If you’ve got a crisp Sauvignon Blanc or a Riesling, for instance, both aromatically and color-wise I’d go with a “neutral” barrel or a stainless steel drum even. A “neutral” barrel means that so many batches of wine have been aged in it and passed through over the years that very little if any oak flavor, aroma, or color is left to be extracted into the wine. A used barrel like this (as long as it’s not leaking) is a serviceable container for aging wine and can be beneficial due to the microoxidation that occurs through the wood. Also, if you leave the wine on the lees during aging in the barrel it can add some additional character but won’t contribute any of the new oak aromas and flavors you might expect from a newer barrel.
In the future you might want to consider experimenting with a mix of new and used barrels, because sometimes 100% new oak on a wine can be overwhelming.
You probably already know this, though not all readers might: Don’t put white wine into a barrel where you’ve aged red wine . . . unless you want to make rosé! If you’ve got a barrel you’re using to age red wine in, it’s pretty tough to clean the barrel enough to be able to subsequently age rosé or white wine in it without affecting that wine’s color. You’d be amazed how far soaked-in the wine gets. I’ve had some success soaking the barrel for a few days with a very strong sodium percarbonate solution (ProxyClean or Proxycarb are two commercial products), rinsing with water, then soaking in a tartaric acid solution for another day. After this treatment the barrel should be safely decolorized . . . and sadly, also stripped of much of the new oak aromas and flavors. Because of this, it’s always best to designate “white barrels” and “red barrels” from the beginning. You can always turn a white barrel into a red one but it’s always harder to go the other way.
Whatever you do, don’t use chlorine bleach on winery equipment of any kind, which can lead to TCA (2,4,6-trichloroanisole) contamination, more familiarly known as the “corked” wine aroma. The swampy-smelling TCA is generated when certain kinds of molds interact with chlorine molecules in their environment. Most often associated with corks (you’ve probably experienced the infamous restaurant cork sniffing tableside), TCA can also infiltrate cellars via cardboard, barrels, sacks of wood chips, and even drains. Because of this, chlorine-containing products of any kind have no place in a winery or cellar. Always use carbon-block filtered water for your cleaning, sanitizing, and winemaking needs if your tap water contains any chlorine additive.
Winemakers who make wine batches at scale are able to use the new and neutral barrel mixes to their advantage by varying the percentage of each type. You may have heard the term “30% new oak” or “40% new, 60% used” in wine descriptions. What they mean is that in each case, 30% and 40% of the barrels in the batch were new, respectively. Mixing barrel ages is a great way to really dial in a style, and though I know most home winemakers (“microvintners,” I like to say) will never have batches large enough to properly go there, you can still achieve a certain amount of the same effect by aging your wine in a neutral barrel but introducing new wood into the barreled wine in the form of oak chips, beans, sticks, or spirals. In my Winemaker’s Answer Book (Storey Publishing) I show you how to make an oak chip infusion “sock” by stuffing toasted oak pieces into a nylon stocking, tying it up and leaving it with a string on the outside of the bung. This way you’d still be able to introduce some new oak character into your wine while being able to take advantage of the lees-stirring and aging dynamics of a neutral barrel. Added bonus? Once the wine’s oaky enough you can simply remove the oak sock . . . so no over-oaked wine!
All in all, if well taken care of, your barrel should last you for 10–15 years or so and, if you’re lucky and it’s well-made with no leaks, it could potentially serve you for much longer. I wish you well on your new-barrel journey!
Q I started a batch of grape wine and then also used a glut of plums to make plum wine. The grape wine is doing fine and the plum wine, treated in much the same way, just isn’t taking off. It’s all in the bucket (plums, sugar, yeast, and yeast nutrients) but it has never fermented. It is new yeast and the bucket is in the warmest place in the house. This was two weeks ago and still not a single bubble in the airlock. It is regularly stirred. There is a little froth on top of the mixture but no visible fermentation going on.
I thought the room was too cold (we’ve not yet put the heating on) so I used a heater near the bucket — no luck. So I put the bucket in the airing cupboard — still no luck. (Incidentally the grape wine I started in the same way responded to extra sugar and yeast, but this hasn’t worked with the plum).
Unfortunately, I can’t remember exactly what the starting gravity was but close to that of a sweet wine. I added more yeast but no luck. No campden tablets or sulfites have been added. The plums were clean and just picked, Washed, and no stones were added. Some had previously been stewed with sugar. When I take the lid off there’s a strong but not unpleasant smell, and there’s froth on top, but no fermentation. Yeast was always pre-started with lukewarm water.
Will it by now all be bad and should I just chuck it? Or should I rack it into demijohns and add more yeast? There’s about 6 lbs. (2.7 kg) of sugar in the 2 gallons (7.6 L).
Cheryl Felix
Lincolnshire, United Kingdom
A It sounds like you’re doing a lot of things right, especially being that your grape wine has taken off, but your plum wine is just plum tuckered out.
Seems like you’ve got it in a warm enough spot and you’ve added all of the right things — you haven’t over sulfited it and you’d think that since your grape batch was happily fermenting your yeast strain and nutrients were working just fine.
What does stick out to me a bit (and it took a couple of readings of your details plus a little math conversion to work out) is your starting Brix or sugar content. Though you don’t say what the plum’s initial Brix or sugar level was, you do mention that a portion of the plums were cooked with some sugar and that there were 6 lbs. (2.7 kg) of sugar added to 2 gallons (7.6 L). 6 lbs. = 96 oz. = 2.72 kg of sugar. Your volume is 2 gallons = 7.57 L of juice. That works out to be about 31.5–32 °Brix in sugar alone.
Add that on top of the natural sugar present in the plums, which, depending on the variety, could contribute between 10–20 °Brix themselves and you’re looking at a potential °Brix range of around 42–52! If you translate that into potential alcohol, that’d net you somewhere in the region of 24–30% alcohol. I don’t know of any wine yeast strain that can ferment anything higher than 18% alcohol to dryness. K1, BCS103, EC1118 (also known as Prise de Mousse or “PDM”) and a handful of others are good “power yeast” strains and must be used when faced with high Brix situations.
Needless to say, your Brix here is a little on the extreme side. Even if you use some high-Brix, dessert-wine type yeast and inoculation practices (more on that below), at that high of a sugar level you’re frankly going to eventually just encounter too much osmotic pressure from the sugar. The sugar may be too high for the yeast to get much of a foothold and unless you do multiple stepwise inoculations, “feeding” the fermentation with the high-sugar juice as you go, it’s possible the yeast might not even be able to start fermenting in an environment where the sugar content is that high. There’s a reason that jams, jellies, and fruits preserved with sugar manage to keep so well over time.
Yeast cell walls just aren’t built to handle sugar at the level your must appears to be and they’ll become what I call (the super-scientific enological term) “cranky.” When I’ve made dessert wines in the past (I once made Bonny Doon Vineyards’ “Vin de Glaciere” and “Framboise” earlier in my career) I experienced the full gamut of effects that maladjusted yeast can throw at you: Sluggish starts, high volatile acidity (VA), aldehyde production, off-aromas, oxidation, and of course the inevitable stuck fermentation. It takes a lot of winemaking derring-do to avoid these outcomes.
So, what to do in your situation? You have a few choices. First, you could add water (and maybe add a little more acid and yeast nutrient accordingly to make up for the extra volume of water) to dilute the sugar down into a more reasonable level. In my history of making sweet wines, I’ve never attempted a sweet wine (which will have residual sugar) above 32 °Brix. Dilution can affect flavors and aromas, however, and there usually is a point of diminishing returns that is dependent upon the flavor concentration in the fruit concerned.
You could give up on fermentation altogether and just fortify your plum solution with a lot of brandy, rum, or whisky (I’m serious!) to make a sort of alcoholic punch concentrate. You’d want your alcohol level to be at least 20%, so buy some booze and do your algebra accordingly.
This might be lovely spiced up with some cinnamon, orange peel, and nutmeg and bottled as gifts for the holidays. Just dilute with some sparkling water, serve over ice (or mull with orange and cranberry juice) for festive, delicious cocktails. Since you’ve got 2 gallons (7.6 L) of the stuff it seems like it’s a workable volume for fortifying and then bottling up as thoughtful homemade gifts for loved ones.
Or . . . you could attempt a yeast inoculation and fermentation, in which case you’re going to want to follow all of my high-Brix fermentation tips, below:
-Start with a super-robust yeast strain: BCS103, EC1118 (a.k.a., PDM), or K1 are good choices. Basically, you want to choose something with the highest alcohol tolerance you can find. Low VA production is also a plus.
-Use a higher inoculation rate: Look at what the yeast manufacturer recommends and then increase it by 50%. This helps guard against the normal cell debilitation and death that can occur with high-Brix, as well as high osmotic pressure, fermentations.
-Add more nutrient than you normally would: I would do an increase of 30% over what you would normally use for a regular (22–25 °Brix) grape fermentation. This ensures that everyone has a chance to be fed. The risk is residual nutrient remaining in the wine to potentially feed spoilage organisms later, but this can be fixed by filtration and judicious watching and care of your aging wine later.
-Follow good inoculation protocols: Practice scrupulous sanitation. Use filtered (non-chlorinated) water. Measure temperatures accurately. Use a hydration-water yeast nutrient like Go-Ferm or FermStart in order to help build up the strongest cell walls possible. Follow yeast vendor’s directions for that particular organism.
-Pitch differently: Rather than hydrating dry yeast and tossing it all into the must/juice at once, a very sweet wine requires a very different approach. The first step is indeed the same: Hydrating the yeast (with hydration nutrient) in warm water to make sure it’s viable. Then, as opposed to tossing the yeast slurry into your juice/must, you’ll be gradually “feeding” your juice must into your yeast inoculation. Guidelines will differ based on your total volume and starting Brix, but basically the idea is to always make sure you’re never overwhelming your fermentation with sugar levels that are too high.
In your case, since you’ve got only two gallons (7.6 L) and you’d start with a yeast hydration solution of probably ¼ cup volume or so, I’d dilute maybe 25 mL of your juice/must with 50 mL of water, then add that to the hydrated yeast. Wait for good bubbling and activity to show (should be quick, probably about 30 minutes or so). Then proceed to add 50 mL of your juice/must diluted with 50 mL water to that, make sure you’re seeing good activity again (maybe around an hour or so). Then you should be able to feed direct small volumes of your juice/must into the solution, monitoring activity by Brix drop.
Yes, this can be a laborious process and I’ve had sleepless nights doing it in the cellar. Eventually the fermentation will slow down and stick . . . and this is the ending point where you have to add SO2, chill it, settle, and eventually filter it before bottling. The hope is that by this point the VA won’t be too high and you’ll end up with something drinkable.
Which option to choose? I leave it up to you. Super-sweet juices and musts are always difficult to deal with and yours seems like no exception!