Kegging Your Wine
As the penultimate step in winemaking, bottling can be one of the most exciting parts of the process. Crushing, pressing, fermenting, racking, clarifying, adjusting and weeks and months of waiting all come to that day when you get to put the final product into its package. Bottles are gathered, washed, sanitized, rinsed, drained, filled, corked, labeled, capsuled, and laid down to wait. Ah, such romance, such a signifier of good things to come.
Or is it? Bottling is 95% janitorial work. Throw in a lot of lifting and bending over the course of hours, and you may actually find it’s not as much fun after the tenth or twentieth time as it was the first. If you’re a low-volume winemaker, it’s not so bad. But what if you’re a high-volume winemaker? Some WineMaker magazine readers make hundreds of gallons (or liters) of wine. The legal limit in the USA is 200 gallons (~760 L) per household, per year — we know that no US citizen would ever exceed that — but Canada has no limits at all, and I personally have made more than a thousand gallons (~3,800 L) in a single year . . . in my professional capacity, of course!
A thousand gallons is an immense amount of wine, but even 200 is an awful lot — it adds up to a thousand bottles washed, sanitized, rinsed, drained, filled . . . you get the picture. After a few years the romance wears a little bit thin and Vandergrift’s Second Law of Home Winemaking (the desire to fill bottles is inversely proportional to the number of bottles filled over a lifetime) kicks in and you start having bottling “parties” where neighbors and friends are pressed into helping in exchange for wine, you make your kids do the drudge work of washing bottles for their allowance and sometimes you even run out of wine because you’ve put off bottling (the horror, the horror!)
You could package in larger bottles to reduce labor. After all, in addition to the traditional 750-mL bottle there are 1-L, 1.5-L, 2-L and even larger bottles, some of which have fantastical names: Jeroboam (3 L), Methuselah (6 L), Balthazar (12 L) Nebuchadnezzar (15 L), Melchior (18 L) and the majestic Sovereign (over 25 L!)

While larger bottles initially seem like a great labor reduction (double the size, half the filling) there are issues around obtaining and storing them, and when you get right down to it, who opens a 25-L bottle of wine on a weeknight? Unless you’re a giant or a caucus, you’ll have a lot of trouble emptying the larger bottle sizes in one go. Any unfinished wine in a larger bottle will be subject to oxidation and spoilage.
Winemakers have used other work-arounds to reduce bottling labor — there are dispensing bags, that bag-in-box (BIB) bulk wine is sold in. While these do work, and come in a variety of sizes from 3 liters and up, they don’t protect the wine from oxidation all that well. Major wine producers only package high-volume/high turnover wines in BIB, because even unopened they’re rarely rated for longer than 90 days.
The answer, then, is some kind of a larger vessel, one that holds a decent amount of wine, yet isn’t too heavy for an average person to move. It should allow you to draw off whatever volume of wine you want, be it a glass or a gallon, and keep the remaining wine in good condition for later. Ideally it would sit in one place (your cellar or bar) for convenient access, yet not be impossible to move to a barbecue or a party when the mood strikes. It should be easy to clean, simple to operate, reusable and when priced out against an equivalent number of bottles and corks over the years, it should make economic sense.
That thing exists today, and not only does it fulfill all of the criteria for an excellent bottling alternative, it’s a proven technology that’s neither very expensive nor especially challenging to use: The Cornelius keg.
A Corny Name for a Complete System
If you’re old enough, you’ve seen Cornelius kegs behind the counter of a fast-food joint or stacked outside the back door of a movie theatre — they’re the 5-gallon (19-L) stainless steel kegs that soda pop used to be served from. I say “used to” because unlike much larger beer kegs, they were phased out of the dispensing game in favor of BIB’s of concentrated soda syrup that is diluted with carbonated water.

The nickname comes from the Cornelius Company of Anoka, Minnesota, the best-known manufacturer of the kegs. They were also manufactured and distributed by Spartanburg Steel Products (of Spartanburg, South Carolina). Despite being consigned to commercial obsolescence decades ago, they’re still in circulation today, and even though Spartanburg and Cornelius no longer manufacture them, new kegs are still being made by other companies.
Cornelius kegs were purpose-built to be pressure vessels, to contain carbonated soda pop under considerable pressure. As the soda was dispensed it was replaced by more carbon dioxide gas, ensuring that the last glass of fizzy sugar water was just as sparkling as the first — as well as just as fresh.
Carbonation is a distinct detriment as far as most home winemakers are concerned (Champenoise-style and sparkling wines excepted), especially for kit winemaking, where the short fermentation times make it difficult to excise all CO2 gas by bottling day. That’s all right though: you don’t have to carbonate your wine to dispense it from a keg. The gear is the same that homebrewers use, and it’s plentiful and easy to source.
Advantages of Kegging Your Wine
Serving wine from a stainless steel keg may lack the romance and historicity of popping corks, but one 5-gallon (19-L) keg holds twenty-five standard (750 mL) wine bottles. Just like glass bottles, stainless steel kegs are inert and won’t alter the taste of wine, even during indefinite storage. Because there’s no cork, there’s no chance of trichloranisole contamination (TCA, cork taint), or corks splitting, leaking or chipping. You also don’t need a corkscrew!
Kegs also reduce oxidation. The amount of headspace as a ratio of wine is vastly lower in kegs than it is in bottles — you fill the keg right to the tippy-top. Second, the kegs have excellent seals, as they are meant to hold against pressure, and unless damaged, they don’t leak. Finally, prior to filling them with wine, the kegs are purged with bottled gas, excluding oxygen. This ensures that the wine will always taste exactly the same as the day you bottle it (but see the note on this later in the story).
When you keg your wine you can drink a single glass at a time without having to open a whole bottle. If you do need a bottle (say for a dinner party or a picnic), you can easily fill one directly from the keg and cork it at need. Party upstairs? Trot down to the cellar with a carafe or a jug and you’re good to serve in moments. Because the wine dispensed is replaced with oxygen-free gas, the wine stays fresh right to the bottom of the keg.
One more advantage for kegs: they’re very green. Commercial kegs have an approximately 30-year lifespan, but they get treated absolutely horribly, smashed about in storage and handling, and battered by cleaning machinery and during transportation. With care and maintenance, most of the kegs re-purposed from the soda industry have many decades of use ahead of them, and each year they’ll save cork, capsule and label waste, to say nothing of cardboard boxes and bottles lost to breakage and shrinkage (thirsty neighbors may forget to return empties!)
 Getting to Know Your Keg
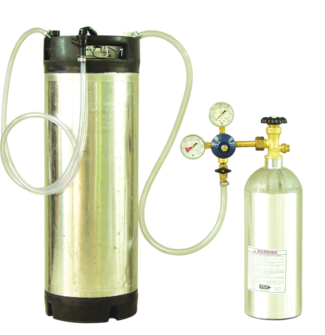
Corny kegs are stainless steel cylinders with a tension-clipped access hatch on top. Most have rubberized bumpers on the bottom to keep the keg from scratching or bashing surfaces, and molded rubber handles on top to make it easy to move them. Hatches almost always have a pressure relief fitting built into them, with a wee pull-tab to let off gas pressure.
Logic dictates that there needs to be a way to get wine out and gas into the keg. To do this, two screw-on ports are installed on the top of the keg, one for gas in and another for liquid out. The latter is connected to a stainless steel tube, known as a dip tube or spear. It reaches to the very bottom of the keg. The former has a very short tube that opens into the top headspace of the keg. Gas coming through the gas in port pushes the wine up the dip tube and out the liquid out port, which is usually connected to a dispensing tap.
The gas in port is connected to your gas source and both it and the liquid out port are hooked up with quick connect fittings that attach to plastic tubing held in place with tubing clamps. (A quick note on these port fittings: Cornelius kegs can be found with two different types, those used by Pepsi, which are ball-lock type, and require ball-lock quick connectors, and the pin-lock type used by Coca-Cola, which require pin-lock connectors. Ball-lock kegs are much more common, and the two aren’t interchangeable, but each can usually be found in homebrew shops or from online suppliers. Be aware of this when you set your system up. Other than there being a lot more pin-lock-type equipment out there, there’s no technical advantage to one or the other, but once you’re locked into a type, you’ll have to stick with it to use your connectors with new kegs.)
The most common Cornelius keg is 5 US-gallons (19-L) and stands a little over 2 feet (60 cm) tall and weighs about 10 pounds (4.5 kg). They take a little more height clearance once the fittings are in place, so be sure to measure your kegs as they’ll be configured before you build any cabinet or space to store them.
There are other sizes: 2.5-gallon (9.5-L), 3-gallon (11.4-L), 10-gallon (38-L) and 15-gallon (58-L). Other than 3-gallon (11.4-L), the odd sizes are somewhat rare, and more costly than a standard 5-gallon (19-L) keg. While 3-gallon (11.4-L) kegs are extremely nice for toting to barbecues and picnics, the larger sizes get quite heavy for easy handling.
New Cornelius kegs run $80–$150 each, depending on manufacturer and style, but used kegs are available for much less. How much less depends on their condition: rinsed and pressure checked ones can be found for $50, usually with a pretty solid guarantee of function, but they could be quite beat up and you might have to return the occasional one. Kegs that have been thoroughly cleaned and inspected, and have had all of their pressure seals and O-rings replaced are somewhere in the $80 range.
Scrap kegs used to be available for as little as $15, but those days seem to be passed. They also usually require very thorough cleaning and some replacement parts, which eats into the savings.
Taking Care of Your Corny
All winemaking equipment has to be both clean and sanitary before use, and your kegs are no exception. Kegs are cleaned through the access hatch on top. You’ll have to give the pressure-relief valve a tug before you open the hatch to release any gas. Once inside, clean the keg with an appropriate product for use on stainless steel, scrubbing the interior surfaces thoroughly. Take the gasket off of the lid and soak and scrub it as well.
The first time you put wine into a used keg, and at occasional intervals for kegs you’re already using, you’ll want to completely disassemble and clean the keg. This will involve undoing the gas in and liquid out ports using a socket wrench. You can tackle many of them with a crescent wrench, but be careful not to strip them. If you do, you’ll have to buy new port fittings. Many homebrew shops carry the appropriate keg wrenches, and some may even loan them out for good customers.
When the ports come out they’ll have small spring-loaded valves inside known as poppet valves that will drop out onto the ground and roll under tables or furniture. Place these and the ports into a small bowl of cleaning solution and give them a scrub with a small brush. (You may have to replace the poppet valves in used kegs.)
From the liquid out port the dip tube will slide straight up and out of the keg. Although it’s made of stainless steel and quite sturdy, be careful not to place in anywhere that it can become bent or kinked, or you’ll have to replace it. It should be scrubbed inside and out. To get the inside, folks who own firearms are at a distinct advantage as they already possess the tools for cleaning the interior of long, small-diameter tubes. The rest of us can make do with a very tiny wad of cloth on a piece of dental floss, or perhaps (very careful not to scratch!) with a straightened length of coat hanger pushing a bit of cloth.
Once it’s all scrubbed and rinsed, put the keg back together and sanitize it. Beer makers use a product called Iodophor, an iodine-based sanitizing rinse, but if you’re like most winemakers you’ll already have a sulfite sanitizing solution on hand, which is perfectly fine for wine. One caution: stainless steel and chlorine don’t mix — bleach or hypochlorite-based sanitizers will corrode and pit the surface of stainless steel, so stick to the approved cleaners.
Giving It the Gas
Cornelius keg systems were designed to be filled with carbonated soda pop and the liquid pressurized out of the keg with carbon dioxide gas. It’s very convenient for soda pop and beer because carbon dioxide dissolves quite easily into liquids. Unfortunately this means that unless you want to serve nothing but sparkling wine, you can’t use the standard CO2 setup that homebrewers use.
That’s a little bit of a bummer, because CO2 systems for beer are so common that complete package systems can be had, sometimes quite cheaply. But fear not! Nitrogen will save us from fizzy Merlot and frothy Gewürztraminer.
Nitrogen is extremely common, forming about one-seventh of our galaxy and nitrogen gas (N2) makes up 78% of the air we breathe. It’s colorless, odorless, and because it has an extremely strong elemental bond it doesn’t interact with other elements unless motivated by some energy input to do so. This makes it excellent for our purposes — the wine won’t soak it up and become fizzy, and it won’t spoil the wine or change its taste over time.
Tanks of nitrogen gas can be found at stores that sell compressed gas — welding shops and fire supply places are a good bet, and there are specialty companies that cater to gas users. You’ll need a nitrogen regulator to control the flow of gas to the keg. CO2 regulators like the ones used for beer setups don’t work on nitrogen tanks: you’ll need to buy (or rent) one from the gas supplier.
You can also get regulators at advanced homebrewing shops. An N2 regulator sells for around $70-$90 and while you can buy tanks, it’s usually cheaper to rent and swap them as necessary. All of the other hardware (tubing, connectors, clamps, cobra taps, etc.) are the same as those used for CO2. When you’re dealing with a homebrew shop for nitrogen equipment, be sure they understand you’re using it to dispense uncarbonated wine — that might save some confusion, or an attempt to get you to purchase a Guinness-type “Nitro Tap,” which is the reason many beer makers seek to use nitrogen.
Finishing Your Wine
Now that we have our equipment, it’s time to fill the kegs and use them, right? Not so fast: In the beginning of this article we noted that the wine wouldn’t change after kegging. That means if it goes into the keg needing a bit more time to be ready to drink, it’s not going to get that time.
Aging is an extremely complex phenomenon, not perfectly understood in all aspects. The point that we need to concern ourselves with is simple, however: If the wine has any reductive aromas (sulfury, “green” notes) that would normally subside as it ages under cork or in bulk storage in carboys, they won’t go away in the keg. Wine that is bottled with a stinky smell will be exactly as stinky months or years later.
This threw some winemakers for a loop when screw caps first went into use. Reductive wines that normally finished out under cork, where a tiny bit of oxygen exchange cleaned up the sulfur notes, stayed unrepentantly stinky, offending critics and hurting sales. It took some producers a while to sort this out, but the smart ones got it the first time.
According to WineMaker’s own Wine Wizard, Alison Crowe, who kegs her Garnet Vineyards wine commercially (to great success), this goes two ways: You can only keg wine that is, “Enjoyment ready, i.e. not needing any further aging,” but on the other hand, the wine doesn’t go through bottle shock, where agitation in the presence of oxygen makes wine aromas numb and distant for weeks and sometimes months. Bottom line: Your wine should be in peak condition, clear, stable, and ready to drink before you keg it.
Using Your Cornies
Connect your nitrogen tank, regulator and all of your tubing according to the manufacturer’s diagrams and attach the gas in fitting to your cleaned, sanitized keg.
For the dispensing side, you have a couple of options. The simplest is to run plastic tubing from the liquid out fitting disconnect to a cobra tap. While the line could be any length you choose, around 6 inches (15 cm) will do just fine.
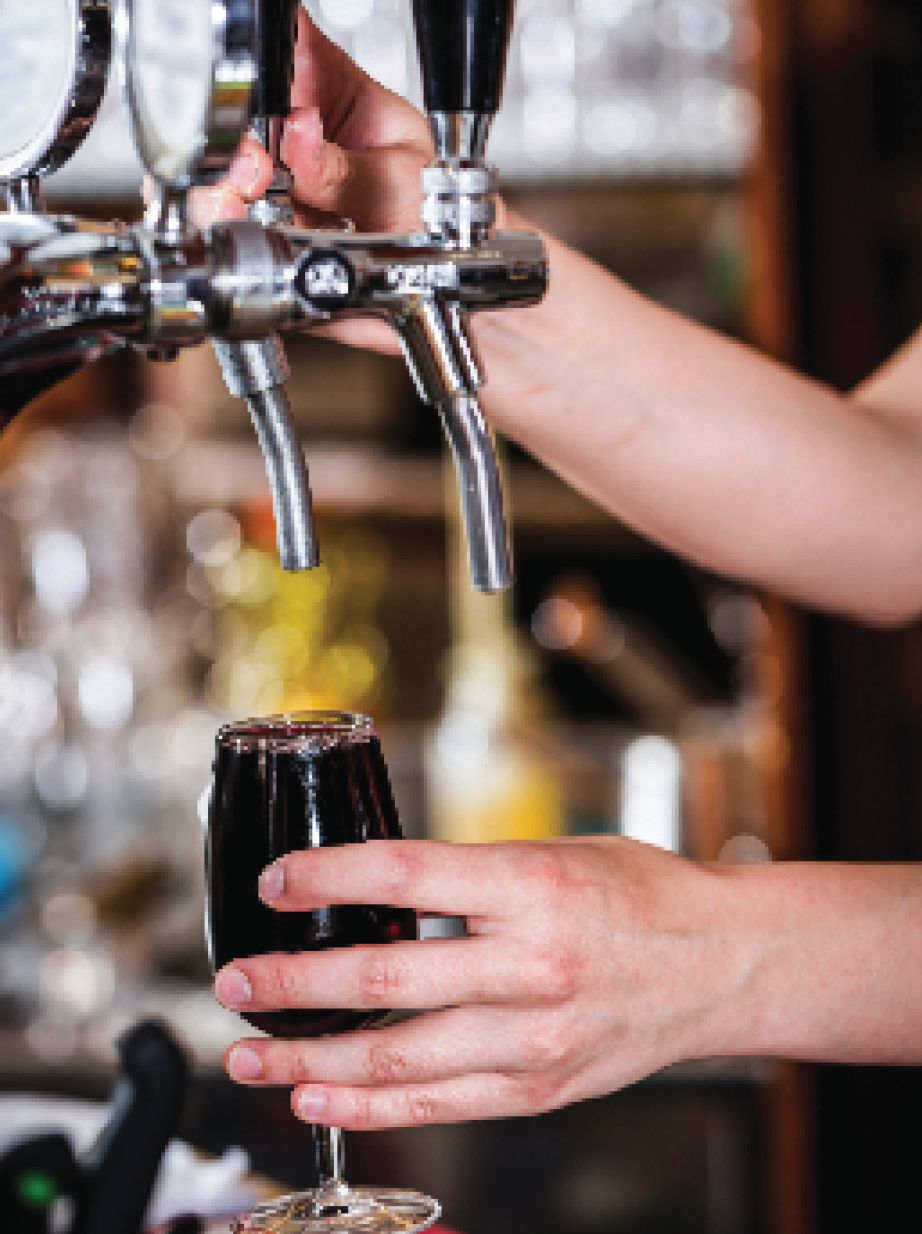
If you’re the kind of person who has a really cool bar set-up you can also dispense your wine through a standard beer faucet, like the ones on draft towers in bars (such as the one shown on page 28). While that’s pretty swanky (envy, envy!) draft faucets need regular disassembly for cleaning, and can attract fruit flies, while a cobra tap and line can be disconnected and soaked in sanitizer in only moments.
Before you fill your keg with wine you need to purge it of oxygen. Seal the lid on the keg and open the valve on the top of the nitrogen tank. Set the gauge pressure to 3–4 PSI and leave the valve open until you hear the gas flow stop. Shut off the regulator and pull the pressure relief valve on top of the keg. This will purge the oxygen from the keg. Repeat this, opening the valve and filling the keg with gas again once more.
Turn off the regulator, bleed the pressure from the relief valve and rack your finished wine gently into the keg. Pop the lid back on and repeat the purging process again — it will be much faster as there should be only a small amount of headspace under the lid. Turn on the gas again, pressurize the keg and you’re ready to serve your wine!