Making Port-Style Wine Kits
“Port is not for the very young, the vain and the active. It is the comfort of age and the companion of the scholar and the philosopher.”– Evelyn Waugh
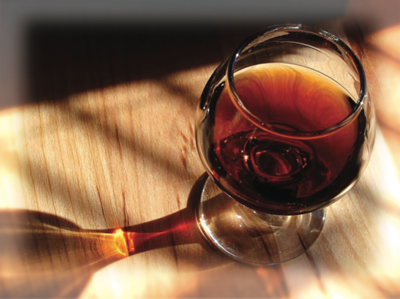
Drinking Port can be a completely transcendent experience, with colors ranging from lurid purple-black to mellow, pale cinnamon. Aromas range from dense, concentrated fruit to delicate ethereal spiciness while flavors range from burly, throat-gripping grape-bombs to majestic whispers of sunshine.
Do you see what happens when you drink good Port? It makes you goofy with the poetry of it all! And it’s been doing that to people for centuries. Port, as we think of it today, evolved slowly over a very long period of time and actually owes its character more to the English than to the Portuguese. While Port isn’t made with raisins, a significant percentage of it is pre-aged so that it can be consumed immediately upon purchase, with only the cream of the crop (i.e. the most expensive) intended for long cellaring. The good news is, with a little attention to detail and a good wine kit you too can make a great batch of Port-style wine to enjoy and age in your own cellar.
A quick history of Port (plus geography, geopolitics and economics)
In the 17th century England was at it again, engaged in yet another bout of unpleasantness with France and had banned French wine imports. William III further complicated matters by imposing brutal taxation on wine. English merchants made a run for Portugal, an always-friendly country. They moved about a bit but eventually settled along the Douro river valley, where they began exporting the opaque, mouth-puckering reds (the product of hot fermentations over-extracting the grapes.)

In order to ensure that the wine they produced would arrive in England in good condition, the merchants added a measure of brandy to their finished wines, jacking up the alcohol content. It wasn’t until a monastic wine-making enterprise started adding the brandy to the wine before the fermentation was finished (killing the yeast and stopping fermentation before all the sugar was consumed) that the rich, sweet style of Port was born.
Grapes and Port making
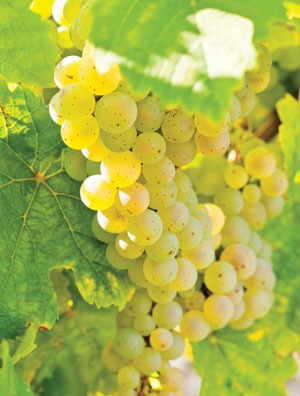
Portugal’s five major growing regions Alentejo, Barirrada, Dão, Douro and Oueste, (plus the Island of Madeira) grow over a hundred different grapes, and 80 of these are allowed for use in Port making. The five most common Port grapes are Touriga Nacional, Tinta Roriz, Tinta Barroca, Tinto Cão, and Touriga Francesa. Of these, the Touriga Nacional grape is considered to be the best variety for the style. It has decent vigor but yields less than the other grapes. Lower yields usually mean deeper color and powerful flavor.
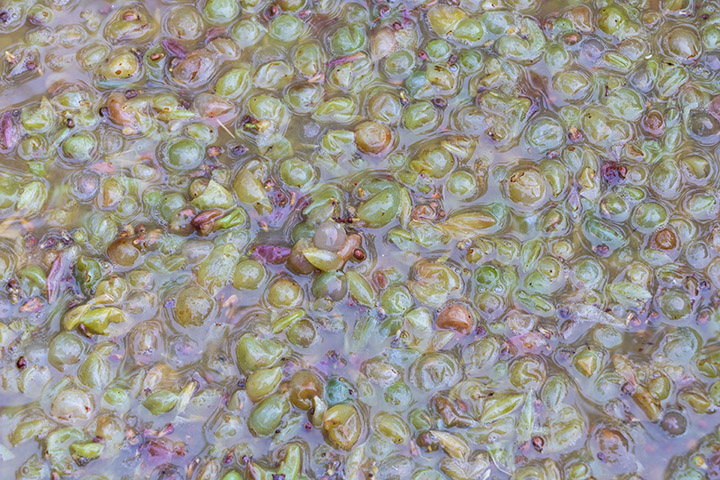
As mentioned above, the secret to sweet-but-powerful Port is the addition of brandy to the fermenting must. When the grapes are picked, they’re traditionally dumped into a large, shallow cement or granite vat called a lagar. These were in use already in Roman times, but today it’s common to use autovinifiers, which lack a bit of the charm. Inside these lagars, grapes are crushed by foot. It turns out that if you want to squish the maximum flavor and color out of a grape without crushing the pips (grape seeds), which contain extremely bitter oils, the human foot can’t be beaten: it presses the skins, gently smooshing the good stuff out and leaves the seeds unmolested. This involves encouraging the pickers (who have been working in very strenuous conditions all day long) to drop their pants and climb into the vats, linking arms, dancing about, singing songs and usually having a beverage or two to keep their spirits up.
As the juice is released, indigenous yeast on the grapes begins the fermentation, aided by the warmth of the local climate, which ensures very rapid activity. This, in turn, extracts a lot of phenolics from the grapes giving the wine the necessary Port-like character.
Rather than allowing this fermentation to go to dryness, it’s halted by the addition of grape brandy to the must after fermentation is less than half-
completed. There is more on brandy below, but enough of it is added to drive the wine to 19 or 20% alcohol by volume (ABV), taking Port out of the category of Table Wine and into the category of a slow sipping beverage.

Port styles — the quick and the deadly — deadly delicious, that is!
Port can be broadly divided into two styles: cask-aged and bottle-aged. Cask-aged Ports are kept in large barrels (sometimes even in cement tanks!) until they’re fully ready to drink, and are bottled for immediate sale. Bottle-aged ports see the inside of barrels for a short period before being bottled and require extremely long aging before they’re ready to drink — twenty, thirty or even forty years!
The cask-aged versions can be further divided into two styles: ruby and tawny. Ruby Ports retain the intense ruby-red color and simple (but powerful) fruitiness of youth, while the Tawnies are aged long enough to take on a pale amber or brown hue, with a delicate, nutty character.
Bottle-aged Ports can be broken into vintage, which is Port all from the same year, aged for two or three years, and late bottled vintage (lbv) which is aged for four to six years before bottling, which prevents the large drop-out of sediment (called “crust” in the Port trade) that happens to vintage Ports. Vintage Ports are usually the most expensive, and feature the finest, ripest Touriga Nacional grapes of the harvest.
There are a bunch of potential subdivisions within each of these, but there are no firm regulations defining them, so Port shippers often make up style designations with an eye more to marketing than to strict interpretations of style.
White Port? I’m with old Ernie Cockburn, head of one of the largest Port firms of the 20th century, who said, “The first duty of a Port is to be red.” Not many wineries (or wine drinkers) expend much effort on white Ports. Their sales are limited, and I’m not aware of any currently available white Port kits.
Port from kits
Once again the modern wine kit saves you time and trouble and lets you make a great batch of Port with little fuss. Most Port kits come in a half-batch size, 3 U.S. gallons (11.5 L) and will yield approximately 14–15 750 mL bottles, rather than the standard kit size of 6 U.S. gallons (23 L). This is mainly due to consumption patterns — few people have the liver to drink more than one bottle of 19 or 20% alcohol wine at a time. This means that you can use your regular primary fermenting pail, but you will need to purchase a proper 3-gallon (11.5-L) carboy to finish the wine.
An alternative is to double up the batch and use your regular 6-gallon (23-L) carboy, but unless you’re a confident winemaker, or have a lot of friends to share with, you may want to start small — and everybody eventually needs a half-size carboy in their winemaking arsenal anyway.
Port kits usually come in two styles: Ruby and Tawny, although the kits regarded as Tawny-style are on the deeply colored and flavored end of the scale. The kits all contain carefully blended juices and concentrates that have the powerful, rich grape characters that make Port such an intense and gripping wine, and the best thing about this blending is that its main focus is to bring out the flavors and aromas that would normally take years of aging to achieve — not quite like making pre-aged wine out of raisins, but kit Ports drink quite nicely while young.
Now, as I am fond of saying, when you’re making a kit, follow all of the instructions precisely, omitting no detail however slight. Make sure that you follow recommendations for temperature, yeast handling, stirring, racking, etc. There are, however, a few general keys to success with Port:
Remember, the volume is only 3 gallons (11.5 L): Before you start, fill that 3-gallon (11.5-L) carboy to the neck with water, empty it into your primary fermenter and after the level settles, mark it off with permanent felt marker. This will make hitting the 3-gallon (11.5-L) starting volume much easier! Don’t try to measure out the water with a measuring cup or similar — this seldom works out to accuracy.
Port kits usually have extremely high starting gravities, usually in excess of 1.100, and sometimes as high as 1.130. Combine this with the fact that many of the kits are over 2 gallons (7.6 L) in the bag, and you’re adding less than a gallon of water. If you are short as little as two cups of water, you can push the gravity up beyond the yeast’s osmotolerance level. This means the yeast can’t stand the super high-sugar environment, and won’t be able to fully ferment the kit. This may not sound bad, because Port is supposed to be sweet anyway, but you might get stuck with an overly sweet Port with a low alcohol content. Yipes!
When the instructions say “stir,” stir until your arms fly off. This is crucial with kits that have a high starting gravity because the thick juice doesn’t easily mix with the added water. You’ll need to whip the must hard before you measure your gravity and pitch your yeast.
Keep the temperature at the upper end of the described range. Remember, Port is fermented in open vats in the heat of Portugal, going over 90 ºF (32 ºC) in only a couple of days. A little warmth will not hurt the flavor, and warm yeast is happy yeast. Stick to 75-77 ºF (~24 ºC) must temperature at pitching, and try to maintain this throughout the entire fermentation.
Some kits require a “sugar feeding.” This is an addition of sugar to the fermenting must while it is still in the primary fermenter. This is done to increase the alcohol level of the finished kit. As mentioned above, if there is too much sugar before fermentation, the yeast can’t tolerate it and the juice simply won’t ferment. If you add the sugar to the ongoing fermentation the yeast can take it in stride. Make sure to dissolve the sugar in hot water first, allow it to cool and stir it in. Stir up all the yeast sediment at this time as well, rousing the yeast back into suspension.
Watch your specific gravity very closely, and make sure not to proceed with the next steps before you hit the recommended levels. If you rack or stabilize before you hit your gravity target it’s very difficult to restart a stuck fermentation.
Most kits contain sweetening pouches, which are added after fermentation to bring the sugar levels up to style. Be sure to put yours in a safe place, so you know where it is when it comes time to add it to the kit!
Fortifying
Port kits without a sugar-feeding usually have an alcohol content between 14 and 15% ABV at bottling, with the sugar-added kits going up to 16 or 17% ABV. While this is in the correct range for commercial Port, you may wish to enhance it by fortifying the wine with brandy. The extra alcohol will act as a flavor carrier, changing the taste and the mouthfeel. It sounds like a no-brainer, but I strongly recommend conducting a trial to ensure that this is actually an improvement in the Port before you doctor up the whole batch.
It’s the word “brandy” that causes some cognitive dissonance for home Port makers looking to fortify their wines with a bottle of French or domestic brandy from the liquor store. The brandy used in Port making is to sipping brandy what nitromethane is to apple juice: another animal entirely. Distilled from local grapes or imported from the EU (where they have a bit of an overcapacity problem), this brandy is known as “Aguardiente,” and is 77% alcohol by volume. This is very important: if one were to use regular drinking brandy at 80 proof (40% abv), the Port would get 6 gallons (23 L) of water for every ten gallons of brandy added, watering down the flavor by the time the alcohol content moved substantially. With aguardiente, 7.7 gallons (29.3 L) out of 10 gallons (38 L) are pure alcohol, which prevents watering-down.
If you’re having trouble finding a source for aguardiente, you could use a high-proof product, like grain alcohol. Remember, you’re looking for the alcohol effect, not a flavor change, so as long as the fortifying alcohol is relatively neutral, the higher the proof the better.
If you are going to add alcohol to your Port, you’ll need to use the Pearson Square method of calculation. Basically you need to know the alcohol content of your kit, the volume, and the desired alcohol content. Run the numbers and you’ll know precisely how much rocket-fuel to add to your Port to finish it to your desired style. (For additional information on using a Pearson Square see this article.)
Aging
You could start drinking your Port once it gets over bottling shock (about one month) but you’ll get a much bigger payoff if you can wait at least six months, and your Port won’t really hit its stride for at least a year.
With a good cork and nominal storage conditions, Port will improve happily for seven to ten years without any trouble at all. Note that if you are fortifying your Port, you’ll want to wait at least six months for the alcohol/sugar/acid reaction to mellow out and blend in.
Drinking
If you’ve got an adventurous palate, the classic pairing with Port is Stilton blue cheese. Paired with the nutty sweetness and rich phenolics of Port, Stilton is transformed into a delicate, mushroomy extravaganza of creamy goodness — if you like that kind of thing. Toss in a few toasted walnuts or (my favorite) pecans and you’ve got a simple but perfect set of nibbles for your noble Port.
Get your Port on
Some of you may be reading this article thinking, “It’s the summer issue of WineMaker — why would I want to make Port now?” Ha-ha! You should make it now because summer is the perfect time. Port doesn’t mind the warmth, and it needs at least six months to age — you should be just in time for your midwinter holiday feast if you start a kit right now!