Six Essential Winemaking Techniques
Commercial winemakers and wine industry professionals don’t become experts overnight. It can take many vintages to figure out what works and what doesn’t work in a home or commercial winery. But that doesn’t mean hobby winemaking has to be hard — and it helps to get some pro-level advice to boost your confidence.

We spoke with some of our most trusted hobby and commercial wine professionals to see what they think are the essential skills you need to make the best wine possible at home.
The Winemaking Pros
Anna-Katherine Mansfield, Associate Professor of Enology at Cornell University’s State Agricultural Experiment Station (NYSAES) in Geneva, New York. Anna first worked in the wine industry in North Carolina’s Yadkin Valley, received graduate degrees at Virginia Tech and the University of Minnesota, and served as the first Enology Project leader at the University of Minnesota from 2001-2008. Mansfield returned to the East Coast in 2009, and currently focuses her efforts in aiding small regional wineries through enology extension, wine sensory evaluation, and research on hybrid wine phenolics and fermentation nutrition. Anna will spoke at the 2012 &2017 WineMaker Magazine Conferences in Ithaca, New York.

Sheridan Warrick, author of The Way to Make Wine: How to Craft Superb Table Wines at Home (2d ed., University of California Press, 2015). Sheridan is part of an active winemaking community in the San Francisco Bay Area, with more than thirty vintages behind him. He is a freelance editor and the former Executive Editor of Health and Via magazines. Sheridan has also written for WineMaker magazine in the past, including “The Essential Ins and Outs of Oak Barrels” in the October-November 2015 issue.

Christina Musto, head of Business Development and Vineyard Relations at Musto Wine Grape Company in Hartford, Connecticut. Christina has been working with wine grapes since she was 11 years old. She graduated from Sonoma State University with her Wine Business MBA and completed the UC-Davis Orientation into Viticulture course.

Olin Schultz, Owner and Founder of MoreWine! and Olin Wines. Olin started MoreFlavor!™ as Beer, Beer, & More Beer™ in 1995. A few years later he made the jump to a full retail space. He has been brewing beer for over 20 years and making wine for over 15 years. He remains passionate about the creative process and makes several batches of wine and beer each year.
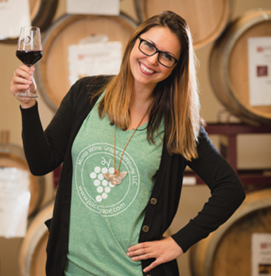
Alison Crowe, WineMaker’s longtime “Wine Wizard” columnist and winemaker for Plata Wine Partners. Alison is a native Californian, UC-Davis enology graduate, professional winemaker, published author, and calls the Napa Valley home. In addition to her work with Plata, Alison provides custom winemaking services and consulting to nationally distributed as well as small start-up brands.
Pro Techniques for Winemaking
1. Train Up Your Tasting Skills
The best winemakers are also very often great wine tasters. While you don’t need to be a tasting super hero to make excellent wines, it will certainly help if you are a good taster, and can entice some friends to learn to taste with you. Knowing how to identify wine tastes and aromas, especially the faults, can really boost your wine quality.
Anna-Katherine Mansfield, Associate Professor of enology at Cornell University’s State Agricultural Experiment Station (NYSAES) in Geneva, New York explains some of the ways that you train your wine-tasting palate.

“You certainly do not have to be a sommelier to get trained up on basic aromas, especially flaws, pretty much anybody can do it,” says Mansfield. “If you can smell your bread bake, or your breakfast coffee, you can learn to identify some of the important things,” she adds.
“Taste a lot, taste everything, taste with friends, take good notes, and take classes [tasting workshops and wine flaws training] if you can,” recommends the professor. We’re not just talking about wine here: Mansfield asks her students to make a ‘smell journal’ for a day. “Because of the way our brains are set up,” explains the professor, “we don’t have a really good internal framework for remembering smells, so increasing your vocabulary by actually paying attention to and actually recording the things you smell throughout the day gives you all kinds of words to use which is helpful.”
There are other useful tools. Smell boxes (boxes containing isolated scents) can help you get familiar with the aromas in wine but Mansfield says, over time, they lose their potency and the different smells can change over time. The Wine Aroma Wheel (available for $6 at http://winearomawheel.com), developed by retired UC-Davis professor Ann C. Noble, is a helpful facilitator for identifying the different flavors in wine and articulating descriptions for them.
The big payoff from training up your tasting skills: Being able to identify wine flaws. Mansfield says this is a critical part of winemaking and often tricky because flaws often don’t occur alone. “There are often several things wrong with the bottle.”
Mansfield details the main issues to look out for. “For a home winemaker, and actually for any winemaker, in my experience the two biggest problems are too much SO2, or oxidation which means too little SO2. Then Brettanomyces, cork taint, and film yeast during aging.” There’s also Volatile Acidity (VA), “that can smell like vinegar or nail polish remover because over time it converts from the acetic acid i.e. vinegar to ethyl acetate.”
“SO2 is an interesting one, especially because the human threshold varies quite widely, so what is way too much for you I might not even smell.” An easy way to practice identifying excess SO2 would be to dissolve too much SO2 in a sample of wine and smell it.
Your tolerance for particular wine flaws could be the same as your genetically related family members. So if you work in a family winery, Mansfield says it’s important to get a non-family member to taste the wines.
It’s also worth tasting using an International Standards Organization (ISO) wine glass, which are designed to give a fair impression of the positive and negative tastes and aromas in the wine. Mansfield says you should avoid specialty glasses that are designed to enhance the pleasant flavors because they can depress the flaws.
“If you’re trying to smell your wine and get an honest assessment of it you don’t want to put it in a glass that makes it smell the best,” says the professor.
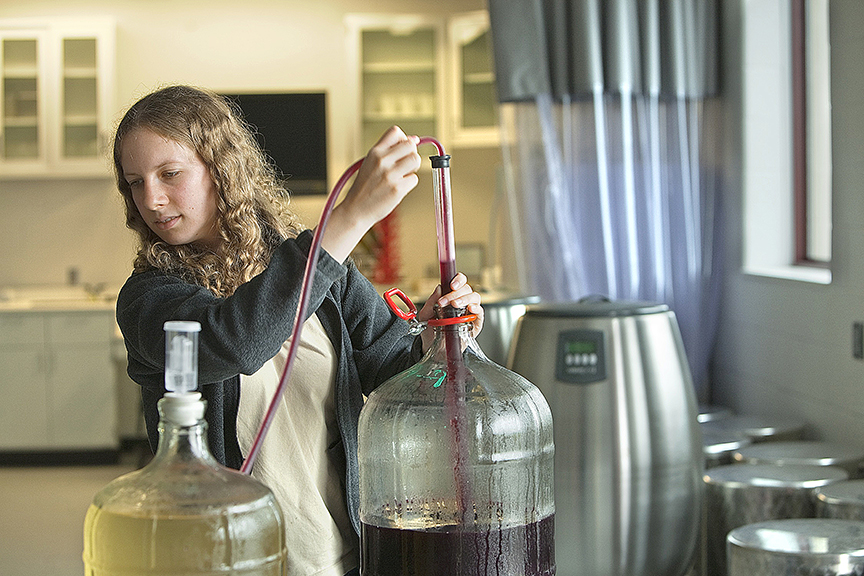
2. Rack it, Rack it Good!
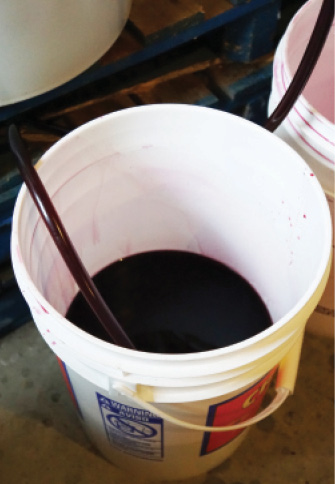
Once you transfer the wine to the fermenter, the work isn’t over. Wine needs to be transferred periodically to get it off of the lees (dead yeast cells and other particles that fall out of suspension over time) to prevent off odors.
Christina Musto, Head of Business Development and Vineyard Relations at Musto Wine Grape Company in Hartford, Connecticut says some winemakers don’t like racking and even forget to rack when they should. “Racking is a big deal because there are a lot of microbes in the juice and the lees will fall down to the bottom [of the container] and keeping your wine on that for significant periods of time is just providing opportunities for bad things to grow.” One major wine fault caused by not racking off the lees is poor or even stinky aromatics, including smells like rotten egg.
“Rack about every three months,” says Musto. “And for the first racking you’re going to have the most lees so you might do that sooner rather than later.” So just when the fermentation has finished.
After that, keep an eye on your developing wine. “If you see a significant amount [of lees] it’s time
to rack! It’s better to get it off,” she says.
“If you see a significant amount [of lees] it’s time to rack!
3. Cultivate Healthy Yeast: Choose Carefully and Treat it Right
Wine kits already contain a suitable yeast for fermenting, but with fresh grapes and pails of juice you’re faced with a multitude of yeast options. The wrong yeast choice could result in a stuck fermentation and the prospect of a sweet wine when you were making a dry. Poor yeast nutrition leads to off aromas. However, by following a couple of simple rules you’ll invoke yeast envy from hobby winemaking friends. First, choose a yeast that suits your grape variety and the style of wine you want to make. Secondly, feed it right.
Christina Musto again weighs in: “You really want to make sure that you choose the yeast that will bring out the flavors you want in the wine and that will enhance the wine as well as complete the fermentation fully,” says Musto. “It’s a way to almost guarantee that you have a full fermentation.”
Musto says there are a couple of things to look out for when you pick a yeast. “If you choose to go with a native fermentation and you source your grapes from different vineyards every year, each time you bring in grapes you’ll be bringing in different yeast strains. So each time you make wine you may have multiple yeast strains in the juice fighting over their food source, the sugar. By the time that battle ends, the survivors might be so depleted and their food source so scarce, they kind of cancel each other out and they will stop the fermentation.”
Which is why Musto prefers an inoculated fermentation. “So by killing the native yeasts with sulfite and then using a cultured yeast, there’s only one yeast fighting for that food so you should almost always, as long as the instructions are followed, get a complete primary fermentation,” she says.
For red grapes including Cabernet Sauvignon, Sangiovese, and Syrah, Lalvin D254 is one of her favorites. According to the strain’s manufacturer, Lallemand, this particular strain was isolated by the French enology laboratory the ICV (Institut Coopératif du Vin) from a Rhône Valley Syrah fermentation. It has an alcohol tolerance of up to 16%.
“It really brings out the great fruit flavors of the wine as well has having a little bit of earth to it. So you get the berry fruits coming out, but you also get mild spiciness,” says Musto.
“For whites I would suggest VIN13,” she says. Anchor Yeast’s VIN13 is an anchoring yeast that can reach alcohol levels of up to 16.5%. It was developed by the Department of Microbiology and Institute for Wine Biotechnology at the University of Stellenbosch in South Africa. “It’s a very rigorous fermenter and brings out some awesome aromatics, like really great floral and honeysuckle. That one’s really suggested for a lot of whites, like Sauvignon Blanc but also rosé wines,” she adds.
Sheridan Warrick, author of the book The Way to Make Wine: How to Craft Superb Table Wines at Home provides another yeast tip: Feed them the modern way. “Boning up — just a bit — on the fine points of yeast nutrition can help you make wine as delicious as the pros make,” says Warrick.
He outlines three steps:
1) Measuring your grapes’ nitrogen content. Also known as “yeast available nitrogen” (aka YAN), Warrick says the way to measure this is to send a sample of the raw juice to a commercial enology lab, such as Gusmer Enterprises, Enartis, or My Enologist. (Ask for the “juice panel.”) “They’ll email results within a day,” he adds. “A YAN reading below 150 parts per million suggests adding yeast nutrient.
2) Give your packaged yeast a strong start with a rehydration nutrient such as Scott Labs Go-Ferm.
3) Add a carefully measured dose of yeast nutrient (e.g. Lallemand’s Fermaid K) when the Brix has fallen by 1/3. “A safe approach (assuming you’ve used a yeast rehydration nutrient) is to add 1 gram of Fermaid K per gallon of must or juice when the fermentation is in high gear.
Warrick recommends Scott Laboratories’ yeast nutrients FAQ (http://www.scottlab.com/products-105.aspx) as a good place to continue your yeast education.
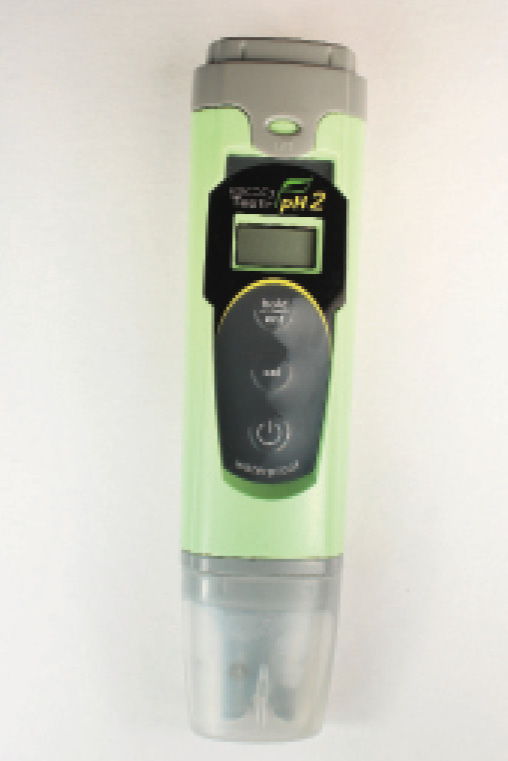
4. License to Calibrate: Know your pH Meter
Acid is such an important contributor to a wine’s flavor, potential longevity and its ability to deal with microbial issues. So it makes sense that regularly calibrating your pH meter to ensure accurate readings from harvest time through to the end of the winemaking is a must (get it?).
Sheridan Warrick, author of the book The Way to Make Wine: How to Craft Superb Table Wines at Home says you should be sure to calibrate your pH meter before each use. “A wine’s pH is its ‘effective acidity,’” he explains. “That measure is an important gauge of your grapes’ initial ripeness. It shows you whether your wine will be tart and harsh, flat and drab, or exactly right — smooth, balanced, and stable. And it governs the potency of any sulfite you add along the way, helping guarantee that your wine will be long-lived.”
Warwick says calibration of a pH meter is a simple, two-step process and the pH meter and calibration solutions (called buffers) are easy to find. Ask for them at your local home winemaking shop.
Christina Musto, head of Business Development and Vineyard Relations at Musto Wine Grape Company in Hartford, Connecticut (see bio on facing page) is equally adamant about the importance of recalibrating before every use and describes how to do it: “Use the calibrating solution and there is a little screw on the side of the pH meter that you turn until you reach the number on the calibration liquid,” she says. “And you do this twice – once with the 7.01 solution and once for that 4.01 solution.” The solution is certified to have that pH so you can check that the pH is going to measure correctly.
“Please remember that the pH meter must ALWAYS be kept wet — aka stored in the storage solution,” adds Musto.
5. Overcome Oxygen
Oxidation is a big bogeyman for the hobby winemaker. Once fermentation is over (which provides a natural protection from oxidation by creating CO2), there are many points during the rest of the winemaking process when oxygen can impact the wine so one technique won’t be enough to completely stop it. Use any of these three techniques and you’ll be significantly reducing the threat of oxidation. If you use all of them you’ll just about bullet proof your wine against O2.
Olin Schultz, Owner and Founder of MoreWine! and Olin Wines, says that eliminating oxygen from wine storage containers, and stopping the wines’ exposure to oxygen overall, as the most essential aspect of winemaking. “I have seen more wine ruined through oxidation than any other mistake that could be made,” says Schultz. “Sometimes a higher level of oxygen exposure doesn’t ruin a wine but it will rob the wine of depth and fruit characteristics.”
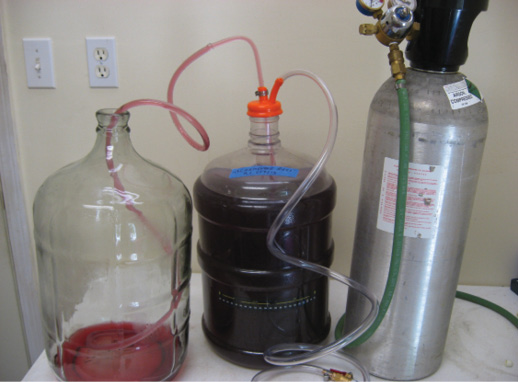
The MoreWine! Founder says flushing storage containers with argon or nitrogen before filling (pictured left) will greatly reduce oxidation. “Flush from the lowest point in your tank and in a horizontal direction to the tank bottom or wine surface.” He says to help reduce turbulation set your regulator at a very low level. “Argon is heavier than air so if it is allowed to disperse without turbulation it will slowly rise, pushing out most of the oxygen,” explains Schultz. “To know when a tank is flushed hold a lighter over the opening at the top of your container. When the flame is blown out by the rising argon level you are done.”
He says a tee made from stainless steel pipe fittings is something they regard as an essential tool for flushing partially filled tanks. “The tee is attached to a gas line and lowered to the level of the wine so that argon can be dispersed calmly onto the surface,” says Schultz.
For flushing from the top in a tank filled with wine, something as simple as a stainless steel, ?-inch Female Pipe Thread ($4.99) and a stainless steel barb (also $4.99) along with tubing (about 84 cents per foot) and a gas regulator (at $75). An argon tank is available at your local gas supplier.
WineMaker’s “Wine Wizard” columnist and winemaker for Plata Wine Partners, Alison Crowe (see bio at the top of this page) adds that maintaining fully topped up containers of wine is the cheapest and easiest way to exclude air. “So if you have two barrels of wine and few carboys,” says Crowe, “those carboys are going to be your topping up sources.”
“To do that properly,” she adds, “you have to keep around a nice assortment of vessels of varying size and that is what the commercial wineries do. And that’s the cheapest, easiest way to do it.”
6. Sulfur Dioxide: Don’t Stop ‘Til You Get Enough
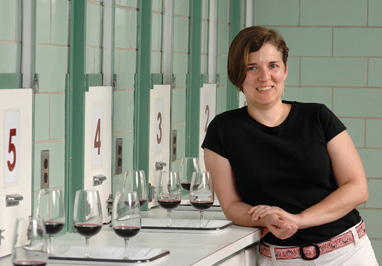
Alison Crowe, Winemaker for Plata Wine Partners, says maintaining proper free SO2 levels during bulk storage is critical. She explains two methods.
“If you have the equipment to do it yourself at home that’s great (see photo on facing page). You can buy, for about $200, the set-up to do what’s called an AO or aeration-oxidation titration for free SO2,” says Crowe. “Or, you can send some wine samples out to a wine lab to get a measurement.”
Costs for sending to lab vary, depending on how many samples and how far you are shipping but you’d be looking at about $30 says Alison.
Once the free SO2 is taken care of, the next thing, she says, is being able to accurately calculate the level of sulfur dioxide you want in your wine. “Usually home winemakers are using Campden tablets or measuring out potassium metabisulfite,” she says. “I have a calculation in my book (The Winemaker’s Answer Book), depending on what method you’re using. Sometimes you can use an aqueous SO2 solution as well — that’s what a lot of wineries use just for convenience — but you really just need to know how much SO2 you have and how much do you need to add to maintain, let’s say a red wine, between 28 and 32 ppm. If you have a high pH wine you’re going to add more.”
Until you bottle your homemade wines, Crowe recommends checking the SO2 levels of the wine each month. The ideal time is when you are topping up the carboy or barrel.