Monitoring Your Wine: What to test for and when
When it comes to analytical data on their wine, hobbyists show a wide range of interest. I’ve had people tell me that they don’t do any testing because “Great Grandfather didn’t do any testing and his wine came out just fine.” So they feel compelled to make wine in the same fashion. On the other hand, I have helped set up fairly sophisticated small laboratories and, often, referred winemakers to a commercial wine lab for specific tests. This column represents something like a middle position. For each stage of winemaking I will recommend specific analytical testing and give options for extended testing.
Just about any home winemaker can set up a lab corner in the wine cellar for basic testing. There are simple, cost-effective instruments that allow a reasonable level of accuracy and precision. For those with the interest and aptitude, there are more expensive techniques available for more advanced home testing. Beyond that level, unless you are pursuing wine analysis as a hobby of its own, I recommend submitting a sample to a commercial or university lab.
Some wine stages apply to any project, but you may not need to consider all of the possibilities for your next wine. If growing your own grapes or they are sourced locally, pre-harvest testing applies. For any fresh grapes, harvest day (or grape pickup day) testing is next. Regardless of fruit source, testing during primary fermentation and at the end of primary are important. Progress of any secondary fermentation follows, then bulk-aging, blending, and bottling.
Pre-Harvest
Some tests here can easily be carried out by the home grower or, if you are allowed access to the vineyard, a grape buyer. First and foremost is measuring the rise of Brix (percent sugar by weight) in the juice as harvest day approaches. A simple optical refractometer can be used directly in the vineyard. I like to sample an individual berry from at least three vines per row, squeeze the juice onto the prism, and note and record the Brix. Back in the house, I do the arithmetic to get an average for that day in the vineyard. Alternatively, you can pick berries from different vines (up to 100 grapes or so), put them in a zipper plastic bag, and pop the berries with your fingers. Knead the bag to mix the juice and drizzle a small sample on the refractometer’s prism. That same prep method can be used for the other early tests. Once sugar is near your picking decision, measure pH and TA (titratable acidity). A variety of reliable sources can guide you as to good values for your grapes (such as the article “Harvest and Beyond” by Wes Hagen or in his Guide to Growing Grapes). A portable pH meter can be under $50 and a good laboratory-grade model is $250 or so. The little Country Wines TA kit is under $15 and you can enhance its performance with that pH meter you just bought. (Go ahead and use the indicator as usual, but verify the pH 8.2 endpoint with your meter.) Those three tests — Brix, pH, and TA — should be enough to make a harvest date decision.
Harvest/Pickup day
Once you have your fruit in hand, the next step is to grab a sample for some more testing. (Kit wines do not usually need testing as any required adjustments have already been made by the manufacturer. Frozen must on the other hand will often benefit from testing.) With fresh grapes, as they go through the crusher into a tub or bin, push a plastic beaker or cup down into the must and collect some juice. I like to do this early with red grapes because the TA test uses a color indicator making pale juice easier to test than dark red juice from soaking. A well-mixed sample after soaking will provide more comprehensive information, but the early sample is usually good enough to let me know if adjustments will be needed. About 100 mL (4 oz.) is enough for either home testing or sending out to a lab. At home, you can do pH and TA as previously described. For Brix, go ahead and check with your refractometer to see how representative your vineyard testing was. For the rest of fermentation, measure Brix with a hydrometer. Even though the initial value may not be the same as your refractometer, use the hydrometer value to monitor fermentation. The values from the two instruments likely differ because they are based on entirely different principles for estimating sugar levels in juice. The refractometer measures the degree of refraction of light caused by the presence of dissolved solids, compares that to a “zero” level of pure water, and displays the result as though all of the refraction is caused by dissolved sucrose — a pretty close approximation. The hydrometer displays the difference in density of the sample compared with pure water — again a pretty close approximation to dissolved sugar, but not exactly the same thing. Once alcohol is present in the fermentation, it will confound the refractometer, so you will need to use the hydrometer anyway. Take that reading as your baseline.
For many winemakers, these three numbers are enough. For complete management of your fermentation, though, there are a few more worthwhile data points. Of these, I find nutrient information most useful. If you know how much nitrogen is available to your yeast and you look up the nitrogen demand of your chosen strain, you can fine-tune your nutrient additions to avoid off-odors while not leaving residual nutrient to support later spoilage organisms. Yeast use nitrogen in the form of ammonia and certain amino acids called “primary amino acids.” There is not much out there yet for home testing these components so I submit a sample to a nearby commercial wine laboratory (I use ETS in Healdsburg, California, not far from where I live near Petaluma in Sonoma County). Names for the tests vary, but at harvest time any lab will understand what test you want. Try asking for YAN or Yeast Assimilable Nitrogen or YANC, Yeast Assimilable Nitrogen Compounds. ETS set me up with an account and simply bills my charges to a credit card. If you don’t have commercial wine laboratories in your region, there may be a university enology department or county extension agent that will help you with testing. Alternatively, you can freeze and mail a juice sample to one of the many labs in wine country.
On the subject of lab-based testing, you may want to check a few more things. If you have had trouble with high acid/high pH conditions with your grapes, you may have elevated levels of potassium in the juice. Commercial wine labs can test for potassium (K+) content. For more about the effects of high potassium on the pH/TA relationship, see my article “The Relationship of pH and Acid in Winemaking” or in the October-November 2014 issue. And speaking of acid, if you want complete information to guide your malolactic fermentation, you may want to ask the lab to test for malic acid and lactic acid in the juice.
While fermenting
Every day, measure the temperature. Every one or two days, measure the Brix with your hydrometer to verify that sugar continues to drop and the fermentation is not stalling out on you.
End of fermentation
While techniques vary, I like to verify that sugar is at or below zero °Brix to press off red wine, initiate malolactic fermentation, or rack and sulfite whites and rosés. If doing malolactic fermentation, this is the point at which you can get a “starting” value of malic acid and lactic acid if you did not do that on the juice. Since you now have wine, you can use a paper chromatography kit (less than $100) to estimate these acids.
In secondary fermentation
A couple of weeks after inoculating with malolactic bacteria, test for malic and lactic acid. If you use the paper chromatography kit, completion of malolactic fermentation is indicated by an absent malic acid spot and a bright lactic acid spot. If you send the sample out, look for a malic acid level below about 50 mg/L or ppm. Having verified completion, check your pH and TA again. If TA has dropped below your desired level, you can still add tartaric acid. After any acid addition, check the pH again to manage your sulfite additions with guidance from a source like the sulfite calculator at winemakermag.com. This stage is also a good time to check residual sugar and alcohol. A low level of residual sugar, usually designated as glucose + fructose in wine testing, indicates complete fermentation (to dryness). While definitions vary a bit, I consider wine with a final glucose + fructose number of less than 0.4 g/100 mL (4 g/L) to be completely dry and not at risk for spontaneous refermentation by residual yeast. Note that this test is performed by an enzymatic method in a lab; it is impossible to determine such a low level with any hydrometer — even a “precision” hydrometer — because the lower density alcohol confounds the higher density dissolved solids, including sugar. If you do send that sample out, you can also ask for ABV (alcohol by volume) for complete label accuracy or just because you are curious. There is no simple, low-cost method for accurate measurement of alcohol at home.
In bulk aging
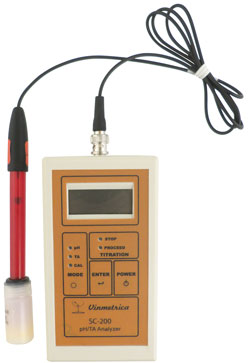
Time to add another test to our list: Free sulfur dioxide or free SO2. Test your wine soon after your initial addition and again at least every couple of months. I like to add sulfite monthly and run free SO2 tests a couple of days after every other addition. Free SO2 testing goes hand-in-hand with pH; the lower the pH of the wine, the lower free SO2 levels are required and vice-versa. While little titrets are available for home testing, they are only recommended for white wine. A home aeration oxidation kit is a bit cumbersome, but works fine ($100–$200). More convenient are the amperometric instruments from Vinmetrica ($250–$500). You may also want to run a total SO2 test, although allowable levels are generally so high that only free sulfite comes into play. Besides the home tests, your local (or remote) commercial or university laboratory can run these tests, also.
Blending and Bottling
To make decisions about fining, blending, sweetening or other alterations, bench trials are very useful. You can learn more about those in references like Jon Iverson’s Home Winemaking Step by Step or my article “Performing Bench Trials” (found in the October-November 2013 issue). Commercial laboratories can do bench trials for you as well, but they are prohibitively expensive for most home winemakers. Before bottling, check free sulfur dioxide one more time to make sure you will bottle sound, stable wine with a long shelf-life ahead of it. Your testing cycle for that wine is done — now just enjoy drinking it with friends and family!


