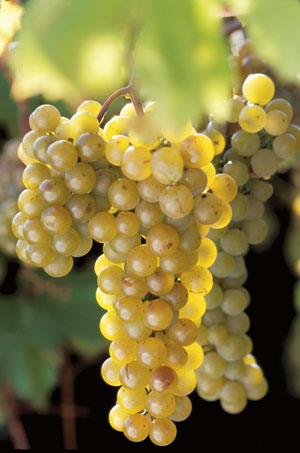
 In this issue we look at the white grape La Crescent and how it came to be as one of the most cold hardy grapes grown in North America.
The story of La Crescent’s origins is one of necessity. Grapes grow on every continent on earth except Antarctica and in the 5,000 or so years humans have been making wine, I’m sure we have tried to grow just about every grape possible, some tries successful, some not so successful. The biggest grapevine success in the winemaking world was the discovery of Vitis vinifera. Over the years the best vinifera varieties were selected for their ability to produce fruit with balanced flavors and acidities.
Many European immigrants brought their favorite vinifera grapevines with them when they came to America. For those settling in more temperate regions along the coasts, vinifera plantings proved to be relatively successful, aside from the challenges from native pests like Phylloxera and local fungus pressures. In the northern interior of the continent, however, vinifera varieties could not survive the winter without extraordinary physical efforts. To overcome the challenge of cold weather, wine growers turned to the same breeding programs that were established to deal with pest resistance to develop grapes with cold hardiness.
The growing season in the Upper Midwest, where La Crescent was developed to grow, is generally short — June to September. With such a short season, the ability for grapes to fully mature is important. Also, the long, cold winters can kill the dormant vines unless they are physically protected. V. vinifera varieties will die if temperatures fall below -3 °F (-19 °C), whereas varieties with V. riparia can survive prolonged periods as low as -30 °F (-34 °C). In terms of cold tolerance, V. riparia hybrids are more tolerant than V. labrusca types, which are more tolerant the classic French-American hybrids, and V. vinifera are the least cold tolerant. V. vinifera does well in France because the growing regions are temperate, and while they can be cold in the winter, they do not experience the winter conditions of the northern latitudes of North America.
Before the recent infusion of cold hardy hybrids, growers in these climates used physical means of protecting the vines, such as burying the vines in winter. The vines are laid down and the vineyard soil is scraped over the top of them to act as an insulating blanket. In the spring, the vines are uncovered and retrained on the trellis. Growers on the western slopes of the Colorado Rockies will often plant two vines per position and train in a mono-cordon in opposite directions. In this case, if one vine died the surviving vine could be trained to replace the dead vine until a new vine could establish itself.
Thankfully, the University of Minnesota maintains a grape breeding program that has released many cold-tolerant varieties in recent years (see this article for more information). In the same manner that grapes are bred for disease resistance, this program works to develop varieties that will survive Minnesota-like winters. The screening process is fairly straightforward: seedlings are started in the greenhouse then transferred to a research vineyard. If the vines don’t survive the first winter, they have been naturally culled. The U of M program also looks for the grape’s ability to be made in to a wine — not to mention if a little disease resistance is thrown in you have a good package to work with as a winegrower and winemaker. The successes of this breeding program have resulted in double the number of growers in Minnesota since 2002. In 2002 there were 200 acres of grapes planted in the state, which had increased to 1,500 acres by 2010. In 2009, Minnesota produced about 114,000 gallons of wine in 2009.
La Crescent, originally known as MN1166 during its breeding trial time, was first selected for in 1992 and was released in 2002. It was bred by Jim Luby and Peter Hemsted and is a hybrid of St. Pepin and the hybrid V. riparia X Muscat Hamburg. Elmer Swenson, a longtime grape breeder in Minnesota, produced both of these hybrids. St. Pepin (Seyval Blanc X Minnesota 78) makes up fifty percent of its overall parentage. Wines from St. Pepin are said to have a Riesling-like quality, and it makes for a good table grape as well. St. Pepin is a pistillate female, which means that it does not self-pollinate and must be planted near its male counterpart in order to achieve pollination. The other parent, V. riparia X Muscat Hamburg was not patented and only used as breeding stock for La Crescent. The aforementioned cold hardy native American grape V. riparia lends La Crescent its ability to tolerate temperatures as low as -34 °F (-36 °C). The characteristics from Muscat Hamburg (also known as Black Muscat) give it aromatic qualities, resulting in wines that, when made in a Germanic style, are quite well received.
La Crescent is a vigorous variety. For example, a 2003 study revealed an eight-foot (2.4-m)-long cordon after five years. Budbreak is early, lending some vulnerability of the young green tissue to spring frost. The clusters are loose, and there are some reports that fruit set can be a problem. It ripens with sugars ranging from 22 to 27 °Brix. It is also susceptible to black rot, downy mildew and crown gall. The two former conditions require that any La Crescent grower needs to maintain a good fungal spray program. Crown gall is a disease caused by the bacterium Agrobacterium vitis, formerly known as Agrobacterium tumefaciens, that can cause girdling of vines and reduced vigor and yield. Agrobacterium tumefaciens is known worldwide to cause crown gall in many other plant species, but the species that infects grapevines is specific, thus the change in name. Crown gall is introduced in to the vines via wounds caused by freeze damage or through some other wound such as a pruning wound or tractor blight.
Every grapevine’s cold-climate tolerance is also dictated by the previous season’s disease control program, cropping level and the physical conditions in the vineyard, including the duration of cold temperatures, snow cover and exposure. South facing and elevated sites are the better choice for growing La Crescent as they allow for good airflow to minimize the risk for late spring or early fall frosts. Depending on exposure, east and west facing slopes will work, but avoid north facing slopes as the reduced sunlight exposure will delay ripening.
La Crescent is naturally high in acidity because of the limited growing season in these cold climates. Acidity levels of 12 to 14 g/L are not uncommon. It also is able to achieve high sugar levels in the 25 to 26 °Brix range, which is pretty high for such a short ripening season. The grape is described as being rich in flavors like apricot, tangerine, lime, tropical and herbal notes and is reported to not taste “foxy” as many North American hybrids are described.
Enologically, the best wines made from La Crescent are sweet or semi-sweet where the sugar balances out the high acidity. The pH values for wines, as reported by the University of Minnesota, average 3.05 and those reported by the Iowa State University average 3.00. Fermentation should be accomplished with an aromatic yeast variety such as Lallemand QA23, which is not very finicky when it comes to nitrogen requirements.
Fermentation temperatures should be low, 55 to 58 °F (13 to 14 °C) to take advantage of QA23’s ability to form esters. This fermentation can take up to four weeks but is well worth waiting for. Balancing the wine for the right acid-sugar balance depends on your scale of operation; if you have good temperature control and filtration equipment you can arrest the fermentation at your desired sweetness by lowering the temperature to less than 40 °F (4 °C), adding 50 to 75 parts per million of sulfur dioxide. Keep in mind that the fermentation won’t completely stop, but will only slow. Watch for the yeast to start to settle out, then perform one or several filtration steps to a final filtration through at least a 0.45 micron membrane filter (however sterile filtering would be recommended if you are not bottling under sterile conditions as 0.45 micron will not guarantee that a re-fermentation will not occur). For home winemakers, this balance may be best achieved by reserving some of the juice at the beginning of the fermentation, fermenting the remaining juice dry, and then adding back the reserved juice to taste. In any event, these sweet wines will need to be filtered — possibly sterile filtered (especially if you have added a sweet reserve) prior to bottling to prevent re-fermentation in the bottle.
La Crescent is a new horizon to high-latitude winemakers where options to grow grapes are limited. This relative newcomer is one of the latest in the millennia of grape history to be developed and brought to the table as a promising change to local growers and winemakers. It is gaining popularity in the high latitudes of North America with excellent wine examples coming from Minnesota, Wisconsin, Michigan and Vermont. Hopefully if you live where it is cold, you will give La Crescent a chance!
La Crescent Recipe
(yield: 5 gal/19 L)
This recipe assumes that the winemaker has a general knowledge of winemaking and sanitation. References to brands or trade names mentioned in this article do not constitute endorsement of the product by the writer.
Ingredients
• 125 lbs. (57 kg) La Crescent fruit or 6 gallons (23 L) commercially available juice (settled and racked). If you are using fresh juice, skip to step 4. If your juice is not racked and settled, go to step 2. This recipe is for a sweet style, absent of malolactic fermentation.
• Distilled water
• 10% potassium metabisulfite (KMBS) solution: weigh 10 grams of KMBS, dissolve into about 75 milliliters (mL) of distilled water. When completely dissolved, make up to 100 mL total with distilled water.
• 5 grams Lallemand QA23 yeast (Premier Cuvee is a good substitute)
• 5 grams Fermaid K (or equivalent yeast nutrient)
• 5 grams Di-ammonium Phosphate (DAP)
• Potassium sorbate (at bottling)
Other equipment or needs specific to this recipe
• 5-gallon (19-L) carboy
• 6-gallon (23-L) carboy
• 6-gallon (23-L) plastic bucket
• 1-gallon (3.8-L) plastic jug
• Airlock/stopper
• Racking hoses
• Equipment cleaning and sanitizing agents (Bio-Clean, Bio-San)
• Inert gas (nitrogen, argon or carbon dioxide will do)
• Refrigerator (~45 °F/7 °C) to cold settle the juice. (Remove the shelves so that the bucket will fit. Many home refrigerators are too cold, so be sure to take a temperature reading first. If yours is too cold, find another cool locale to cold settle the juice.)
• Ability to maintain a fermentation temperature of 55 °F (13 °C) TIP: Use a 33-gallon (125-L) plastic can as a water bath. Place ice blocks in the water to maintain a relatively constant cool temperature for peak fermentation. TIP: you may have a need to keep it warm, in this case wrapping the bucket/carboy with an electric carboy wrap (available at most home winemaking outlets) works well.
• Thermometer capable of measuring between 40–110 °F (4–43 °C) in one degree increments.
• Pipettes with the ability to add in increments of 1 milliliter.
• Clinitest® tablets to measure residual sugar at the completion of fermentation.
• Ability to test or have testing performed for sulfur dioxide.
Step by step
1. Clean and sanitize your winemaking equipment and winery surfaces.
2. Crush and press the grapes. Do not delay between crushing and pressing. Move the must directly to the press and press lightly to avoid extended contact with the skins and seeds.
3. Transfer the juice to a 6-gallon (23-L) bucket. During the transfer, add 16 milliliters of 10% KMBS solution (This addition is the equivalent of 40 mg/L ppm SO2). Move the juice to the refrigerator or cool spot you used to settle the juice (see note above). Any extra juice (approx. 1–2 gallons/3.8–7.6 L) – transfer to 1-gallon (3.8-L) plastic jugs and settle as with the main lot of juice.
4. Let the juice settle at least overnight. Layer the headspace with inert gas and keep covered.
5. Measure the Brix both after the juice is racked and again when it reaches hydrometer calibration temperature. Record your results. Higher Brix will produce higher alcohol wines and since this is a sweet wine recipe, you may need more fresh juice to balance the alcohol and acidity.
6. When sufficiently settled, rack the juice off of the solids into the 6-gallon (23-L) carboy.
7. Rack the juice in the plastic jugs off the solids, return to the jugs and freeze. Be sure to leave headspace to allow the juice to expand when frozen.
8. Prepare yeast (QA-23). Heat about 50 mL distilled water to 108 °F (42 °C). Measure the temperature. Pitch the yeast when the suspension is 104 °F (40 °C). Sprinkle the yeast on the surface and gently mix so that no clumps exist. Let sit for 15 minutes undisturbed. Measure the temperature of the yeast suspension. Measure the temperature of the juice. You do not want to add the yeast to your cool juice if the temperature of the yeast and the must temperature difference exceeds 15 °F(8 °C). To avoid temperature shock, acclimate your yeast by taking about 10 mL of the juice and adding it to the yeast suspension. Wait 15 minutes and measure the temperature again. Do this until you are within the specified temperature range. Do not let the yeast sit in the original water suspension for longer than 20 minutes. When the yeast is ready, add it to the fermenter.
9. Add Fermaid K or an equivalent yeast nutrient.
10. Initiate the fermentation at room temperature (~65–68 °F/18–20 °C) and once fermentation is noticed, (~24 hours) move to a location where the temperature can be maintained at 55 °F (13 °C).
11. Two days after fermentation starts, dissolve the DAP in as little distilled water required to completely go into solution (usually ~ 20 mL). Add directly to the carboy.
12. Normally you would monitor the progress of the fermentation by measuring Brix. One of the biggest problems with making white wine at home is maintaining a clean fermentation. Entering the carboy to measure the sugar is a prime way to infect the fermentation with undesirable microbes. So at this point, the presence of noticeable fermentation is good enough. If your airlock becomes dirty by foaming over, remove it, clean it and replace as quickly and cleanly as possible. Sanitize anything that will come in contact with the juice.
13. Leave alone until bubbles in the airlock are about one bubble per minute. Usually about two to three weeks, then measure the Brix every two to three days.
14. The wine is considered dry, or nearly dry when the Brix reaches -1.5 °Brix or less. Measure the residual sugar using the Clinitest®. When the result is less than 0.5%, add 3 mL of fresh KMBS (10%) solution per gallon of wine. This is the equivalent to ~40 ppm addition. Transfer the wine to the five gallon carboy and lower the temperature to 38–40 °F (3–4 °C).
15. After two weeks, test for pH and SO2 adjust as necessary to attain 0.8 ppm molecular SO2. (There is a simple SO2 calculator on the Web at www.winemakermag.com/guide/sulfite). Check the SO2 in another two weeks, prior to the next racking and adjust while racking. HINT: Rack to another sanitized 5-gallon (19-L) carboy, or your bucket. In the case of the latter, clean the original carboy and transfer the wine back to it. This is done at about 4-6 weeks after the first SO2 addition. Once the free SO2 is adjusted, maintain at the target level by monitoring every three to four weeks.
16. Taste the wine. The style here is to ferment the juice to dryness and then determine the degree of sweetness needed to balance the acidity and alcohol.
17. Thaw the juice. Perform bench trials, adding small amounts of the juice to fixed volumes of the wine to determine the best balance in the wine.
18. Blend the juice and the wine as determined in the previous step.
19. Consult winemakermag.com for tips on fining and filtration. Add 2 to 4 g of potassium sorbate and double check your SO2 level to prevent refermentation in the bottle.
20. At about three months you are ready to bottle. Be sure to maintain sanitary conditions while bottling. Once bottled, you’ll need to periodically check your work by opening a bottle to enjoy with friends.


