Maintaining Fermentation Temperatures
When Ray Charles and Betty Carter sang the definitive version of Frank Loesser’s song “Baby, It’s Cold Outside,” it’s a pretty sure bet that home winemaking was the last thing on their minds. It’s a pity, because temperature control for kit winemaking is deucedly important, but it’s one of those things that never gets the attention it deserves, like international monetary policy, or when those jet packs and vacations on the moon I was promised back in grade school are going to get here. The bottom line is that most people make their kit wines too cold — far too cold — which leads to a large number of immediate concerns and downstream processing problems for the kit.
So why do they do it? There’s lots of blame to go around: partly it’s a misunderstanding of how wine kits perform best (that’s my fault for not explaining it better), partly it’s marketing pieces that trumpet the benefits of “cold-fermented in stainless steel,” or other such advertising-speak, and finally it’s because some people won’t read or obey instructions (hah, bet you wondered when I’d get around to blaming the customer!)
While it’s true that some white wines benefit from cool fermentation, that’s a very small percentage of wines that are made. The idea behind keeping it cool is that the very most delicate and volatile aromas (from very low-weight molecular compounds) which contribute that top 1% of the aromatic nose of a wine can be blown off of a fermentation that is too vigorous or too warm. But this only applies to grapes that have been picked cold, transported cold, crushed cold, and kept cold at every single step of the way. Let it warm up for even a short time and those low-weight molecular compounds are simply gone.
Consider a wine kit for a moment. The fruit is picked cold, of course: hot grapes oxidize quickly and the juice spoils. Pressed cold, sure — nobody heats a press or puts it anywhere but in the shade. Also pumped, transported and blended cold, as this keeps down spoilage at every step of the way. But at some point the juice is going to go through a pasteurizer and hit 160 °F (75 °C) before being cooled back down for packaging. You can see where this breaks down the whole cold-alla-time ideal.

Greasy yeasty
With that negation of the low-weight molecular compounds, not only are there no benefits to cool fermentation, there are a lot of potential problems. Kits that are too cold at yeast pitching time, have a very slow onset of fermentation. This is because the dried yeast pitched into the must has to soak up some liquid and soften up before it can go to work. This allows the yeast’s integument (outer skin) freer passage of nutrients and sugar in, while waste products, like alcohol and carbon dioxide, out.
Think of the integument like a complex balloon of layered fatty-acid esters. It more-or-less resembles a bubble of grease with the living machinery of the cell inside. It sounds weird, making a living organism out of grease, but if you ate Mennonite food like I did for the first half of my life, you’d see how it’s possible. It all makes sense on a microscopic level, where the surface tension on a teeny-tiny grease droplet is so intense it’s actually as strong as steel.
But it’s still grease. Soak your bacon platter in cold water and I don’t care how much dishwashing liquid you use: your dishes will still be coated in a solid greasy layer. But switch to warm water, and the grease will soften and slough off. Same deal with yeast cells. Warmer must = softer outer integument, and a more rapid exchange of nutrients and waste products and a quick start to breeding.
There are some folks who like to re-hydrate their yeast before use. Theoretically this has benefits — only, however, if you do it exactly according to the instructions, and use water at 100 °F (~40 °C). This really softens up the yeast. The drawback is that you have to acclimate the yeast to the must temperature. If you pitch 100 °F (~40 °C) yeast slurry into 65 °F (18 °C) must the temperature sheer will kill most of the yeast immediately. And then the yeast metabolism will slow right down, due to the chilly conditions. Dry pitching is fast, safe and easy.
Getting a quick start and breeding as rapidly as possible has many benefits, not least of which is the greedy-jerk factor: by rapidly breeding the yeast tie up all the nutrients and resources necessary to complete cell-wall synthesis and new cell production. This form of competitive exclusion ensures that other organisms, which could invade the wine and ruin it, are left without a food source. Warm, happy yeast are kind of like those really big guys ahead of you in the buffet line. You can pretty much kiss that plate of shrimp goodbye!

Another effect of increased speed of onset of fermentation is that the sooner the yeast start producing ethanol, the sooner the wine is protected by the sanitizing power of that alcohol, and a fast onset can ensure a thorough fermentation that doesn’t leave any sugars or nutrients for other organisms to spoil the wine post-fermentation.
Giving you gas
Low temperature fermentations run a risk of slowing or stopping altogether. Yeast is a living organism — when cold, it metabolizes much more slowly. This is why we store food in a refrigerator: at cold temperatures the organisms that can consume the nutrients in food are slowed down so that they cannot spoil it before we use it. Keep yeast too cool for too long and they can go dormant or even die, leaving a wine with residual sugar and a stuck fermentation.
Plus, colder fermentation temperatures contribute to the retention of carbon dioxide gas in solution. As the yeast metabolize the sugar, they don’t just produce alcohol, they also make a lot of carbon dioxide. But they let it go in extremely small amounts at a time, and certainly not in a bubble big enough to see. In fact, that bubble in your airlock is the combined effort of tens of millions of yeast cells, and it’s not until the wine is totally saturated with microscopic bubbles of CO2 that it begins to fizz out of solution.
And one quirk of CO2 saturation is that the colder a liquid solution is, the more gas it will hold. Think of two cans of soda, one buried in ice, the other in the back window of your car on a sunny day. Open both and the cold one barely hisses, but is powerfully fizzy when you take a slug. The hot soda foams madly when you open it, but it’s very nearly flat when you taste it — that’s the power of gas saturation and temperature!
This has a lot of downstream implications for clearing and flavor development. Gassy wines are difficult to clear (the finings keep getting lofted back into suspension by CO2 bubbles) and are often stinky because the CO2 also brings along fellow travellers, like a whiff of H2S (hydrogen sulphide, that rotten-egg smell). All fermentations produce a little H2S, but it’s normally blown off in the course of a warm, vigorous fermentation, and it easily gets trapped with the CO2. Pyew!
And it’s more difficult to stir a cold wine to degas as required by most kit instructions. You can stir a cold wine all day long and still harvest more gas bubbles, and you’ll still wind up with a little fizz when you go to bottle. Warm it up to an appropriate temperature and the living (and stirring and degassing) will be easy.
A number of astute readers (and by definition, if you’re reading this column you are very astute. Probably good looking to boot.) are going to ask, “If cold fermentations are so heinous, how do commercial wineries get away with it?” They get away with it because unlike you they’re making tens of thousands of gallons of wine at a time — so they’re not looking at an empty wine rack tapping their feet with thirst, and can wait until the wine finishes on its own time. And a lot of time is what it can take with some cold fermentations, taking months simply to finish before any additional processing (stabilizing and fining) can be attempted. Few kit winemakers have that luxury (or that large of an existing inventory to coast for four or five months, waiting for the fermentation to finish)!
Also, as I mentioned earlier, there aren’t that many extremely cold fermentations. Many red wines are allowed to rise up to 90 °F (32 °C) in order to extract more color and tannin from the skins and warm fermentations are necessary to a variety of styles of both red and white wines.
Measuring up
Now that we’re agreed that warmer is better, the first step for making sure you’ve got the right temperature is to get a thermometer. Most winemaking equipment kits include a food-grade floating thermometer in the standard box. These work fine, but are a little bit pokey, and being made of glass they are a bit fragile for some people. There are a variety of instant-read thermometers available for kitchen use that can be adapted, as long as the probe portion of the thermometer reaches far enough into the must. I have to confess that a deeply held gadget lust that guided my purchase of the ultimate winemaking thermometer: my digital infrared thermometer (pictured to the right). It’s one of those gadgets so much better, so profoundly improved over regular technology that it changes everything. It reads almost instantly, is incredibly accurate, and lets you survey multiple carboys in seconds. You can tell right away if your must is warm enough for pitching, or if you need to work on temperature regulating your fermenting area.
The one I use is the Reed ST-882. I got it for less than a hundred bucks from a lab supply company and it’s good from -58 to 1000 °F (-50 to 538 °C). It’s so incredibly useful that I tote it around and find things to point it at in my spare time. Got a fever? I can tell from across the room! Is that sugar syrup ready for peanut brittle? I can tell from the house next door! It even has an aiming laser that allows you to precisely focus on your intended target. Of course, that led me to name my thermometer “Goldfinger” in honor of villainous lasers everywhere. You may not wish to shell out that kind of dough for a techno-fetish, but whatever sort of thermometer you wind up with, the most important thing is that it gets used regularly.
Getting it right
What’s an appropriate temperature? The top of the range mentioned in your wine kit instruction set. Typically they list a range such as 65–75 °F (18–24 °C), so you want to shoot for 75 °F (24 °C) from pitching day to bottling day, to ensure you can get your kit finished in the correct time frame and properly clarified and degassed. The most crucial part of this will be the temperature of the must before you pitch the yeast. If it’s not warm enough, you’ll need to get it up to temperature before the rubber (yeast) hits the road (fermenter).
If you’ve already made the kit up and it’s too cold, the most important thing is to avoid adding the yeast until you get the temperature up to the right level. By far the quickest way to do this is to immerse the fermenter in a washtub or bathtub full of warm water, and monitor the temperature, stirring gently until it comes into range. It’s important not to leave the water running while you’re out of sight of the bucket: not only could it overflow, even worse the bucket could tip over in the rising water and you’ll have a Cabernet and soap scum blend!
If you can’t lift the primary fermenter into a tub you can put it in the warmest spot in the house and use a warming strategy: an electric blanket, a place by the fire or a small space heater gently directed at it. All of these things will work well, but have some risk: never, ever put the fermenter on top of an electrically heated pad or blanket. This can cause dangerous shorts, hot spots and even fires. Also, don’t leave it unattended by a fireplace or with a heater pointed at it — it could get too hot and the must could boil or the fermenter could even melt.
It helps to think of your wine as a helpless baby (please, no goo-goo talking to your wine). You wouldn’t leave any living thing unattended wrapped in an electric blanket, so don’t do it to your poor yeast! Keep stirring to distribute the heat and keep checking the temperature on a regular schedule to make sure it doesn’t overheat.
If you’re making up your kit and want to make sure it’s warm enough, the simplest strategy is to get part of your water additions from the hot water tap in your sink. This assumes that you’re using your own tap water to make up kits, a practice I normally recommend (read more about water in WineMaker’s February-March, 2008 “Wine Kits” column). It takes a bit of fiddling, stirring and temperature monitoring, but it does ensure instant temperature gratification.
If you’re using bottled or spring water you can heat up a portion of it to make up the must. Don’t heat it up to boiling — too much chance of overheating or even potentially cooking a portion of the must when you add it. Instead, blend a gallon (~L) of boiling water with a gallon (~L) of cool water and slowly add it to the must, stirring and checking the temperature as you go. It sounds a bit tedious on paper, but it goes quickly and easily in your winemaking area.
What to do once you’re there
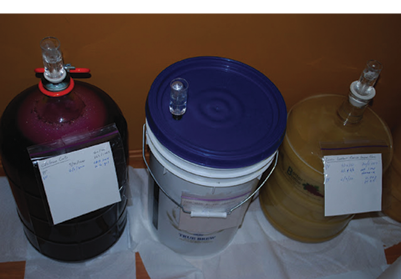
Maintaining the temperature of the fermentation is easier than you might think. Even in the small volumes of a 5-gallon/19-L fermentation vessel the metabolizing yeast create enough of their own heat to buffer against a slight chill. As long as the fermenter is in a reasonably warm place, within a couple of degrees of your target temperature, it should get along just fine.
What about a cool house? With increasing energy costs, very few people leave their homes at 70 °F (21 °C) during the day while they’re out — except perhaps those folks living in the scorching South who are cooling it to that level! But this article is about coming in from the cold, not retreating from the heat. If you do turn down the thermostat in the morning, you’ll need a strategy to keep your wine from icing over.
First, find the warmest room in your home. A handy tool for this is a min-max thermometer, commonly sold at gardening store and home centers. As the name suggests, it records the highest and lowest temperature of the sampling period. Put it in the room, come back in 24 hours, check it and reset it and you have your answer. With my min-max I found out that my pantry, next door to the hot water heater, stays at 75 °F (24 °C) year-round, making it a perfect place to dry herbs or ferment wine. Who needs a pantry anyway?
If you’re lucky enough to have zone-control over your house heat you can forget the min-max testing, arbitrarily pick a space and adapt it. If not, then there are very small fan-driven ceramic heating units available for less than $40. The elements in them never get hot enough to start a fire; they’re thermostatically controlled and use minimal amounts of electricity. They can keep a small room comfortably warm for very little cost. Just make sure to monitor your fermentation regularly until you’re certain that the temperature is stable and the room is neither too hot nor too warm.
If it’s only a single carboy and you don’t want to heat the whole room, or if you don’t mind spending money on even more gadgets, then you may wish to invest in the available fermentation temperature control devices. The simplest and least expensive of these is the Brew Belt. Looking like a blue plastic men’s belt (ah, the sartorial splendor of the 1970’s never dies) it slides around the carboy and plugs into the wall socket, maintaining a steady 70–72 °F (21–22 °C). While the manufacturer does not recommend using it with glass carboys, it works fine with all sorts of plastic. I’ve got a half-dozen in my winemaking drawer and wouldn’t leave home without them.
A bit fancier (and useful for glass carboys) is the FermWrap Heater, which looks like a sheet of MACtac with a power cord. It is safe for use on glass carboys, but you’ll have to figure out how to judge the temperature you can maintain with it through trial and error. Or not: there is a kit to go with it that includes a temperature probe and a digital controller that lets you dial in the desired temperature and then puts a computer in charge of maintaining it.
Now if only those FermWrap characters were working on my jet pack and my moon holiday! In the meantime, the most important thing is not to worry: a little thermometer work and a little warm water will take care of most of the temperature adjustments your wine will need, and when it’s cold outside . . .