Ferment What You Eat
Fermenting food is a simple, delicious, safe, and fun hobby that can be shared with the entire family, all while using equipment you most likely already have. I love the fact that my kids get involved in recipe designs, process, and enjoy eating the final product as much as I do.
After making fermented beverages for over two decades I decided to try fermented foods, which began with a focus on fermented pickles. Fermenting foods as a hobby quickly took hold of me and led to a wild journey full of fun and delicious non-alcohol snacks. There is much to discuss in this article, so let’s get to it!
Equipment Needed
As a home winemaker, it’s very likely you have most, if not all, of the equipment required to make the recipes I’ll be sharing in this article. Here is necessary equipment:
pH Meter: If you don’t own a digital pH meter then do yourself a favor and get one. They are not that expensive and you will use it all the time in fermented foods and making wine.

Scale: A scale that reads in grams for salt additions, ounces for spices, and pounds for vegetables is ideal.
Mason jars: 1,000- or 2,000-mL jars with calibrated markings to measure milliliters of water as a graduated cylinder.
Fermenter: 1-3 quart/L (I use 32-oz./950-mL) Mason jars with lids and rings.
Airlock: A lid loosely on the jar, or even covered with tinfoil will work. Or you can buy Mason jar lids with an airlock if you choose. Personally, I like to keep it simple with a lid that I screw on loosely enough that pressure can be released.
Weights: There are commercial glass weights that can be used to keep vegetables submerged under brine. Instead of buying them, I use the plastic can carrier tops often used with packaged craft beer 4-packs that are rated HDPE #2 (High Density Polyethylene) or rHDPE #2 (where the “r” stands for recycled). HDPE #2 plastic is safe for foods as they do not leach chemicals. The plastic 4-pack holders are the perfect size after cutting them into single can lids — getting four out of a carrier or into pairs getting two per carrier. Place the single lid on top of the vegetables then fold the double lid and place it on top. This will act like a spring on the jar keeping everything submerged under the brine.
Basic kitchen utensils: Pots, funnels, a sharp knife, cutting board, stove burner, blender.
What to Know Before Getting Started
Salt
Avoid using iodized salt as it can contain caking agents and less mineral content than other salts, which may delay your initial fermentation time and cause spoilage (though this is debated). I like to use kosher salt because it is cheap and available at any grocery store. However, branching out to exotic salts like pink Himalayan salt or sea salt from a specific location could be a fun addition.
Making a Brine
Brine is salt water, and the percentage (usually 1.5–3%) is the amount of salt in the water by weight. 1 mL of water weighs 1 g, so if you need 1,000 mL of brine at 2.5% the equation would be: 1,000 mL x 0.025 = 25 grams of salt needed. I used to just make a brine for my pickles and hot sauces, pack the jars, and top off with brine with great success; however, it is recommended to include the vegetable weight with the water weight. This will help ensure a uniform salinity at the desired percentage. To do this, simply pack the vegetables into your jar and record the weight, then fill with water just under the rim of the jar. Pour the water back into an empty calibrated jar to take a volume reading in milliliters. Add the water and vegetable weights for a total weight to base the salt percentage off of.
Pickling vs. Fermentation
Before we dive deeper into the subject, let’s just get these two terms cleared up. Pickling is when you submerge vegetables in vinegar, or a 50-50 ratio of vinegar-to-water, to lower the pH of the product. Fermentation in brine allows lactic acid bacteria (LAB) to ferment the product, which naturally lowers the pH. The flavors and products are similar, but noticeably different in character.
What Is Going on When Fermenting Foods?
No matter what fermented food you are making, the main process is to keep the vegetables under a brine in an anaerobic environment void of oxygen. The salt content is usually in the range of 1.5–3%, which fends off unwanted bacteria or molds, all while allowing the salt-tolerant LAB to colonize, thrive, and out-compete any unwanted pathogens. The salt also draws out water and sugars within the vegetables through osmosis, which the LAB consumes.
LAB is present in the air and on just about everything, including the vegetables that will be used in your fermented creation. There is no need to purchase LAB cultures, as it is abundant on the vegetables and is sufficient to start a natural fermentation. LAB mainly produces lactic acid, but can also produce other byproducts like acetic acid and ethanol alcohol. In the presence of oxygen, acetic acid bacteria (AAB) like Acetobacter will convert ethanol into acetic acid, like that found in vinegar. To prevent or minimize the production of acetic acid, keep the fermentation free of oxygen, keep a small head space to push out oxygen during fermentation remaining in a CO2 environment, and ensure that all vegetables are submerged in brine.
Leuconostoc mesenteroides starts the fermentation process and creates lactic acid, carbon dioxide, and ethanol as a byproduct. This is then followed by Lactobacillus brevis and a few other LAB strains as fermentation continues. If you add fruit to your fermentation, those sugars will accelerate fermentation and create ethanol alcohol. To calculate the ABV from the fruit additions, search grams of sugar per 100 g of the selected fruit and multiply by 4.536 to get points per gallon (PPG) for the fruit variety. Without adding fruit, the average ratio of lactic acid-to-ethanol produced during fermentation is 1.7:1 (g/g) and falls within 0.2-0.5% ABV. If you pasteurize the product, then any alcohol will be cooked out.
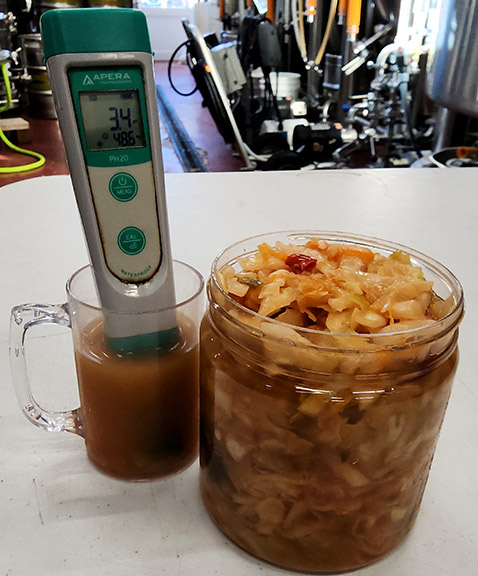
LAB-optimal fermentation temperature is at the common room temperature range of 60–70 °F (16–21 °C). The warmer the temperature in this range, the faster the reaction will be. As the LAB consumes the sugars in the vegetables it creates carbon dioxide and lactic acid, along with a minimal amount of ethanol alcohol. The lactic acid created by the LAB is responsible for dropping the pH down to around 3.3 pH. A pH of 4.6 is the safety threshold of acidic foods in regards to Clostridium botulinum and canning practices, however Cornell University states that fermented foods should have a pH of 4.0 or below to be considered safe to consume and shelf stable.
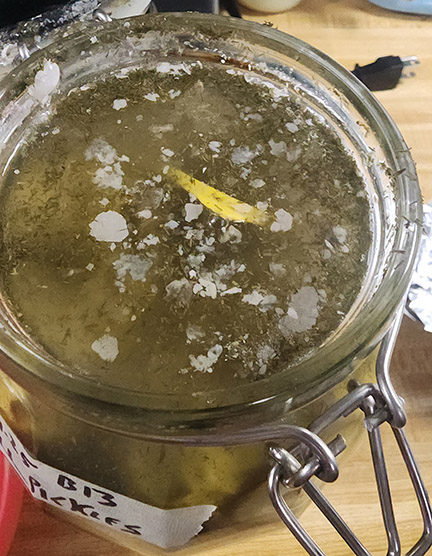
Kahm Yeast & Mold
After fermentation is completed, occasionally you will see a secondary white yeast film grown on top that closely resembles a Pediococcus pellicle called kahm yeast. The word “kahm” comes from the German word Kan, which originated from the Latin word cana that describes the greyish layer of dirt on wine. Kahm yeast is a mixed culture consisting mainly of Pichia, Debaryomyces, Mycoderma, Hansenula, and Candida. Kahm yeast may not look appealing but is safe to eat. I scrape the kahm yeast off the top and discard; however, you may also find it attached to pickles. When this happens, I eat with no concerns.
If your vegetables are exposed to the air and oxygen then you have a high potential for mold growth. Some unwanted molds include: Aspergillus, which has various colors of green and blue; Penicillium, which is furry and can be blue-green or yellowish-green; Mucor, which is furry white with a brownish-gray coloration; Neurospora crassa, which is a furry red bread mold, and Serratia marcescens is a pinkish red bacteria that is often mistaken for mold. It is said within the fermented foods community that you can discard the molded sections and eat the good stuff that lies underneath, but for me if there is mold I throw it all out and try again. No risk getting sick eating something you are unsure about.
Side note: As I mention colors of mold, it is worth noting that there is a chemical reaction that occurs with a sulfur compound called allicin within garlic that turns garlic blue-green when reacting to amino acids in acidic environments. This reaction is 100% safe and is not a health concern.
The best way to prevent kahm yeast and molds is to ensure your vegetables are submerged within the brine and void of oxygen.
Recipe Formulation
I find smaller batch sizes more practical than larger ones. Once your fermented food creations are at their prime you need to place the product in the refrigerator or a cool root cellar to drastically slow down, or stop, the fermentation process. This helps keep the products in their best condition in texture and flavor for a longer period of time and slows the process of creating over-fermented, mushy foods. The more you make, the more cold storage you will need if you don’t plan to throw a party and have it consumed quickly. I have found harmony in making batches of many fermented foods in 1–2 quarts (or liters) at a time every week or two to match our family’s supply and demand based on product. After a few batches you will find what best suits you and your needs.
When it comes to ingredients, it’s fairly simple as each product has a core base. Pickles use cucumbers, sauerkraut uses cabbage, and hot sauce uses peppers. You can keep it as is with base ingredients or add to it. Any other ingredients or spices are complementary to your product and can be added as you like. This is a great excuse to experiment and try different ingredients and dosing rates. While I still weigh everything out, you see a lot of recipes call for general estimates like a “dash,” a “fist full,” or a “few shakes” of a particular ingredient.
A note on sizing: To help with buying ingredients, I have found a one-quart Mason jar with a single and double lid weight from a 4-pack carrier can fit 2 pounds (0.9 kg) of vegetables for sauerkraut and about 1 pound (0.45 kg) for pickles and hot sauces depending on how small you cut the vegetables and how tight you pack the jar.
Pickles
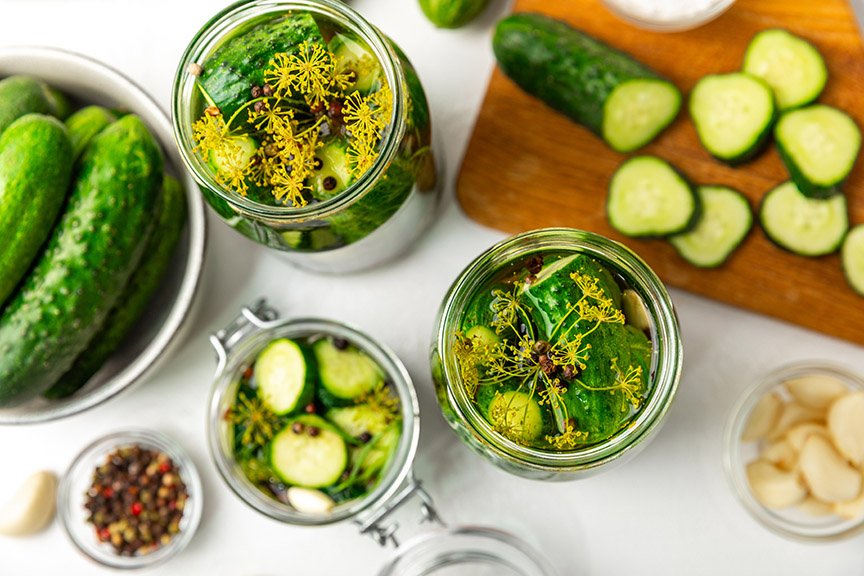
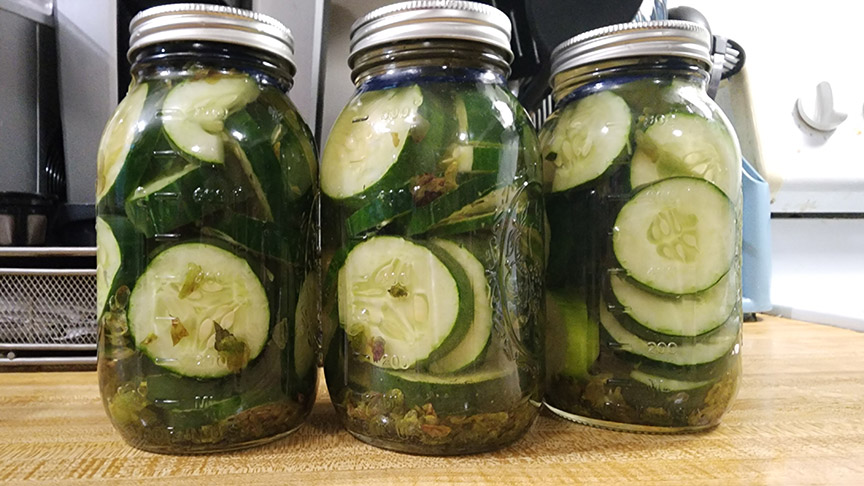
When making non-fermented pickles with vinegar, I found a 2-week waiting time was perfect to get a uniformity or equilibrium within the jar. With fermented pickles, I’ve found 3–5 days is plenty of time to get a complete fermentation verified with a pH meter in the target range of 3.3–3.6. There are many varieties of cucumbers that are good for pickling such as Kirby, Persian, and Gherkin cucumbers. Common garden cucumbers are easy to grow, are easily found at the grocery store or roadside stand, and make delicious pickles. Feel free to experiment with pickling other vegetables like zucchini, eggplant, or squash for a different style pickle too.
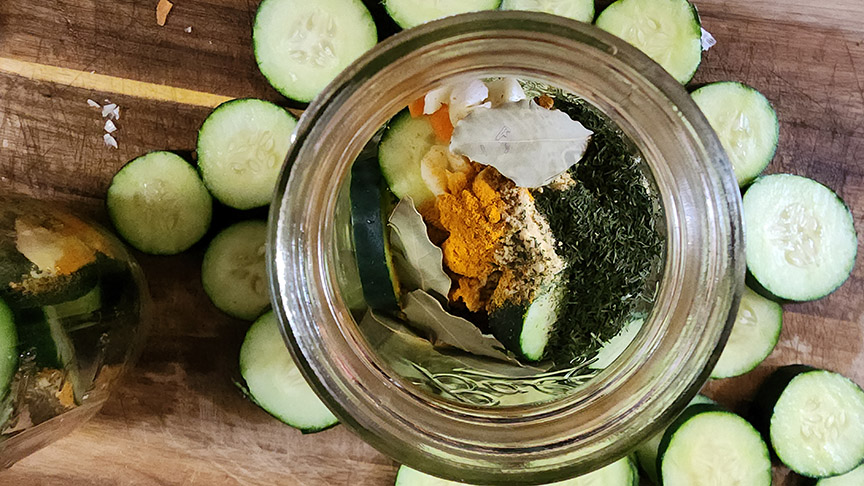
The biggest topic when it comes to fermenting pickles is keeping the crunchiness of the cucumber and preventing them from becoming mushy. A common recommendation in the pickling community is to add tannins to help prevent the enzymes within the cell walls of the vegetables from breaking down the pectin. This helps keep the cell walls intact and retain crispness. As a home winemaker, you may have tannin products to add, or some ingredients that provide tannins include: Bay leaves, dill weed, carrots, coriander, mustard seed, garlic, turmeric, oak leaves, and even tea bags (black tea). If you look at that tannin list, it includes most of the common spices found in jars of pickles and it helps shine a light on why different spices were used throughout time and in different locations or cultures. Sure, they add flavor and character, but it also helps keep the pickles crunchy.
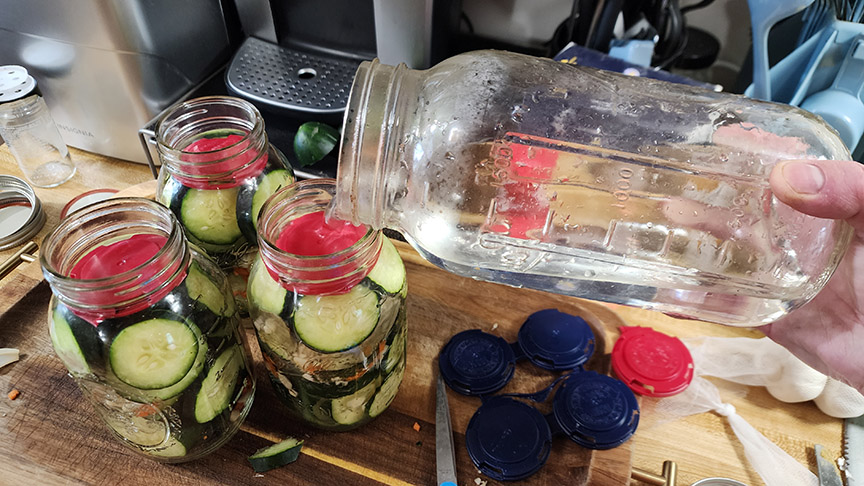
For me, making pickles is as simple as throwing a pinch, dash, or spoonful of spices in a jar, pack with cucumbers (whole, spears, or sliced), top with a 2.5% brine, weigh down vegetables with a weight, and sealing the jar with a loose lid or airlock. By day 3 or 4 the pH should be below the 4.0 safety threshold, and by day 5 with a pH of around 3.3–3.6. I like eating these pickles at each stage or pH range. Give it a try and find out what you prefer. When the pickles have reached the desired target flavor, pH, and crunchiness, then place the jar in a refrigerator or root cellar to stop the fermentation process and lock in your pickles’ character. In our house these pickles rarely survive 24 hours once declared ready to eat.
Fermented Pickles Recipe
1-quart (1-L) jar fermenter with lid and ring
Weight (I use single and double lids from a plastic 4-pack carrier, described earlier)
1 lb. (0.45 kg) cucumbers (whole, spears, or sliced into round chips)
475 mL water
23 g non-iodized salt (makes 2.5% salinity brine)
2 cloves garlic (whole or sliced, optional)
2 g dill weed (dried or fresh, optional)
2 g mustard seed (optional)
2 bay leaves (optional)
2 g coriander seeds (optional)
Procedure
Place optional spices to your liking in the fermenter jar. Pack cucumbers into the jar. Place weights on top of the cucumbers, then top with brine. Add loose lid or airlock lid and ferment 3–5 days, or longer if desired, before eating or placing in the refrigerator.
Sauerkraut
Some of you who have never tried fermented sauerkraut may be thinking, “eeeew sauerkraut?” This is not the vinegar-based, pasteurized, soggy cabbage that can be found in a can or a clear bag on the grocery shelves. Instead, this is sauerkraut that has character, texture, and most importantly, flavor. Sauerkraut is a fermented food that is immersed in history and culture from all over the world. There are different methods, fermentation vessel types and sizes, varieties of cabbage, and even spices that are unique to the geographical location of where it is made. Sauerkraut can be as easy as slicing up cabbage from your garden — or any cabbage variety obtained from your local produce stand or grocery store — and then submerging it under brine. You can ferment as is, with spices, or even by adding accompanying vegetables for more character.
Once you have your ingredients ready, chop or finely shred the cabbage and other ingredients. I used to throw away the white core part of the cabbage, but over time I have grown to enjoy that more than the green leafy layers. Now I just chop it all and mix them together with the other ingredients. You need to take a final weight, but I like to weigh all the ingredients individually so I can look at ratios for the next batch. The salt content for sauerkraut can range from 1.5–3% with 2–2.5% being the common target. This range allows for the LAB to set up its colony and start fermenting, keeping unwanted pathogens from colonizing and spoiling the product. Salt higher than 3% can retard the growth of LAB, causing possible soggy sauerkraut, too salty of a product flavor-wise, or even potential spoilage due to mold.
Once the vegetables are chopped, weighed, placed in a pot or bowl, and the salt percentage is weighed out, then you mix the salt into the vegetables. This is often done by simply squeezing it with your hands and working the salt into the vegetables. For larger batches, some people use a pounding device like a smooth wooden stick or even a baseball bat dedicated to kraut-making. By squeezing or pounding the vegetables it allows the salt to draw out the water within the vegetables through osmosis creating its own brine. I find that mixing the vegetables with salt for five minutes, waiting roughly 20 minutes while cleaning up, then another five minutes of squeezing is more than enough work and time to create its own juices/brine.
Next you pack the fermenter jar with the vegetables and brine, add a weight to keep the vegetables submerged under the brine, then close off the fermenter/jar with a loose lid or lid with an airlock, and wait.
How long do you wait? This depends on your personal preference. I have made large sauerkraut batches that went into small fermenter jars and I enjoyed each stage of ferment for its own specific reasons. I like a 3-day ferment for its crisp vegetable texture and young effervescent acidity and mild carbonation, while I also enjoyed the complex maturity of a 3- to 4-week fermentation. You can ferment longer, sometimes even for months, although I usually have already eaten all my creations prior to that.
Sauerkraut Recipe
1-quart (1-L) jar fermenter with lid and ring
Weight
1 small cabbage (any variety,
~2 pounds/0.9 kg, chopped)
23 g non-iodized salt (makes a 2.5% brine)
Procedure
Chop cabbage finely, work in salt as described in the article, pack the jar with cabbage, add weight to the jar, top with remaining liquid brine. Loosely add lid and ring, and ferment for a minimum of three days up to several months before eating or placing in the refrigerator. pH should be below 4.0.
Hot Sauce
Pro tip: Use food-safe gloves when handling or cutting any hot peppers to prevent irritation or burning hands from the capsaicin oils.
I am not a fan of excessively spicy foods and was surprised at how much I enjoy making fermented hot sauces. Once you do a side-by-side comparison of your fermented hot sauce versus vinegar-based hot sauces you will clearly notice the difference in depth, complexity, and character between the two.
There are three common ways to ferment peppers for making hot sauces. One method is a traditional pepper mash consisting of blended peppers and salt in a fermenter that is exposed to air. The main mash is under a layer of salt and I find that this can have a tendency to mold if not done correctly, so I choose not to do it.
The second method is to ferment the peppers and salt in a vacuum-sealed bag with enough extra space to allow for expanding carbon dioxide that will be produced. This is a popular method due to its easy and safe way to ferment in regards to mold spoilage, I choose not to use this method because I do not have a food saver device, and I would go through a lot of bags on different projects.
My preferred method is fermenting the peppers in brine just like I do pickles due to its simplicity.
You can use 100% peppers of a single variety, mix different pepper varieties, smoke or roast a portion of peppers, include character ingredients like bell peppers, garlic, carrots, or spices, or even add fruit. I have added peaches and other fruits during fermentation, which adds a different complexity to the final product; however, I find fruit is best added post-fermentation for that full fruit flavor.
When fermenting in a jar with brine I like to cut the ingredients into small pieces so there is more surface area and more can fit into the jar. I add the pepper seeds without worrying about separating them. Once the jar is nearly full, leaving some head space, place a weight in the jar. A 3% brine is the top end of the recommended salt content for brine, but I really enjoy the final product and it is what I use for making hot sauces. In another Mason jar I measure 1,000-mL of water and mix in 30 g of salt to make a 3% brine. Be sure all the salt is dissolved in the water. Then pour the brine into the fermenter, push down on the weight and even move the fermenter around to allow any air bubbles to rise to the top. You want everything in the fermenter to be submerged under brine. Record the volume of brine that you added to your fermenter as you should have some extra brine left over. Loosely add the lid or airlock. The first 3–5 days the fermentation will create the bulk of carbon dioxide that will leak from the loose lid or airlock. After this time, I close the lid and store at room temperature until ready to process. I like to ferment hot sauces for at least 30 days, but the longer you ferment the more complexity the product develops. Ferments can go for months or even years depending on your recipe.
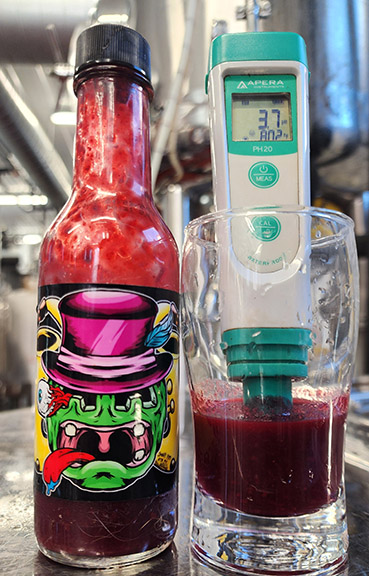
After fermentation, the pH should be in the 3.3–3.6 range. I take the entire contents of the fermenter and blend it. I used to separate the brine and add it back to the blender to thin out the sauce just as you would with vinegar. I found that I like the character of the fermented brine to thin out the hot sauce, so now I try to ensure that I have extra brine, somewhere in the range of 400–500 mL per fermentation jar. You can experiment to find what works best for you.
If adding post-fermentation fruit, you would add it to the blender. Adding fruit can raise the pH, so keep a watch that it does not go above the safety threshold of 4.0 pH. I have found a 1:1 ratio of fermentation vegetables-to-post-fermentation fruit is a good target to keep the final pH below 4.0. This is another reason to have extra 3.3-3.6 pH brine, or vinegar, to help lower the main pH if needed. This step is optional, but after a few batches I now incorporate adding xanthan gum to the blended mix at a dosing rate of 1 g per 1,000 mL. This helps keep everything suspended in solution and prevents separation of ingredients in the bottle when allowed to sit for a period of time. If you don’t use xanthan gum, then just shake the bottle before use.
Once everything is blended, I place the liquid in a large pot and heat on the stove to pasteurize. Pasteurization is only required when using fruits or sugars like honey; however, I pasteurize all of my hot sauces for extra assurance. Pasteurization kills the LAB and prevents any sugars from continuing fermentation in the bottle, which can possibly create dangerous pressurized bottles that might break or cause injury. Heat the hot sauce to 180 °F (82 °C) or higher and hold for 15 minutes. After pasteurization, use a ladle and a funnel to fill hot sauce jars, tightening the cap and placing upside down to pasteurize the lid for 15 minutes. As it cools it will create a vacuum and now the bottle of hot sauce will be shelf stable. If you do not have hot sauce bottles you can always fill into Mason jars.
Basic Hot Sauce
1-quart (1-L) jar fermenter with lid and ring
Weight
1 lb. (0.45 kg) hot peppers (chopped, any varieties)
500 mL water
15 g non-iodized salt (3.0% brine)
Procedure
Follow procedures described in the article. Should yield 5 to 6, 5-oz. (150-mL) hot sauce bottles.
Habanero Berry Hot Sauce
1-quart (1-L) jar fermenter with lid and ring
Weight
1 lb. (0.45 kg) habanero peppers (chopped)
500 mL water
15 g non-iodized salt (3.0% brine)
1 lb. (0.45 kg) raspberries, blackberries, mulberries, or other berry of choice (post-fermentation)
7–17 fl. oz. (200–500 mL) whiskey, Bourbon, or brandy (optional, post-fermentation)
Procedure
Follow procedures described in the article. Should yield 7-8, 5-oz. (150-mL) hot sauce bottles.
More Fermented Foods
Now that you know the basics of fermenting food, you can try your hand at some more challenging projects, from bread to even French fries. Check out these articles to find your next project.