Pressing Rosé, Creamy Chardonnay, & Oak Origins
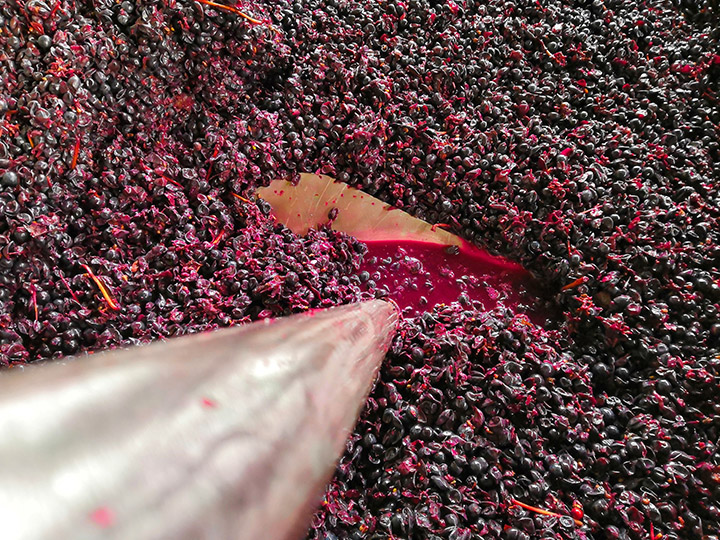
Q. We are making a rosé wine out of Pinot Noir grapes. We were checking the color by scooping out a glass full of the must. At three and a half hours it still didn’t appear to be pink enough. So we stirred with our punchdown tool and saw that the juice was almost red! So red, that we considered making red Pinot instead of rosé. But we decided to press right away and go rosé. It’s still fermenting. We added bentonite and PolymustTM Rosé after pressing. Will the color lighten as time goes by or is there a method to make it lighter? Even if the wine comes out tasting great I don’t want that much color. In the future, what is best way to test for color while still on the skins? Obviously the way we did it wasn’t good.
— Karen Wall • Paso Robles, California
A. Thanks for writing with such a vivid description of your rosé-making adventure. Even winemakers who’ve been at it for years know how quickly Pinot Noir can surprise you. Its skins are thin, but they can release pigment readily, and once the juice starts to pick up color, it can change faster than you think — particularly if the fruit is warm or if the cap gets stirred often.
In your case, the main culprit sounds like timing. You just didn’t check early and often enough. Color pickup in juices is relatively unpredictable and can vary with the vintage and the clone of the grape. Three and a half hours on the skins is quite a long soak for rosé. If you’re aiming for a lighter-color style, it’s best to start checking color every 30 minutes or so, especially during the first couple of hours after crushing. The best practice is to make color checks part of your routine from the very beginning, taking frequent, small samples so you can watch the color deepen in real time and decide exactly when to press.
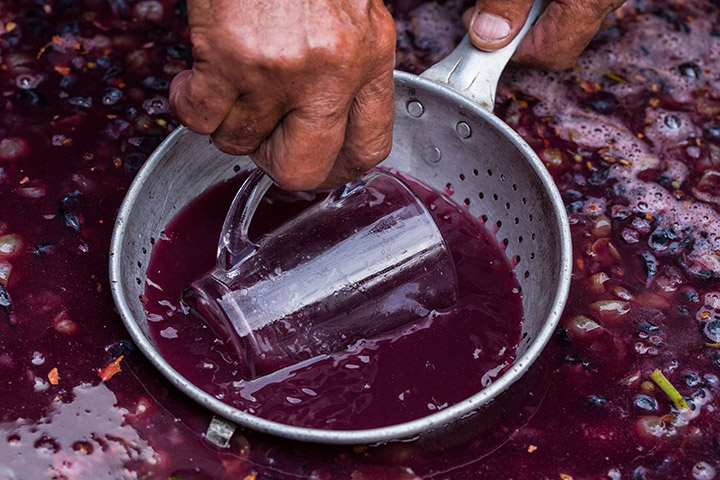
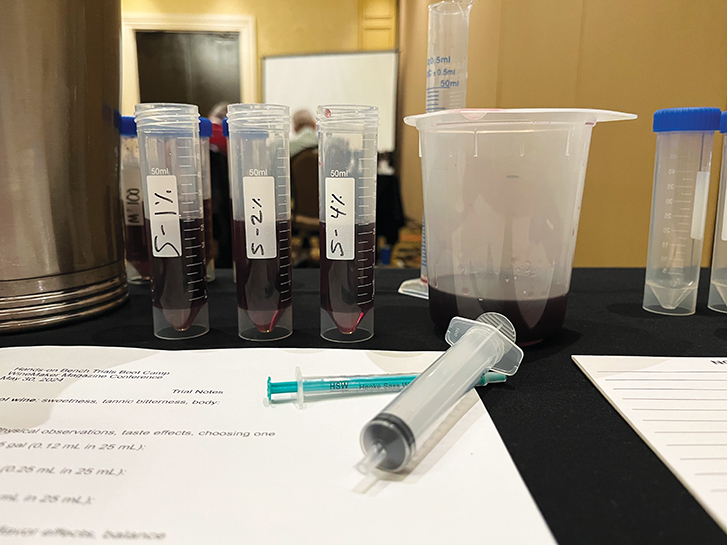
The other challenge was how you judged the color. When you scooped out a glass of must and thought it wasn’t pink enough, you were looking at a mixture still full of suspended solids — bits of pulp, skin, and seeds that scatter light and make the juice look paler than it really is. Once you stirred the cap, you mixed in more of that pigment-rich material and saw how dark the liquid had already become. Even though it’s hard to get a perfectly clear sample when juice is still turbid, give it your best shot. Try pouring it first through a colander to catch the big chunks, then through a kitchen strainer, and finally through a coffee filter to get as much clarity as possible. It takes a few minutes, but it’s the only way to get a realistic idea of what your eventual wine will look like. Even if you can only collect 10 mLs in a small glass graduated cylinder you’ll be able to hold it up to the light and get a good idea of where you are. Try to check the color in both natural light and indoors; light quality makes a big difference in how color appears.

One trick some winemakers use when making rosé is to actually load some of it into the press right away and let color evolve in the press and press pan. Depending on how much must you have and how quickly you’ll be able to separate the skins from the juice, it can let you get a jump on the process so you’re not overshooting your color mark. Factor in the pressing time as part of the remaining skin contact for at least a portion of the juice. You might want to start the pressing process the minute you think you’re at your minimum color level so you can dial it in as you go. This works especially well if you’ve got a big press pan or vessel you’re pressing into so you can monitor the color of the whole batch as it comes out.
Once the skins are removed, the color won’t deepen any further. In fact, some pigment will drop out during fermentation and aging, so the final wine will usually be a bit lighter than the juice you pressed off — but only modestly so, perhaps by 15–25%. Don’t rely on that natural fading to transform a light red into a pale pink; the direction of your rosé’s color is largely set the moment you press.
You mentioned adding bentonite and PolymustTM Rosé after pressing. Those are both fine tools for clarifying and polishing, and they can help brighten color slightly by removing excess phenolics or haze, but they won’t drastically reduce pigment. If, once fermentation and settling are complete, the color is still darker than you’d like, you can consider a light fining with a decolorizing carbon such as Charbon Actif Plus GR from Laffort. Be sure you’re buying the color-removing type, not the deodorizing kind.
Carbon fining should be done on finished wine, never on juice, so that you know where your true starting point is and you can make adjustments gradually and evaluate the results as you go. Dissolve the carbon in about ten times its weight in water and let it hydrate for an hour before adding it to the wine during a gentle mixing or pumpover. Allow the treated wine to settle for about 48 hours, then rack it carefully off the carbon. Because activated carbon particles are very fine and sometimes reluctant to settle, adding an enzyme such as LafazymTM CL will help them clump and drop more efficiently. Even so, you may find it takes weeks for the wine to fully clear, and some winemakers follow up with a fine or sterile filtration to be sure no residue remains.
When using carbon, start with a conservative dose. Like all fining agents, it might remove more than just the target compound — it can take a bit of aroma and freshness with it. Small, cautious additions will give you better control and help preserve the wine’s fruit character.
Looking ahead, prevention really is the best strategy. For rosé, temperature control makes a big difference. If you can, chill the must to about 50 °F (10 °C) before soaking; that slows pigment extraction and gives you a wider window to monitor the developing color. I know well how hot Paso Robles can get during harvest season, so try to pick your grapes as cool as possible — dawn picking in Paso (and most places) can be best so the grapes have benefitted from a full night’s chill down on the vine. Frequent sampling, clarification (as much as possible) of your test juice, and good record-keeping on time and temperature will help you repeat (or refine) your results from year to year.
One final note about keeping that bright, fresh pink hue: I generally avoid putting rosés through malolactic fermentation (MLF). MLF tends to push pink tones toward salmon or orange as pigments react with lactic acid bacteria. Most rosés don’t need the softer mouthfeel that MLF provides anyway, and keeping the wine crisp and fruity helps preserve its fresh color.
Think of this batch as a learning experience, one that will sharpen your eye for future harvests. Pinot Noir can be a fickle partner for rosé, but once you find your rhythm — sampling often, straining carefully, pressing at just the right moment — you’ll have no trouble pouring a wine you’ll be proud to share.
Q. I live in the Finger Lakes region of upstate New York, and I’m hoping to build a richer, rounder style of Chardonnay this year. Most of the local wines here tend to be bright and crisp — great for Riesling, not so much for that classic, creamy style Chardonnay you find from California. I’ve been reading about “aging on lees” and stirring, but I’m not sure how it actually works or how to apply it in my cool-climate cellar. Could you walk me through how to use lees contact and stirring to add body and texture? And what are the pitfalls I should watch for?
Mike Robinson
Geneva, New York
A. You’re absolutely right about the regional difference. Upstate New York’s cooler, shorter growing season naturally gives Chardonnay higher acidity and leaner fruit character — great for crisp, mineral-driven wines, but a challenge when you’re aiming for that plush, creamy texture we often associate with California’s warmer-climate Chardonnays.
The good news is that lees contact and stirring can bring some of that roundness and richness to your wine, even in a cooler climate.
To start, think about building the foundation in the vineyard and crush pad before you even reach the lees stage. For a fuller-bodied Chardonnay, you’ll want the fruit quite ripe — at least 24 °Brix if you can get there. That might mean a late pick, or a carefully chosen warm site with good sun exposure. If, at that sugar level, the acidity is still sharp (which is likely in your area), consider a small deacidification step to bring the pH up into the 3.4–3.6 range. That’s a sweet spot where malolactic fermentation and lees aging will have the most integrated, creamy effect. Too low a pH, and the ML bacteria can’t work optimally, and the finished wine may stay tight and angular no matter what you do later on.
Next comes the fermentation itself. Don’t ferment too cold; a temperature of about 65 °F (18 °C) will encourage a more complex mouthfeel and better integration with oak. At the same time, it’s warm enough for yeast to produce those lovely “bready” and toasty notes that later play beautifully with lees character. If you have a neutral barrel available, that’s ideal — it allows oxygen exchange and gives you the gentle micro-oxidation that helps knit flavors together without overpowering oakiness. If a barrel isn’t in the cards, try fermenting on one to two grams per liter of the highest-quality French oak chips you can find. These will add subtle vanillin and texture, but go easy; with oak chips, less is definitely more.
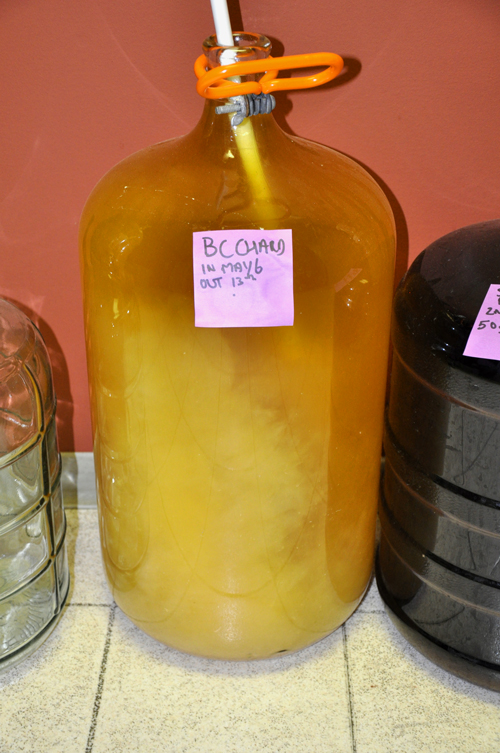
Once primary fermentation is complete, you’ll be staring at a layer of sediment at the bottom of your vessel. This is where the magic (and the potential for mistakes) begins. Not all lees are created equal. The heaviest, coarsest material — the thick, clay-like layer sometimes called “peanut butter lees” by winemakers — is mostly dead yeast and grape solids that can contribute bitterness or off-flavors if left too long. The lighter, creamy lees above that layer are the ones you want to keep. They contain yeast cell walls that, as they break down over time, release polysaccharides and mannoproteins. These molecules naturally add body, roundness, and a sense of sweetness on the palate, even though they don’t contain sugar.
When racking after fermentation, use the old cellar saying, “If it flows, it goes.” In other words, rack off the thick sludge, but don’t be afraid to take the medium and light lees with you. Those are the beneficial ones.
If you’re planning to put the wine through malolactic fermentation, which I’d highly recommend for a rounder, creamier style, this is the perfect time to begin stirring. Regular agitation of the lees during MLF keeps them in suspension and helps integrate the buttery diacetyl character more smoothly into the wine. Just be sure to protect your headspace from oxygen — keep your barrels or carboys topped and avoid vigorous splashing. A stainless-steel stirring wand or barrel lees-stirring rod is ideal, as it lets you move the lees gently without aerating too much. Stir once a week or so during MLF, tapering off as it finishes.
After malolactic fermentation is complete, continue to age the wine on its fine lees for several months. If it’s in barrel, stir every few weeks; if it’s in a stainless or glass vessel with oak chips (start with 0.5 g/L for a month, taste before you add more), treat it the same way. Each stirring brings the lees back into contact with the wine, encouraging autolysis — the slow breakdown of yeast cells that deepens texture and adds those toasty, nutty nuances. You’ll notice over time that the wine gains a broader mid-palate and a smoother, silkier feel.
You’ll know your lees program is working when the wine’s edges begin to soften, the mid-palate fills out, and those once-separate flavors of oak, fruit, and acidity start to become more cohesive. Over time, you will develop a feel for how much stirring your wine needs — more for young, tight lots, and less once the wine feels settled and complete.
Even though your climate is cooler than California’s, careful lees management can help you achieve that supple, integrated style. Between ripeness, a balanced pH, moderate fermentation temperature, and consistent stirring, you’ll be surprised how rich and layered your New York Chardonnay can become.
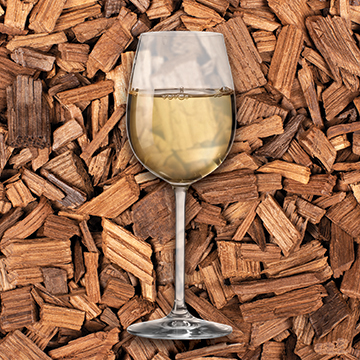
Q. Can you summarize the differences between French and American oak in winemaking? It’s a hot debate around our winemaking club.
Aaron Finklestein
Corvallis, Oregon
A. Ah, the age-old oak question! If you’ve ever stood in a cooperage, inhaling that toasty vanilla aroma from newly charred staves, you know what wonderful textures and flavors can be incorporated into your wine. Not all barrels are created equal, however. As you allude to, French and American oak differ not only in species and origin, but in how they interact with wine over time, giving winemakers distinct flavor, aroma, and texture choices.
French oak typically comes from Quercus robur and Quercus petraea, grown in cool, slow-maturing forests such as Allier, Nevers, Limousin, or Tronçais. The grain tends to be tight, meaning it allows less oxygen transfer and slower flavor extraction. Wines aged in French oak often show elegance and subtlety — think fine-grained tannins, spice, and gentle toast. Aromas lean toward baking spices (clove, nutmeg), sweet cedar, and roasted nuts. This restrained style is especially well-suited to more delicate wines like Pinot Noir, Chardonnay, and refined Bordeaux-style reds, where integration and mouthfeel matter more than overt oak flavors and aromas.
American oak, primarily Quercus alba from the Midwest and Appalachian regions, has a coarser grain that releases flavor compounds more quickly. The most famous cooperage region is Missouri, though oak from Minnesota and Kentucky is also prized. Because of its higher levels of cis- and trans-oak lactones, American oak tends to impart more obvious vanilla, coconut, and sweet spice notes. It also provides a perception of roundness and sweetness on the palate, with broader tannins than French oak. This makes it a natural match for bold wines such as Zinfandel, Syrah, and Cabernet Sauvignon, where a little extra punch complements robust fruit.
Beyond the oak’s species, the way it’s coopered matters too. French barrels are traditionally air-dried longer and often receive lighter toast levels, emphasizing finesse. American barrels may be kiln-dried and more heavily toasted, highlighting caramel, smoke, and vanilla tones. Even within each country, the forest source, grain tightness, and cooper’s style can dramatically change the impact.
If you’re debating which barrel or oak alternative to use, ask yourself what you want the oak to do. For subtle spice and structure, go French. For sweet, toasty richness, go American. Also consider Hungarian and Eastern European oak, which is often described as being somewhere in the middle of American and French oak. Don’t forget that you can experiment with good-quality chips first (buy only from a reputable cooper or supplier) and if you can’t decide, blend both — you might find the best of both worlds in your next vintage.