Set a Foundation With Kit Concentrates
If you’ve been making wine for long enough, you know the old joke: Ask four winemakers their opinion and you’ll get five answers. But regardless of our different techniques and ways to get there, the goal is the same: Balance. Our wines may vary in primary aromas, length of finish, and complexity, but behind every glass is a winemaker working to balance each element in the bottle.
With the introduction of the wine kit, balance became a pre-packaged promise. In a high-quality kit, the chemistry is done for you — the acidity adjusted, sugar levels calculated, and instructions provided to guarantee a stable, drinkable wine.
While it’s great for learning the basics of winemaking, it can be a little too predictable for those of us who have spent years deep diving into the history and chemistry of winemaking and the particularities of each grape variety. After all, great wine is about more than just stability. Wine is an art, an expression of terroir and self. Part of the fun is combining technical knowledge with personal creativity to ferment something unique, not just follow a set of instructions.
But if you have spent any time in a vineyard, you know that growing, harvesting, and utilizing homegrown fruit can be expensive, time-consuming, and risky. The fate of each vintage is dependent on good weather, a timely harvest, and meticulous planning. With hard work comes a deeper level of appreciation for the final product, though, since it is quite literally made from your blood, sweat, and, possibly, tears.

So how can we guarantee stability with the ease of a wine kit without sacrificing creative freedom and terroir-expression? We could ask four winemakers, but the approach I take that has worked for me is co-fermenting wine kit concentrates and hand-picked fruit.
How It Started
I started making wine in April 2021, on my 21st birthday, as entertainment during the COVID pandemic. But as every winemaker knows, your first batch is just the beginning of a very long, exciting, unpredictable journey. I made my first batches with juice and various ingredients I read about online, such as acid blends, tannin, potassium sorbate, and the reliable EC-1118 yeast. While I knew nothing about winemaking, those early batches taught me a lot about the purpose of, and how to use, each additive.
I immediately fell in love with the process and started two more 5-gallon (19-L) batches. However, I ran into two problems: Costs were starting to exceed my minimum wage salary and I had more wine than one person could reasonably drink. How could I afford to keep making wine? Unfortunately for me, but fortunately for society, wine is heavily regulated, which meant I couldn’t sell my wine to just anyone without acquiring the necessary licenses. So, I obtained my federal permit, state license, and distribution license to create a self-sustaining business that would allow me to fund my passion. I’ve previously written about this process in greater detail.
Watkinsville Wine opened in November 2021 and I have been experimenting with various ingredients and techniques to figure out my style ever since. I replaced the Mott’s apple juice with locally-grown fruit and high-quality wine kits.
Getting Creative with Kit Concentrates
When I decided I was going to sell my wines, I got serious about quality control. My first experience with a wine kit was an eye-opener. All of the guesswork was removed and I was consistently making good wine that tasted just as the manufacturer intended the resulting wine to taste. While these early wines were stable, easy-drinking, and relatively affordable, they were not what I envisioned for my business. I wanted the guarantee of a wine kit’s balance, but I also wanted to have total creative freedom. I wanted to have my wine and drink it too.

I memorized the basic process of the kits — from primary fermentation to racking to sorbate additions to bottling — and decided to apply the same protocol to the abundance of fruit available to me from my parent’s garden. Each fruit brought its own challenges, such as the infamous peach haze, so I researched ways to ensure consistent quality utilizing such variable fruits. In the case of haze, pectic enzymes made a world of a difference!
My idea to co-ferment was driven largely by resource availability and inspiration from my good friend and winemaking mentor Todd Holman. Using only the kit concentrate and putting aside everything else that came with the kit, Todd showed me a new way to create unique, age-worthy, and award-winning wines. His years of experience and expertise informs his selection of yeast strain and he manipulates the wine based on his intended goal. Sure, it’s a California Cabernet Sauvignon wine kit, but that doesn’t mean it has to be influenced by the French oak included with the kit or degassed on a particular day. He taught me to think outside the box without using everything in the box.
Once I realized that kit concentrate can be used as a raw ingredient rather than a piece of a designed puzzle, I started combining my pre-balanced concentrates with different fruits to create smooth, easy-drinking, and unique wines. My first successful co-ferment was a peach wine, made from 11 pounds (5 kg) of locally grown peaches and an RJS Craft Winemaking Orchard Breezin’ Peach Perfection kit. Then I tinkered with their strawberry wine kit by adding blueberries from my parents’ garden, and that’s when I realized I was on to something.
When making wine solely from fruit, the final product can sometimes feel thin or watery. By using grape concentrate, especially from a balanced, high-quality kit, you can provide structure and body. Juice concentrates are the strong backbone and the fresh fruit adds a layer of exciting top notes, aromatics, and personality.
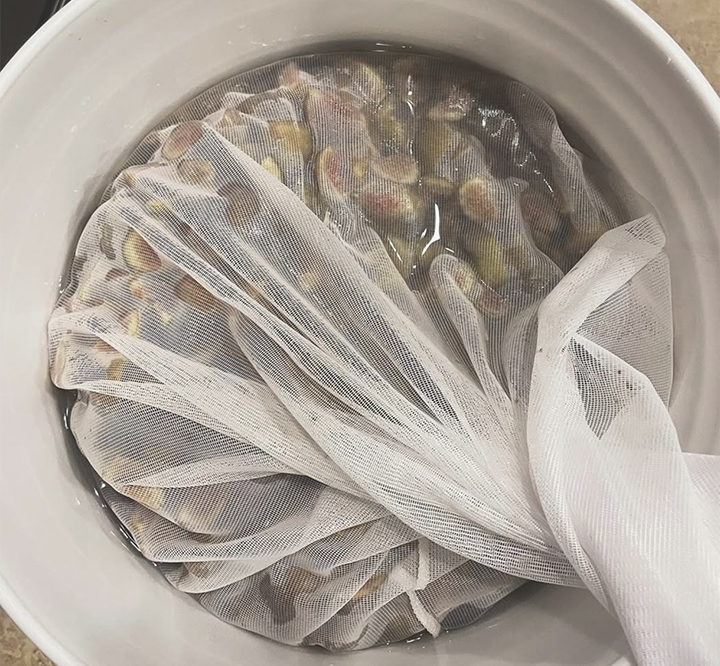
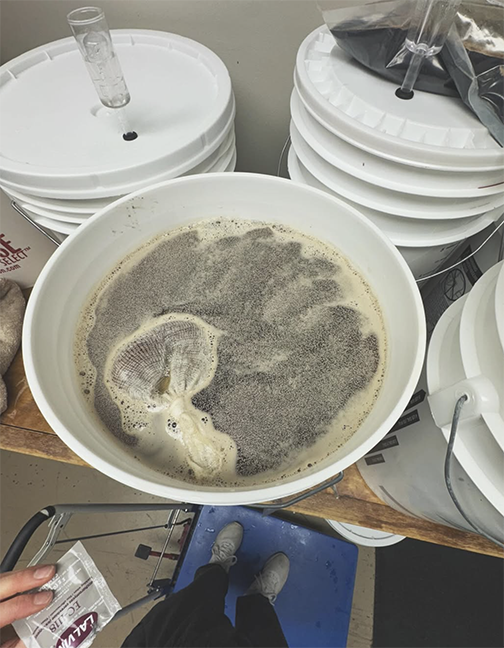
All of my fruit is picked, washed, and placed in the freezer for storage until it’s ready to be fermented. Then I put the fruit into a mesh bag and soak it in whichever concentrate I am using as the base. Using frozen fruit is more than just a convenient storage method; it is actually beneficial for the extraction process. When grapes freeze on the vine in cool-climate regions, flavors and sugars are concentrated to make sweet, delicate wines. My freezer acts on a similar principle called cryomaceration. The water inside the fruit crystallizes and ruptures the cell walls, releasing more juice and color than if I used freshly picked fruit. Plus, it’s practically beneficial. The fruit, picked only in-season can be used to make wine year-round. Or I can store smaller amounts until I have picked my target amount of fruit to use.
At the beginning of my journey, I mainly paired fruits with the wine kit of the same fruit. But as I gained confidence and deepened my knowledge of traditional grape varieties, I started co-fermenting fruits that complemented primary aromas of traditional Vitis vinifera varieties. My first awarded wine was a Blueberry Pinot Noir inspired by the blueberry primary aromas commonly found in Russian River Pinots. The blueberries added a local flair and deepened the already dark fruit profile without clashing.
When I started my WSET Level 1 class, I became more interested in grape varieties and wanted hands-on experience working with vinifera grapes. However, my loyal base of customers expect fruit wines since that is what my business was built on. If they want traditional wine varieties, they can go to a grocery store or wine shop. Watkinsville Wine is about local, small-batch, and unique wines that can’t be found anywhere else. So, a fruit and grape co-ferment wine is just crazy enough to align perfectly with my brand.
With the success of my Blueberry Pinot Noir, I decided to keep using the knowledge I gained from my WSET course to experiment. I started making more wines based on the concept of pairing fruits and the grapes with similar notes — Blackberry Merlot, Peach Chardonnay, and my most interesting — Honeydew Gewürztraminer.
To make these wines, I use the 1-gallon (3.8-L) bags of concentrate and somewhere between 4–11 pounds (1.8–5 kg) of fruit, depending on the fruits I am using and ABV I am trying to achieve. The amount of water added is dictated loosely by the difference between what is recommended in the kit’s instructions minus the volume of the juice from the fruit.
The fruits, having been frozen, thaw in the mesh bag placed in the mixture of concentrate and water. All of this goes on top of the slurry of bentonite. Within 24–48 hours, the enzymes break down the fruit skins, at which time I measure specific gravity and pitch the yeast. It is worth mentioning that the yeast packet in your wine kit may not necessarily be the best choice for the specific fruit you picked for the co-ferment. That specific yeast strain was selected for its strength and reliability for the concentrate it came with. Oftentimes a more aggressive yeast is needed to work in such high-alcohol environments. My favorites include the trusty Lalvin EC-1118 (which is the common yeast in wine kits), along with Red Star Premier Classique (for blueberry-based wines) and Mangrove Jack’s SN9 (for my Vitis vinifera and other fruit co-ferments, such as Muscadine Pinot Grigio).
I let the fruit stay in contact with the juice for the entirety of primary fermentation. This takes about 7–14 days, which allows the fruits to marinate in the concentrate without needing to be punched down. For me, this part is more about flavor than color extraction — that’s just a natural bonus!
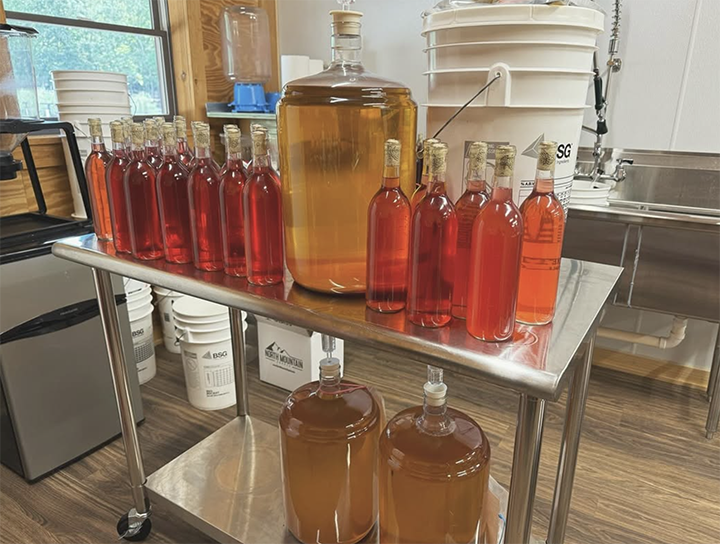
Removing the fruit happens in tandem with, or just before, the first racking, so ideally the potential alcohol has been converted and the sorbate, sulfite, and clarifying agents are ready to be added. To account for the displacement of multiple pounds of fruit, and eliminate excessive headspace, I add water along with the kit’s flavor pack to the wine when racking to the 5-gallon (19-L) carboy. The flavor pack is sweet enough to ensure the final product isn’t watered down and adds a nice, smooth finish. Here, it sits for 4–6 weeks, depending on the wine and anticipated ABV.
Bottling day is thus simplified. Instead of hours spent on bench trials to perfectly blend two separately fermented wines, I bottle two cases of unique, multi-fruit wines from a single carboy.
Don’t Stop at Fruit
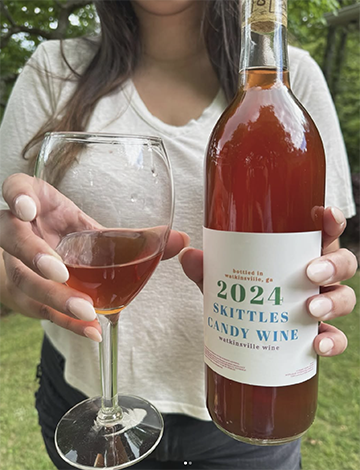
Local fruits aren’t the only thing you can add to make unique wines with a grape concentrate base. My most memorable, and unique, experiment was my 2024 Skittles wine. For it, I dissolved 4 lbs. (1.8 kg) of Skittles into a half-gallon (1.8-L) of hot water and poured it into my primary fermentation bucket with bentonite. However, this concoction was nowhere near enough liquid to fill the bucket. My impromptu solution was to add a gallon (3.8 L) of Winexpert Classic Pink Moscato concentrate. I expected the concentrate would contribute to a mouthfeel more consistent with a traditional grape wine; and the Moscato grape would be sweet enough to pair well with the tart candies.
As you can imagine, Moscato grape concentrate and 4 lbs. (1.8 kg) of candy has a considerable amount of sugar, so its potential alcohol was high (17% ABV). I combated stuck fermentations for months by increasing fermentation temperature, pitching more yeast and nutrients, and adding a few cups of water. Typically, my fruit co-ferments only take 6–8 weeks from pitching yeast to bottling, but this Skittles wine sat for six months, slowly converting sugar to alcohol. Finally, when the specific gravity was at 1.010 (2.6 °Brix), I added sorbate and gave it a taste. Even with the residual sugar, it was too tart to sell with confidence. I later learned it was because Skittles are coated in citric acid (just something to note if you plan on making wine from this candy). My solution was to add the Pink Moscato flavor pack from the kit. Over the span of a few weeks, the wine became smooth, balanced, and, against all odds, delicious! Liquid Skittles.
Having brought a couple bottles to a WineMaker Conference where many attendees tasted it, I’d also say it turned out quite memorable as people who tried it still bring it up frequently.
While not all wines are as outlandish as my Skittles wine, they are all full of personality. Each of my wines have a story and are wholly unique; not one batch is the exact same as another. Local fruits give me the variability that keeps the business exciting, while the wine kits provide the consistency that customers expect. After years of practicing, I have settled into a rhythm and found my brand’s niche. Through this process, I learned how to utilize my creative and technical experience to achieve balance in my wines and my business.
Blueberry Pinot Noir Recipe
This recipe yields a standard 5-gallon (19-L) batch with a 13–14% ABV. The blueberries enhance the berry notes commonly found in Pinot Noir and contribute to a more complex mouthfeel. Grapes with thin skins, such as Pinot Noir, co-ferment well with fruit since the additional tannins do not overwhelm the final product.
Ingredients
6 lbs. (2.7 kg) blueberries, frozen
RJS Craft Winemaking Heritage Estates Pinot Noir
5-gallon (19-L) wine kit (or similar substitute)*
Lalvin EC-1118 yeast
10–15 oz. (300–450 mL) Global Vintners wine conditioner
4 oz. (120 mL) Brewer’s Best® blueberry flavoring
Distilled water
* You will use the pre-measured packs of Pinot Noir concentrate, bentonite, kieselsol, chitosan, sorbate, and sulfite from the kit. In this case, I used the kit’s yeast since it was EC-1118, which is a great choice for wines with higher ABV. Red Star Premier Classique is another good choice.
Instructions
1. Clean and sanitize equipment to be used.
2. Pour 0.5 cup (120 mL) hot tap water into the bottom of the primary fermenter and stir in bentonite.
3. Pour concentrate base into the primary fermenter, rinsing the bag with distilled water and adding to the primary fermenter.
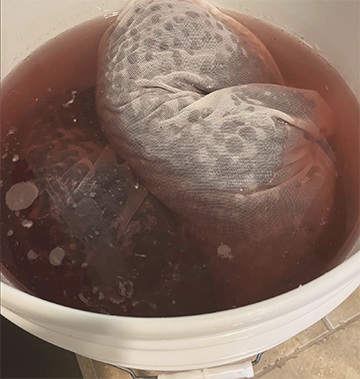
4. Add frozen blueberries into a mesh bag and place in the primary fermenter, along with the concentrate, and bentonite slurry. Top up with enough distilled water to bring the total volume to 5 gallons (19 L).
5. Let sit for one day so the fruit can fully thaw and soak in the concentrate.
6. Use a hydrometer to measure and record the specific gravity (SG). I aimed for a wine with 13–14% ABV, which is an SG of roughly 1.110 (26 °Brix).
7. Sprinkle yeast on top of juice and fruit.
8. After 14 days, remove the blueberries and check the SG.
9. If it is under 1.000 (0 °Brix), use fully sanitized equipment to siphon the wine from the fermenter to a new 5-gallon (19-L) carboy. Be careful to leave behind the sediment. If fermentation is not complete, give it a few more days and check again.
10.Top the carboy up with distilled water to eliminate excessive headspace.
11. Add the sorbate and sulfite packages from the wine kit.
12. Degas the wine slightly by using a sanitized stirring spoon. Stir in one direction for 30 seconds and then change directions. Do this 3–4 times.
13. Pour in the packet of chitosan from the kit and wait one hour before adding the kieselsol.
14. Let sit for 2–3 weeks and then taste. I added the wine conditioner and 2 oz. (60 mL) of Brewer’s Best® blueberry flavoring at this point.
15. Let sit for two more weeks and taste. I added another 2 oz. (60 mL) of Brewer’s Best® blueberry flavoring at this point, though whether you choose to do so is dependent on your flavor preference.
16. Keep tasting and adjusting until you are happy with the flavor and then proceed to bottle.
Skittles Wine Recipe
This recipe yields a standard 5-gallon (19-L) batch with a high 16–17% ABV. Using candy as a base is a bold choice that results in a bold flavor. There is no other way to describe this wine other than “drinking liquid skittles.” The Moscato concentrate and flavor pack bring this wine down to Earth with a smooth finish and familiar notes of your typical pink Moscato.
Ingredients
4 lbs. (1.8 kg) Skittles
Winexpert Classic Pink Moscato 5-gallon (19-L) wine kit (or similar substitute)*
2 packs Lalvin EC-1118 yeast
5 tsp. yeast nutrient
Distilled water
* You will use the pre-measured packs of bentonite, Moscato concentrate, flavor pack, kieselsol, chitosan, sorbate, and sulfite.
Instructions
1. Clean and sanitize equipment to be used.
2. Heat 1 gallon (3.8 L) of water to a boil.
3. While the water heats up, mix bentonite and warm water in a cup and add to the primary fermenter bucket.
4. Pour Skittles into the boiling water. Stir until the candies are all melted and the liquid becomes syrupy.
5. Pour the candy syrup into the primary fermenter on top of the bentonite slurry.
6. Add Moscato grape concentrate.
7. Use a hydrometer to measure and record the SG. You are aiming for a potential alcohol of 16–17% ABV (which is a specific gravity of roughly 1.120–1.125 or 28–29 °Brix).
8. Add one pack of Lalvin EC-1118 yeast and yeast nutrient.
9. After 7 days, pitch one more packet of yeast.
10. After 14 days, rack the wine from the fermenter bucket to a new 5-gallon (19-L) carboy with an airlock. The SG will likely not be <1.000 (0 °Brix).
11. Top with water to eliminate excessive headspace. Then let the wine sit for one more month. Add more yeast nutrient, if necessary.
12. Wait two more months before racking again and degassing the wine slightly by using a sterilized stirring spoon. Stir in one direction for 30 seconds and then change directions. Do this 3–4 times.
13. If SG is under 1.000 (0 °Brix), add the sorbate and sulfite packages from the wine kit. If not under 1.000 (0 °Brix) yet, give it more time until it is.
14. Two days later, add the flavor pack from the wine kit.
15. Let the wine sit for two more months and keep tasting until you like the flavor. Then it’s ready to bottle.
Further Reading . . .
• Wine kits have come a long way since their introduction to the home winemaking market. Learn how kit concentrates are made.