White Kits to Gold Medals
In the world of home winemaking, wine kits are sometimes dismissed as inferior and “for beginners.” However, as these kits evolve, winemakers grow more open to the idea of using prebalanced concentrates for more than just learning the craft. In the annual WineMaker International Amateur Wine Competition, kit wines are blind tasted against wines made from fresh fruit and consistently take home medals and Best of Show awards.
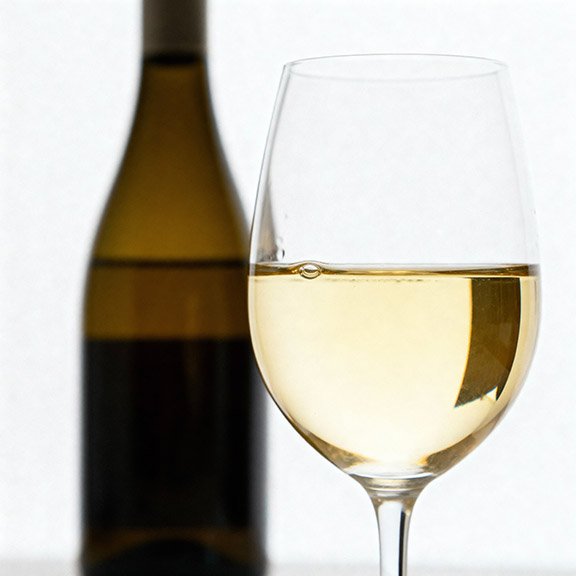
So how do kit wines, sometimes underestimated for their predictability and simplicity, stand out to judges and win gold against distinct and complex varieties that may be estate-grown or come from fresh fruit grown in premier winegrowing regions?
While kits provide the ingredients and step-by-step instructions needed to make a good, drinkable wine, many of the award-winning examples are the result of winemakers putting their own twist on the traditional kit instructions. The high-quality, prebalanced concentrate serves as a base for winemakers to put their advanced knowledge to the test. Maybe it’s swapping out yeast strains for one more tailored to the winemaker’s intention for a particular variety. Maybe it’s manipulating sugar levels to achieve a higher ABV, or even adding a unique ingredient into the mix. Whatever it is, many kit-using winemakers are anything but beginners.
I interviewed four decorated winemakers to see what they do to make such outstanding wine from white wine kits. In true hobbyist fashion, they tend not to follow instructions too closely. Instead, they rely on their scientific expertise, experience, and refined palates to manipulate variables and turn standard juice into award-winning wines.

The Panelists:
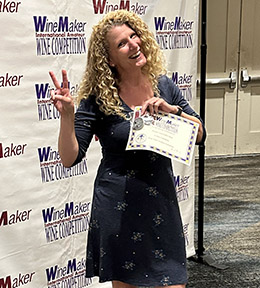
Susan Campbell-Weir is an award-winning amateur winemaker with a background in digital health product management. She lives in Northern California with her husband, where she tends a 38-vine backyard vineyard alongside her veggie garden. She has been making wine since 2011 after being given a winemaking kit and equipment to make a 6-gallon (23-L) batch. Immediately catching the winemaking bug, she regularly attended the WineMaker Conferences where she met like-minded winemakers and became a member of the Not-So-Snobby Wine Club. She is also a WSET Level 2 with Distinction (2025).
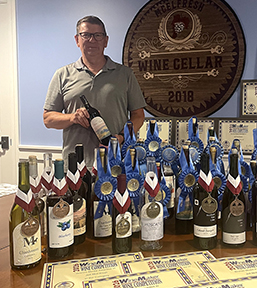
Jeff McElfresh thought it would be fun to plant a few grapevines and try making wine in 2018. True to his engineering nature, he dove in with research, wine shop visits, and a stack of books and issues of WineMaker. While waiting for his grapes to mature, he learned to make wine from kits, and his very first batch turned out so good that friends and family kept asking for more. Jeff entered his wines in the local fair, snagged Best of Show, and has been winning medals in the WineMaker Competition every year since 2023.
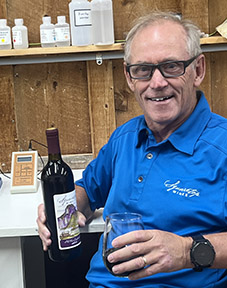
Todd Holman is a retired allergy and immunology physician now living in Colorado. In 2012, he made his first batch of wine. He loves that wine brings hospitality, laughter, and great conversation. After the first batch, Todd went back to school to earn a winemaking certificate, followed by Level 1 Sommelier school (all while balancing a day job). Even more valuable, he says, were the countless hours spent tasting, talking with friends, and joining the WineMaker magazine community at each year’s conferences (especially the “Not-So-Snobby Wine Club”). He often quotes “Backyard Vines” columnist Wes Hagen: “A bottle of wine is worth an hour’s discussion with friends or strangers about anything but wine.”
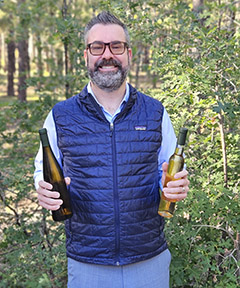
Justin DeLange, DO, is a board-certified neurologist and headache specialist who discovered a passion for winemaking during the 2020 pandemic. What began as a casual kit experiment quickly evolved into a fascination with the chemistry and artistry of enology. Prior to crafting his own vintages, he was, and remains, an active collector of fine wine. Today, his dedication has expanded to a small estate vineyard on his property in Flagstaff, Arizona. A multi-medal winner in the WineMaker Competition, he particularly enjoys the subtlety of conducting temperature-controlled fermentations on aromatic white kits.
1. What award-winning white wine kit (brand and varietal) did you win medals with this year, and what drew you to that specific kit in the first place?
Susan: I won a bronze for a VineCo Viognier in 2025. I’ve also won several gold medals for white wine kits I made into sparkling wine, including Winexpert World Vineyard Riesling and Winexpert Selection California Riesling.

Jeff: Gold for a Winexpert Classic California Moscato. This is a favorite of my mother-in-law, and she asked me to make one for her. Bronze for a Winexpert Classic Chardonnay. I prefer Chardonnays that are bright and not oaky or buttery to go with the food. Bronze for a Winexpert Island Mist Peach Apricot Chardonnay. This is one of the first kits I made, and it had people asking if they could buy a case. I told them that I couldn’t sell it, but their asking gave me confidence that I could make wine people really like.
Todd: The vast majority of the white wines I make are Chardonnays aged sur lie, a style that has won me several medals and remains a favorite among my family and friends. Over the years, I’ve also made numerous batches using Moscato kits, which serve as an excellent entry point for non-wine drinkers. Another longtime favorite of mine (and one I must soon revisit) is a classic Sémillon/Sauvignon Blanc blend.
Justin: This year I won gold medals with a Winexpert Limited Edition Besito wine kit (a Macabeo and Moscatel blend) and a Winexpert Après Riesling Icewine Style wine kit. I am drawn to aromatic and unique grape varieties. For this reason, I enjoy the Winexpert Limited Edition releases, which typically include unique varieties. I’ve found kit winemaking inherently lends itself to crafting off-dry and dessert wine styles.
2. Many kit winemakers use standard tap water to reconstitute their juice. Do you treat, filter, or source your water differently for white kits compared to reds?
Susan: When I started making kits, I just used tap water. But as I’ve tasted my kit wines over the years, I have been trying to eliminate any other flavors or aromas that distract from the grape varietal, so I now buy spring water to reconstitute the juice.
Jeff: I use spring water for both white and red.
Todd: I use carbon-filtered tap water for all of my wine kits. It removes 99% of free chlorine, chloramines, VOC’s, and doesn’t affect calcium and magnesium, so it doesn’t change water hardness. Prior to using carbon filtration, I used spring water.
Justin: I treat water as a critical ingredient that directly shapes the final product. Tap water often contains chlorine, chloramines, or high mineral loads that can strip delicate aromas or create off-flavors. This would be a problem, especially working with kit juice from aromatic varietals, so I never use tap water. Instead, I use a highly tailored approach, sourcing commercial spring waters. I actually look for bottled water sources that align geographically with where the grape variety hails from. Using a region-adjacent spring water provides a clean, harmonious foundation that respects the kit’s chemistry while elevating the final varietal expression. I utilize this approach both in my red and white wine kits.
3. Do you follow the starting specific gravity (SG) exactly as written in the instructions, or do you manipulate the initial Brix/sugar levels to chase a specific final alcohol content or body? What drives that decision?
Susan: It depends on the kit I’m making. If I’m working with a high-quality kit (those at the top of the line for the manufacturer), I normally add water to the suggested 6-gallon (23-L) mark. However, when I’m trying to get a drinkable white made in 3 months, I usually go with a less expensive line. When doing this, I’ve tried to improve the outcome with a little less water, totaling 5.5 gallons (21 L) instead.
Jeff: For the Island Mist kits, I add 1 lb. (0.45 kg) of sugar and a quart/liter of extra white grape juice to make them stronger with more mouthfeel. This was a recommendation from my local supplier, Label Peelers, and I do this with all the Island Mist kits. I do bench trials with backsweetening my Rieslings and with the Moscato, but I did not add sugar to the Moscato that won gold. I followed the instructions for my first kit and made a nice, drinkable wine. I am an engineer, so I like to experiment, and I enjoy doing bench trials and blending to see how I can improve or tailor a wine to my taste, and also involve friends and family for their input.
Todd: As a rule, I do not aim for a particular specific gravity. I have certainly added different types of sugars (pure glucose, both refined and unrefined cane sugar) in the times I do chaptalize to see if I can tell a difference. At most, I chaptalize no more than the equivalent of 1–1.5 ABV. More recently, I have stopped, as I have really begun to prefer lower-alcohol wines.
Justin: I do not like to manipulate the starting specific gravity or chase an alternate initial Brix level in my white kits. Altering starting gravity in certain white kits may irreversibly cause structural imbalance. Also, changing the initial sugar load to force a higher alcohol percentage may increase the risk of a stressed fermentation that may potentially destroy volatile aromas.
4. Kit instructions usually include a standard packet of dry yeast. Do you use the provided strain, or do you swap it out for a specific one to enhance the white fruit aromatics?
Susan: I’m always swapping out yeast as I worry that it’s been shelved too long or that I can achieve better aromatics with another one. MoreWine! had an excellent yeast guide that I use to match yeast strain to grape varietal.
Jeff: In the red wines I typically swap out the yeast, but with my whites I normally use the EC-1118 that comes in the kit.
Todd: I usually change the yeast for both red and white kits. Over the years, I have tried multiple strains. I have used QA23, EC-1118, and D47 yeasts for my white wines. As a rule, I do not co-ferment, as one strain may out-compete another. I have blended two or three batches with different strains after fermentation is complete. My wife, who is a better taster than I, says she can sometimes tell the difference. For the last several years, my go-to has been CY3079. I can ferment it cold, which slows the process and brings out more aromatics. In theory, it enhances mouthfeel, increases glycerol and mannoprotein levels, and adds a buttery feel to the wine. When combined with sur lie aging, it is right up my alley.
Justin: My yeast selection is highly deliberate. For many aromatic white kits, I will often use QA23. This strain is excellent for converting thiols and enhancing tropical, floral, and stone fruit characteristics. I also like the performance of K1 in producing more floral esters in the finished product. Further, if I am working with a high-Brix wine kit such as a dessert wine, I will utilize a sturdy wine strain such as EC-1118 for handling high-sugar environments. Ultimately, my approach has always been to choose specific strains based on the desired aromatic profile or sugar density.
5. White wines thrive in cool temperatures for fermentation. Where do you ferment your white wines and how do you regulate temperature during primary fermentation?
Susan: I started my first kit in December and worried about keeping it up to the recommended temperature (which I believe is 70-74 °F/21–23 °C), so I fermented it in my laundry room, which always seemed to have a higher temperature than the rest of my home.
When I tried cool fermentation, I bought a 33-gallon (135-L) garbage can and moved production to my garage. I placed my fermenter in the garbage can, as well as water and frozen plastic milk jugs. Depending upon how quickly they melted, I replaced them. This didn’t always give consistent temperatures, but it never resulted in a stuck fermentation, just slower.
Today, I have a temperature- controlled cellar that I bring down to 55 °F (13 °C) for my whites. I always make a yeast starter and add the yeast at about 68 °F (20 °C). Then I place the fermenter in my cellar for the duration, and I don’t normally stir or disturb them for 14 days. They’re almost always complete by this point.
Jeff: I have a winemaking area in my basement. I typically ferment the white wines during the winter to be ready for summer drinking, so I turn off the heat in that area, and it naturally keeps the temperature in the low 60s °F (16–17 °C).
Todd: I have always preferred cool fermentation, as it helps with aromatics. I am lucky to have a dedicated space for all of my wine processing. The room is kept between 55–60 °F (13–16 °C) all year long. To raise temperatures, I use old Christmas tree lights (non-LED). A string of 25 lights wrapped around my primary fermenter will raise the must temperature by 5-8 °F (3–4 °C). I have also done several whites at “room temperature” (55–60 °F/13–16 °C). With the lights, I have to check it every day, as fermentation is exothermic, so that means adjusting how many lights are active if the temperature needs to be adjusted.
Justin: I utilize a repurposed wine fridge as a temperature-controlled chamber. I initiate the lag phase at a room temperature of 72 °F (22 °C) to ensure healthy yeast establishment. After 24 hours, I drop the ambient temperature to 55 °F (13 °C). This strict regulation mimics glycol-jacketed systems, allowing for a slow, cool fermentation that maximizes ester retention and avoids any heat spike stress.
6. Do you rely on whatever nutrients are pre-blended into the kit juice, or do you add additional nutrients during primary fermentation?
Susan: I never add additional additives as this has already been balanced for me. I tried malolactic fermentation on a kit Chardonnay once. It turned out disgusting.
Jeff: I normally do not use extra nutrients. I have never had a problem with a kit not fermenting, but I had an issue with a Chardonnay juice bucket once, so to avoid that, I always use nutrients in juice buckets and with grapes.
Todd: My goal in winemaking is to use the kit juice as concentrate, then treat it as I would if pressed from the grapes directly. So, yes, I add nutrients, Opti-White, etc. Fermentation must be active and well fed. Obviously, all of my white wines must be fermented completely dry to minimize the chance of nutrients available for a few stray yeast cells in the bottle.
Justin: With aromatic whites, managing yeast stress is critical to preventing hydrogen sulfide (H2S) production, which may mask delicate floral notes. While I have had success with the pre-blended kit nutrients, I often consider a proactive approach. I may use Go-Ferm during rehydration as an insurance policy for cell wall health. This allows the yeast to cleanly process the kit’s built-in nutrients, resulting in maximum ester retention and vibrant varietal expression.
I will also keep close sensory surveillance on the fermentation. If I detect even a hint of yeast distress, I’ll add a touch of Fermaid-K to prevent any aromatic masking.
7. Many premium white kits come with oak powder, chips, or staves. Do you always use these, use your own, or ditch them completely? If so, do you follow instructions on adding them to the must?
Susan: I have made so many kit wines; I have done most of these things! I normally use the powder/chips that come with the kit for fermentation as I believe the tannins help stabilize the wine for longer-term aging.
A few years ago, I had a new French oak barrel that I used to ferment a high-quality Viognier kit, which turned out delicious. In this case, I didn’t add the oak that came with the kit because I was trying another form of oak.
I have also added a few extra oak cubes to Chardonnays once stabilized to get a deeper vanillin flavor profile (as this is the style preferred by my sisters). They’ve never complained!
Jeff: I use the oak chips supplied in the Chardonnay. If supplied, I normally use them. For red wines, I have a barrel I use and also may add additional oak, typically using oak spirals.
Todd: I will use the oak powder provided for color stabilization and some tannin binding, but NOT for flavor. For most of my whites, if oaked (again, a personal preference), I use French oak staves or cubes.
Justin: I generally skip the oak additions entirely because my focus is on aromatic whites and fruit-forward dessert wine styles. For these specific white wines, any wood contact would clash with varietal aromas and esters.
8. Do you always use the provided fining agents (bentonite and/or chitosan and kieselsol)? If so, do you use it on the kit’s recommended timeline?
Susan: Except for the example with the barreled Viognier, I always used the bentonite to help settle the lees post-fermentation. I have often used the chitosan and kieselsol clarifiers that come with the kits, but not always. Ever since the first year of winemaking, I normally take at least three months to make a kit, so my timeline for adding the post-fermentation clarifiers varies based on my schedule and other wine projects that may be going on.
Jeff: For whites, I normally use the supplied clearing agents as I will not be bulk aging them for long. I follow the kit timeline with adding them. I also cold stabilize my whites by putting them in a small refrigerator to drop out the tartrates.
I have used a filter in the past, but I have found filtration is not necessary if I stabilize and rack my wines.
Todd: I never use sorbate, but hardly any of my whites have residual sugar. Bentonite is added to the must at the beginning of fermentation only, as it helps with protein stabilization (negative charge).
My Chardonnay in my wine cellar carboys was started 18 months ago, sur lie for at least three months, so there is mostly natural clearing. I filter all of my wines nominally to 1 micron.
Justin: Typically, I use the provided fining agents, including bentonite, kieselsol, and chitosan. I follow the kit’s timeline strictly and the instructed dosing (sometimes even under-dosing slightly), as over-fining risks stripping delicate aromas, body, and color from the wine. I especially value adding the bentonite during primary fermentation to guarantee protein stability and prevent heat-
induced turbidity.
Fining is essential for a clean base, but to achieve a flawless, commercial-grade presentation, I use a Buon Vino Mini Jet filtration system equipped with 0.5-micron sterile pads. This balanced combination of chemical fining (utilizing the minimal amount necessary and running bench trials if required) and tight mechanical filtration ensures the wine is perfectly polished, visually brilliant, and microbially stable in the glass.
9. What specific protocols do you follow, if any, to protect your white wines from oxidation post-fermentation?
Susan: I always add extra potassium metabisulfite as my white wines bulk age. At three years old, having used only the packets that came with the kit, my kit wines started browning and tasting oxidized to me, so I’m now very careful about oxygen exposure post-fermentation, and I always keep them at recommended SO2 levels based on WineMaker’s sulfite calculator.
Jeff: I add an additional 1⁄8 tsp. of potassium metabisulfite before I bottle.
Todd: I check pH, sometimes titratable acidity (TA), and free SO2 anywhere from every month to every couple, depending on how stable the wine has been and the pH of the wine. You have to be careful with whites. Reds are more forgiving.
Justin: I view oxygen as one of the enemies of white wines, so I do everything in my power to limit exposure post-fermentation. In fact, my protection strategy begins during fermentation, where I add FT Blanc Soft fermentation tannin to proactively scavenge oxygen and preserve delicate varietal characteristics.
Once fermentation concludes, strict oxygen avoidance is paramount. This includes keeping aging vessels meticulously topped up to the neck and securing them with an appropriate airlock or a breathable silicone bung.
Furthermore, I audit my free SO2 levels every 2–4 weeks using a Sentia digital analyzer. This device provides accurate, real-time data. I then put these readings into WineMaker’s sulfite calculator to precisely adjust my sulfite target based on the specific wine, volume, pH, alcohol level, and storage temperature, ensuring the wine is chemically shielded all the way to the bottle.
10. Do you always use the flavor pack that comes in the kit as instructed?
Susan: The first Riesling kit wine that I made, I added the entire F-pack that came with the kit. Unfortunately, most of my family did not want to drink it because they thought it was too sweet (and so did I). Since that lesson, I always bench trial the amount of F-pack to add and do a blind tasting for my husband or whoever might be visiting that weekend. I found half of the F-pack has won out almost every time. However, if I make a sparkling wine from the kit, I love to use the F-pack as the dosage before closure!
Jeff: I use the flavor pack with the kit. I will do bench trials with backsweetening and have my wife, and sometimes my neighbors, also weigh in on the preferred sweetness level. I have had blending parties with my neighbors to get different opinions before
I bottle.
I did not enter a Riesling this year, but in the past I have split a kit to make a dry Riesling and then conducted backsweetening bench trials to make a sweet Riesling from the same kit. For my Chardonnay, I added a little grapefruit zest (half a grapefruit) to add a little brightness to the wine. I also stirred the fine lees (sur lie aging with bâtonnage) after primary fermentation was complete.
Todd: I generally do not make whites with a flavor pack. My daughter really likes a dry Riesling, so if there is a pack, I only use half. That is the one time I would add sorbate . . . I am not a master of Riesling!
Justin: For rich, dessert-style wine kits, I typically use the entire F-pack because such a style demands an intense concentration of residual sugar and body. However, for kits that are meant to be off-dry, a heavy hand can easily throw the wine out of balance. I will conduct step-by-step bench trials with scaled-down samples to find the perfect equilibrium balancing sweetness with acidity.
To ensure absolute precision, I do not rely on sensory evaluation alone; I validate my palate by measuring the exact residual sugar. I utilize the Wine Meister app paired with Anton Paar EasyDens and SmartRef systems for this purpose. This in-app residual sugar calculator gives me some data-
driven confirmation that my bench trial calculations match my tasting notes. In some instances, these trials actually lead to using more sweetness than the provided F-pack delivers. In those cases, I will utilize wine conditioner to carefully supplement the kit’s sugar profile, ensuring I hit my exact target before scaling up to the full batch.
11. From the day you pitch the yeast, how long do you wait before bottling your white wines? How long do you let them age in bottle before drinking them at their peak?
Susan: I don’t think I’ve waited more than a year to bottle. However, I want them to get over bottle shock before serving, so I normally wait about three months before “releasing” them.
Jeff: With white wines, I find they are normally ready to go quickly. I let them bulk age a month or two more than the kit instructions suggest, but they are ready to go quickly compared to the red wines. I normally try to plan ahead and bottle them a month or two before I plan to drink them, but sometimes I’m out and start drinking them right away.
Todd: My usual protocol is to let my whites age in a carboy for about nine months before bottling. This past year has had some life complications, and my whites have been in carboy twice that long. I’ve been good about monitoring the carboys. I tasted them yesterday, and they are doing fine. After bottling, I let them sit for another couple of months at least. I prefer aged white and reds, so I am a bit slower.
Justin: From the day I pitch the yeast to the day I bottle; my timeline is typically around four months. This duration is not arbitrary; it allows ample time for a slow, cool fermentation, thorough bulk aging at cool temperature, and complete settling before I run it through my 0.5-micron filter. This time frame also allows some degree of natural degassing. Typically, I choose not to manually degas, as I find a touch of residual CO2 adds an interesting, vibrant texture to my aromatic white wines.
Once in the bottle, I allow these wines to age for 3 to 6 months to overcome any initial bottle shock and let the aromas integrate. For aromatic whites from kits, I find the peak drinking window opens right around that 6-month mark, capturing the maximal expression of those fresh esters and floral notes.
12. If you could give just one single piece of advice to a hobbyist who is thinking about making their first white wine from a kit, what would it be?
Susan: Don’t be afraid! When I received my first juice and equipment kit as a gift, I was a bit intimidated, but when 30 days were over, we tasted it and exclaimed to each other, “This tastes like wine!” I think white wines are an excellent starting point for this amazing hobby. Just be warned, just one kit may lead to many more investments in your hobby!
Jeff: Get started! If you follow the kit instructions, you will end up with a nice-tasting wine that your friends and family will enjoy.
Todd: First, learn about sanitization! If you are “clean” and you follow the instructions, your wine will be very good. Then, do your first kits exactly as the instructions suggest. I accept the fact that kit manufacturers are incredible at their trade, so at the beginning I would not change a thing. My first kit was made in six weeks, bottled and aged for 15 minutes in the back of my truck as I took it to a party.
I spent the first 10 or so red and white kits learning about the process — each step, each ingredient. Be curious and ask yourself “why?” Most importantly, wine and winemaking are about sharing stories and hospitality. Share your experience with friends, have them taste your wines at every stage. Listen and learn!
Justin: Invest in temperature control. While sanitation is the baseline for all winemaking, temperature control is what elevates a white kit from an average homebrew to a commercial-
quality wine. Fermenting an aromatic white at a cool, steady 55 °F (13 °C) instead of leaving at ambient room temperature is the single biggest factor in preserving those delicate volatile esters and floral notes. If you can control your fermentation kinetics, you control the final quality of your wine.
Further Reading . . .
• Interested in making more than just white wine from kits? Check out this more general kit winemaking roundtable with award-winning amateurs, which touches on wines of all styles.
• We have also done a roundtable focused purely on making dessert-style wines from kits.