Evaluating Ripeness
Ripeness, in its simplest form, is the vine’s attempt to continue its lifecycle. By making the fruit attractive to birds through coloration and sweetness, the vine encourages birds to ingest the fruit. The bird then flies away and deposits the seed in a new location where a new vine can grow. While this natural process ensures the survival of the vine, winemakers look for additional signs of ripeness to craft quality wine.
In Colorado, we grow grapes in a high-elevation desert climate, where triple-digit temperatures during the summer lead to rapid sugar accumulation. However, the physiological changes within the berry — such as flavor development and phenolic maturity — are slower to develop. Our industry started in the 1980s, at a time when the area’s red wines were typically harvested based solely on sugar content. The resulting wines featured high acidity, green flavors, and big, harsh tannins. Recognizing these challenges, we realized that relying solely on sugar content was insufficient for producing high-quality wines. This prompted a shift toward a more holistic assessment of grape ripeness, considering both the chemical and physiological changes occurring within the berry during ripening.
In this column on ripening evaluation techniques, I would like to share a process taught to me by my mentor Erik Bruner 30 years ago. This method has taught me so much about the ripening process and how to track changes occurring within the berry, allowing me to pick at the ideal level of ripeness for the wines I plan to make. Each of us may prioritize different parameters depending on the style of wine we are creating, whether it’s sparkling, dessert, rosé, white, or red. But we still need to know what is going on in the berry to make that crucial decision.
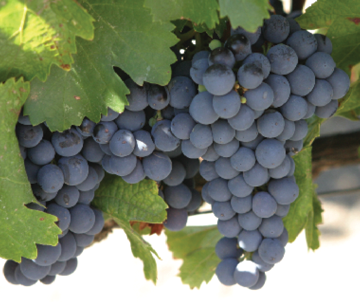
In the grapevine’s annual lifecycle, the onset of ripening occurs during veraison, when the grapes naturally begin to sweeten and turn from green to red in red grapes or green to gold/translucent in white grapes. The most common parameters tracked are the increasing sugar level and an increase in pH while acid levels decrease. Other physiological changes — including color and flavor development and tannin maturity — are happening at the same time.

It is with these physiological changes that we will focus, evaluating color development in the skins, color of the seeds for tannin maturity, and tasting the juice for both flavor development and sugar/acid balance. The only tools needed are a Ziploc bag, small beaker or cup, and ability to write down what you see, smell, and taste. I recommend devoting a notebook for the purpose of writing down your evaluations in the same place for an easy reference. Each time you perform the evaluation, maintain the same order, keeping the description to 1–3 words for a concise language at each stage evaluated.
Evaluating Grapes for Ripeness: Getting Started
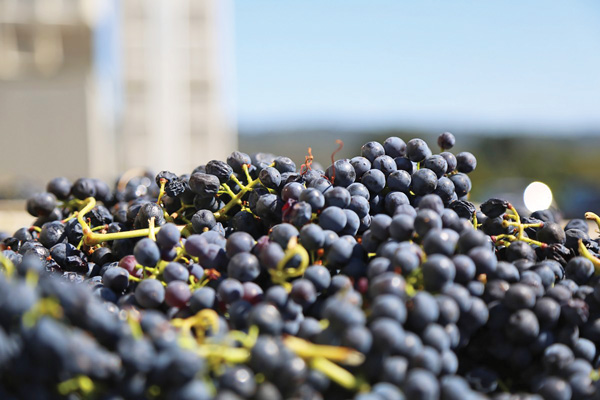
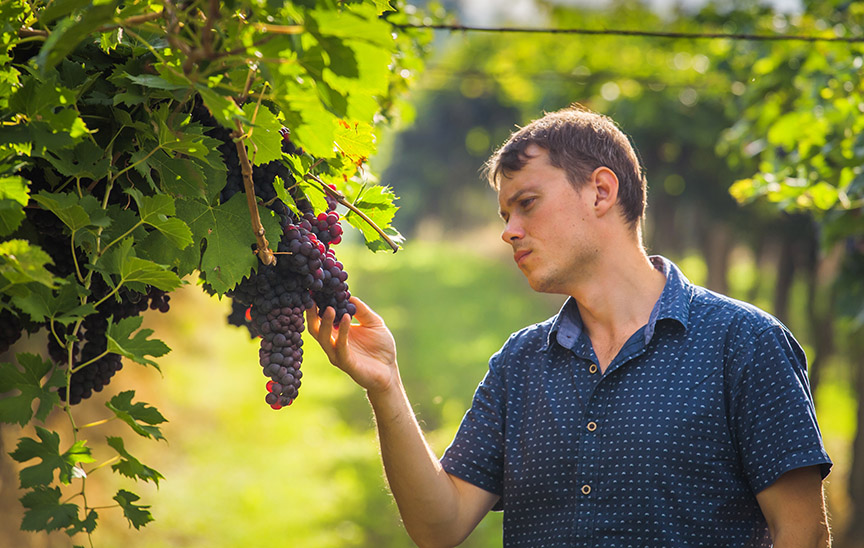
You first need to collect your sample to be evaluated. Grab a 1-quart (1-L) Ziploc bag for each variety or block of grapes you intend to evaluate (the size of the smaller sandwich and snack bags would work, but they are a bit thin and usually spring a leak at some point in the process, so go with the thicker ones). The goal is to get a 50–100 berry sample that is representative of the area you are evaluating. “Representative sample” meaning the clusters you see in the vineyard should be represented in the berries in your Ziploc.
As you walk through the vineyard, pull individual berries from different sides of the vine, different clusters along the cordon, and different berry locations within the cluster itself. If you will not start the evaluation process at that time, then store the whole berries in your bag in a cooler or refrigerator until you are ready to evaluate. If it has rained, allow the clusters to dry, as rainwater can skew results.
Pulp Assessment/Color Development
Begin the evaluation process by popping the berries in the bag. While popping the individual berries, do you see liquid draining out of a popped berry or is the pulp solid and green? At the underripe stage, the pulp will be a solid green center that holds onto the seeds. As the grapes get closer to ripeness the pulp will become more liquid. With native or hybrid grape varieties you may not see a lot of liquid as they retain more of the solid pulp structure, but you should see a loosening of the pulp structure and color change as they ripen.
Once all the berries have been popped or crushed, eliminate the air in the bag so you can lay the bag flat on the counter. Evaluate the color and texture of the skins, pulp, and seeds, writing down what you see at each step. First look at the pulp — do you see mostly liquid or solid green pulp centers? Second, look at the color development in the skin — do you see full skin color or some green, rosé, and red/purple on the same berry skin? This can be critical in red wines where you want full color development with all berries and throughout individual berry skins. The color development can also be evaluated by the color from the skin leaching into the juice.

Seed Maturity
While the bag is still lying flat, look at the color of the seeds. You may see a variation of seed colors within your bag due to the individual stages of clusters or berries in the block you are sampling. Look for the color represented by the highest percentage in your sample. Seeds will start on the spectrum of a lime green or yellow-green, then mature to a brown-green, and finally to a gray-brown with no traces of green as they ripen. Write down the color you see predominately represented in the bag; it can be useful to add a percentage of green-to-brown within one seed to signify where you’re at in the ripening process.
At this time, pull a seed or two out of the bag for tasting. Chances are you might see a few color stages, so it is best to taste each to relate color of the seed to the corresponding taste and development of phenolic maturity. You will be biting down on the seed, not like chewing gum, bite down once and notice the extraction, then spit out the seed. This will make sense when you bite your first lime green seed; it will be very astringent and bitter. Underripe seeds will be chewy; as soon as you bite down on the seed it will be a quick release of tannic acid. If the seed has a higher percentage of brown when you bite down, the seed will have a consistency of a popped popcorn kernel, and the release of tannic acid will not be as harsh.
Now that you have evaluated the skins, pulp, and seeds, separate or press the juice by pouring liquid from the bag into a small beaker or cup, leaving behind the skins and seeds in the bag. There may have been some color leaching, but the overall color is easier to identify when it is in a clear cup or beaker. Use one or two words to describe the color of the juice. Juice from white grape varieties will go from lime green when underripe to golden as the grapes ripen. Red grape juice can start off as a light tan shade, like the flesh of a plum, and then as you progress you will see different shades of light pink to darker shades of pink depending on the grape variety.
Flavor Development
Flavor development is the last parameter for evaluation of physiological ripeness. When I started teaching students at CMU Tech, I developed an apple tasting to show the progression of flavors and sugar/acid balance that was seen in the grape ripening process. The different apple species can give you concise language to write down that corresponds with the flavors, sugar/acid balance, and to some extent the astringency that you are tasting in the juice.
You can do this at home by purchasing Granny Smith, Fuji, Honeycrisp, and Red Delicious apples. Slice each for tasting. You can also purchase a lemon and slice it to replicate a grape that has just come out of veraison with high acid levels. With each of the apples, especially Granny Smith, taste the peel and flesh separately, this adds to your ripening descriptor language. Typically, we start evaluating berry samples for harvest decisions shortly after veraison to start a baseline. The vegetative flavors and tartness of the juice with low sugar matches the flavors in the Granny Smith apple. As the acid decreases and sugar increases, flavors move from vegetative descriptors toward fruit, which is reflected in the Fuji apple. As the grapes continue to ripen, they progress to a Honeycrisp apple with higher sweetness and complete elimination of vegetative components. If the grape continued to ripen or became overripe, acidity is less recognizable on the palate and the flavor profile becomes a bit oxidized. You have gone past the sugar/acid balance of the Honeycrisp apple and moved into the characteristics of a Red Delicious apple. By familiarizing yourself with the different apple species, you will create a language library to be used consistently.
The second part of flavor development evaluation involves tasting the juice and selecting the descriptor that best matches the stage of ripeness. After veraison, underripe grapes often display vegetative or herbaceous flavors, and may even resemble lemon juice. As the grapes mature, these flavors evolve as red grapes move toward berry notes, while white grapes develop riper flavors such as honey, pear, or peach. To maintain consistency and clarity in tracking ripeness, I recommend using broad, standardized descriptors that correspond to each stage of flavor progression.
When evaluating Cabernet Sauvignon grapes, the juice often begins with flavors resembling the tartness of Granny Smith apple peel or freshly extracted lemon juice. This early stage is marked by high acidity and low sugar content, which are typical characteristics of underripe grapes. As the grapes progress in ripeness, the flavor shifts toward apple/plum as the acid levels start to decrease. As ripening continues, sugar increases while acid decreases and close to full ripeness the juice takes on berry flavors. Similarly, white grape varieties like Chardonnay undergo their own distinct flavor evolution as they ripen. The juice initially tastes like fresh lemon juice, then progresses to Granny Smith apple, continues through the apple spectrum, and as ripeness approaches, develops into the flavor of a ripe pear.
Bringing it All Together
To summarize the evaluation of ripeness parameters, we began with popping the berries and investigating the pulp structure. Color development was evaluated by observing the color of the grape skins, the intensity of color leaching into the juice, and examining the color of the juice sample in a clear cup. Phenolic maturity was assessed by examining the seed color and tasting the seed to evaluate astringency, noting texture changes from chewy to popcorn kernel-like. Flavor development was evaluated by tasting the juice for specific flavor descriptors and identifying the overall apple species to represent flavor, sugar/acid balance, and astringency.
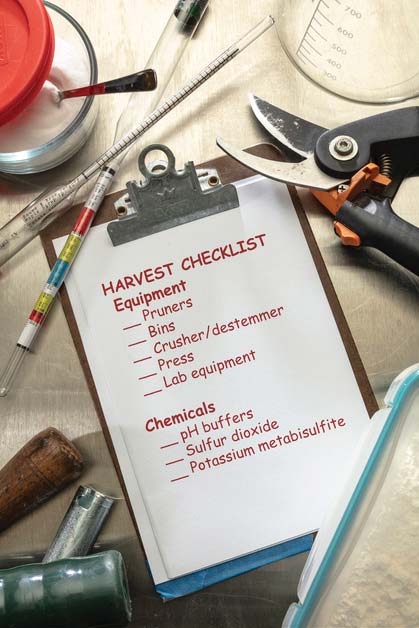
At this point in the process, you have enough volume of sample to continue with lab analysis on sugar, pH, and acid levels. You can run the sugar using a refractometer, but more lab equipment is needed to run the pH and titratable acidity. These numbers will complement the physiological evaluation just performed and will give you a full picture of what is going on within the berry.
While the quality of wine begins in the vineyard, the winemaker’s first critical decision is when to harvest the grapes. This timing has a significant impact on the style, quality, and consistency of the finished wine.
If you are interested in a more in-depth description of the Berry Sensory Assessment along with corresponding photos, I would recommend the book Winegrape Berry Sensory Assessment in Australia by Erika Winter, John Whiting, and Jacques Rousseau.
Further Reading
There is no more critical step in winemaking than picking at the often-fleeting correct moment. Yet ripeness determination is poorly understood and the associated picking logistics are often incompetently executed. Learn more about what to base your picking parameters around.