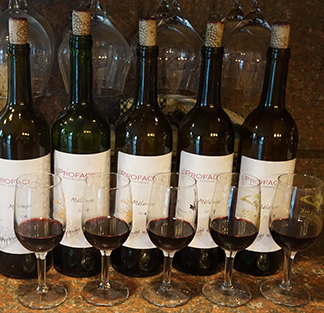
Homogenization Prior To Bottling
Q. In a previous column I saw you included a bottling checklist that mentions homogenization of the wine in another vessel prior to bottling. I assume that means combining similar wines that aged in, say, carboys into a larger vessel like a Brute trash can? Then pump from there? Doesn’t that greatly increase the amount of oxygen mixing in with the wine?
Paul Jester
Poway, California
A. Your assumption is exactly right. That homogenization step is your final blending stage, where lots that have been aging separately finally come together to become the wine you intend to bottle. This might mean combining three carboys of the same Cabernet Sauvignon that aged slightly differently, or it might involve pulling a little Malbec into a Cabernet Sauvignon and Merlot blend to round out the mid-palate.
Your concern about oxygen is also well founded. Any time wine moves from one vessel to another, especially when it is no longer fermenting and producing its own protective carbon dioxide, oxygen becomes the invisible enemy. The goal is not to eliminate oxygen entirely, which is impossible in even most commercial wineries, but to manage it.
Let’s start with why we bother with homogenization in the first place. Wines that have aged in separate vessels, even if they came from the same fermentation, rarely end up perfectly identical. One carboy might have picked up a little more lees contact, another might have had a slightly looser airlock seal for a few weeks. Blending them together gives you a consistent bottling lot, but more importantly, it allows the wine to integrate before you commit it to glass. When lots are combined, small chemical instabilities can show up. A bit of protein haze, a slight tartrate precipitation, or a faint shift in aroma sometimes appears only after blending. Giving the wine a week or two to settle after homogenization lets those surprises reveal themselves while you still have the chance to correct them.

What you want to avoid is turning that blending step into a miniature oxygenation experiment. A food-grade trash can without a lid is not your friend here. It leaves the wine wide open to air, and the broad surface area invites oxygen to dissolve rapidly. Choose your blending vessel based on your lot size, but make sure it is something you can close and protect. For a few 5-gallon (19-L) carboys, a 15-gallon (57-L) keg is perfect. For larger volumes, a stainless steel drum or a variable-capacity tank can serve as the blending vessel. The goal is to have enough headspace to move the wine in and out, but not so much that the wine sits exposed.
Now let’s talk about how to move the wine. Racking for bottling is not the same as racking during fermentation or early aging, when a bit of air can sometimes help a young wine shed stinky sulfide compounds or help with the early aging process. At bottling, the wine should already be where you want it stylistically. This is a time for gentleness. Avoid splashing and move the wine in a smooth, laminar flow. Gravity is wonderful if your setup allows it. If you use a pump, keep the speed low and the line short.
One of the most effective tools you can add to your home cellar is a small cylinder of inert gas, either carbon dioxide or argon, with a simple regulator. These are sold at welding supply shops and many winemaking retailers, and they change the pre-bottling game entirely. Before you begin racking, give your empty blending vessel a brief blanket of gas, just enough to displace the air at the bottom. As the wine flows in, it pushes that inert layer upward rather than mixing with oxygen. After the blend is complete, a light gas blanket over the headspace before sealing the vessel provides an added margin of safety.
Sulfur dioxide is your second line of defense. Check your free SO2 before you begin the blending process. For most red wines with a pH in the middle 3.6 to 3.7 range, I like to see free SO2 around 30 ppm going into the bottling blend. The act of racking and blending consumes sulfur dioxide, so it is wise to check again after homogenization and once more just before bottling.
Once the blend is made, give it a week or so to marry and settle, keeping the vessel topped and blanketed with inert gas. During that time, taste the wine, watch for haze or sediment, and confirm that nothing unexpected is developing. Make little tweaks if needed, but now is not the time to radically change chemistry or do big fining additions unless you’re correcting a grave flaw. By racking gently, limiting headspace, using inert gas liberally, and keeping sulfur dioxide in the right range, you’ll be able to succeed with the pre-bottling blending process.
