Preparing White Wines for Bottling
After the busyness and stress of fall harvest season, winemakers are returning from a much-needed holiday break and getting back to cellar activities. In late winter and early spring, the tasks in the winery turn to barrel management for red wines. For white and rosé wines, heat and cold stabilization activities are performed, as well as some early filtration to get wines ready for bottling in late spring to early summer.
In this article we’ll be discussing these key activities and timing as we approach packaging our white and rosé wines from last fall, as well as some general thoughts on timing, tweaks, and preparing for bottling day.
The details of heat and cold stability, as well as filtration, have been covered in depth in past articles, so we won’t be going into detail in terms of the science or processing here. Instead, we’ll focus on timing and the pros and cons of different approaches. Understanding how long these techniques take will inform our decision on when our wine may be packaged.
Cold Stability – Timing Considerations and Alternatives
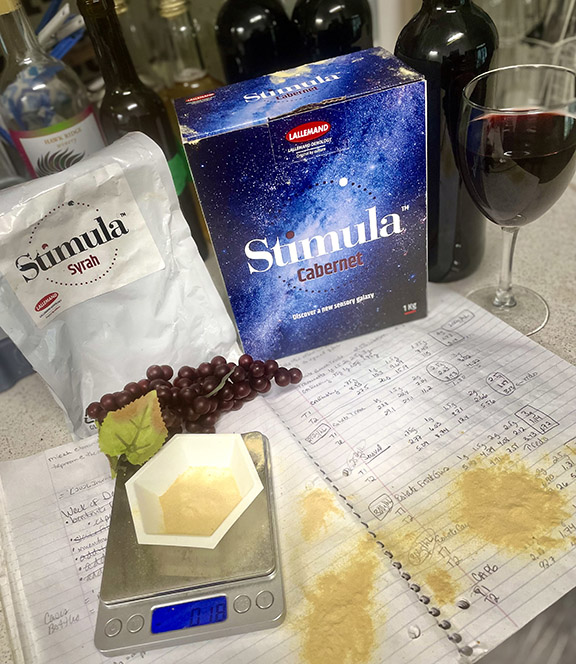
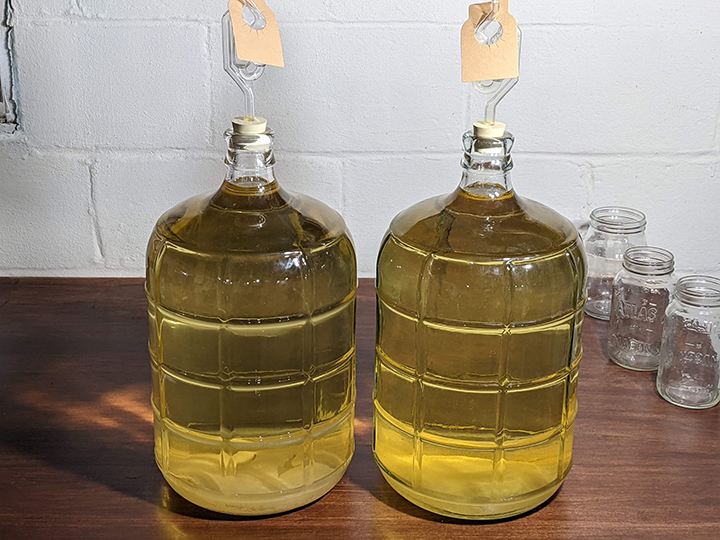
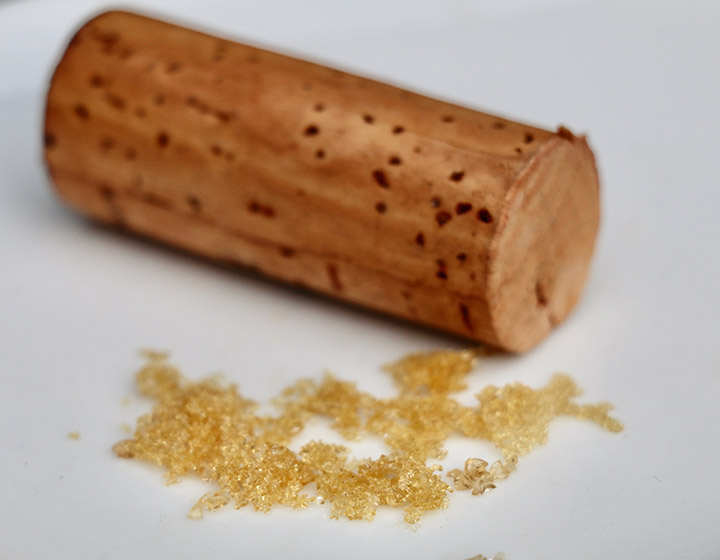
Traditional cold stabilization, also known as potassium bitartrate stabilization, involves forcing the crystallization and precipitation of potassium bitartrate crystals in the wine cellar so that they do not precipitate in the bottle when the wine is exposed to cold temperatures. Cold stabilization in glycol-cooled tanks is often performed at temperatures just under freezing (28 to 30 °F or -2 to -1 °C) and takes several weeks. This process can be accelerated by adding potassium bitartrate crystals (called “seeding”) and mixing.

Bitartrate stabilization happens more slowly at warmer temperatures, so if you’re relying on winter temperatures in your garage to promote stability it might take six weeks or more at temperatures between 30–40 °F (-1 to 4 °C), and may not happen at all at temperatures above range. Be careful with outdoor storage though —if you live in a cold climate and temperatures drop below 20 °F (-7 °C), your wine may freeze, causing broken carboys and oxidation. Even above freezing temperatures, wine volume will expand in cold temperatures, so it is best not to tightly bung carboys that are exposed to cold temperatures. I speak from experience here, as I lost 5 gallons (19 L) of Merlot this way when a carboy cracked due to high pressure after I used plastic wrap to hold a solid bung in place because the bung kept popping out of the carboy when temperatures fluctuated.
Once the wine has been stabilized it can be racked off the potassium bitartrate crystals while still cold. Cold wine is especially sensitive to oxidation, so racking and transfers of cold wine, and storing the wine with head space, should be minimized.
In the last decade there have also been several additives introduced to the market that promote bitartrate stability without chilling, saving time and energy. Carboxymethyl cellulose (CMC) is recommended for white wines only, and potassium polyaspartic acid (KPA) is recommended for all wine types. Wines must be relatively clear and protein stable before addition, thus these additives are usually added just before bottling. If you live in a warm winter climate and don’t have access to cooled tanks, these additives can keep your wines crystal-free.
Heat Stability – Timing
Heat stability, or protein stability, entails removing dissolved protein from the wine so that it is unavailable to unfold, aggregate with other proteins, and fall out of solution as a haze or sediment (this process is accelerated by higher temperatures, thus this visual defect is also termed heat instability).
Heat stability is commonly achieved by performing a heat test and adding a prescribed rate of bentonite to the wine while mixing. Bentonite is relatively slow to settle and may take 1-3 weeks to settle completely. Bentonite often produces “fluffy,” diffuse lees, which means more wine is lost with bentonite lees than other fining agents. Because of large lees losses, some winemakers combine bentonite fining with cold stabilization, as the potassium bitartrate crystals help form a more compact bentonite lees layer. Bentonite fining is good at attracting and removing proteins from wine but usually does not produce a completely clear wine. To achieve brilliant clarity, other fining agents or filtration are usually employed.

Lees Aging – Another Timing Consideration
A technique I frequently practice with white wines is lees aging, where the wine is allowed to mature with the yeast lees for an extended period, with periodic stirring to re-suspend the lees in the wine (AKA bâtonnage). I find that lees aging adds body to white wines and increases the aroma complexity of the wine. Winemakers I’ve spoken with say it takes at least 7–9 months to see noticeable changes from lees aging. You can lees age for shorter periods of time, but the impact on aroma and body will be subtle. I think lees aging is most interesting in wines with subtle aroma and crisp acidity. Allowing wine to age on lees for long periods tends to decrease the fruity, fresh aromas of the wine, so it might not be appropriate for especially fruity and floral varieties like Sauvignon Blanc or Traminette. Long aging of whites also increases the chance for oxidative damage to wine, so it is a bit risky and proper storage is important.
If you employ lees aging for 8 months or more, you clearly won’t be bottling until summer to late fall. As I write, it’s mid-November and I’m cold stabilizing a Pinot Gris I’ve aged on lees from the previous harvest more than a year ago and plan to bottle soon. The wine has aged gracefully and after so long on the lees it has clarified so that filtration will be unnecessary.
Blending and Other Adjustments
Blending is a great way to make synergistic improvements to wines that may be out of balance on their own. For instance, blending a bland wine with high acid levels into an aromatic but flabby wine may produce a wine blend that smells and tastes better than the two wines on their own. Blending is more art than science, and it requires that you have different wine lots available to blend. Blending should not be used to hide a faulty wine; it generally takes a very large quantity of sound wine to hide a wine fault. Don’t ruin a good wine by blending it with a bad one. It’s better to treat the faulty wine on its own, if possible, or dump it and try again next year.
If the aroma is not where you would like it there are not a lot of options for traditional wines other than blending. Some whites and rosé wines benefit from oak aging, but it’s easy to overdo it with oak aroma overpowering the wine, so be careful. There are some fining agents available to minimize faulty aromas, so you can research these additives on home winemaking supplier websites if you have a problem wine. If all else fails, you could consider making a formula wine, where you add some food-grade ingredients to create a more compelling tipple. Citrus and herbs popular in Vermouth or “aromatized” wines like Lillet might be an interesting choice for a wine that you don’t find very compelling on its own.
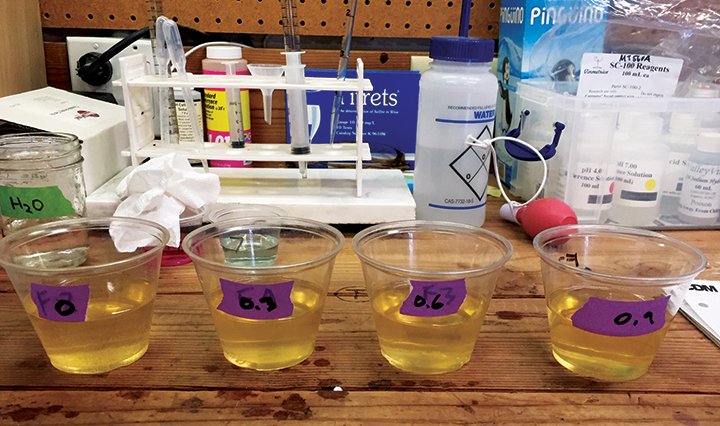
Acid or sugar adjustments are also a great way to bring a flabby or tart wine into balance prior to bottling. Acidification and deacidification late in the process are usually accomplished by adding tartaric acid to acidify, or carbonates (potassium carbonate or potassium bicarbonate) to deacidify. Bench top trials for these additives are best so that you can determine the optimum level of acidity or sugar prior to treating the entire lot. Keep in mind that if you are changing the acidity of the wine, or adding potassium, that you may be impacting the potassium bitartrate stability of the wine and therefore a stability check should be performed prior to bottling if that is important for you.
Clarification and/or Filtration
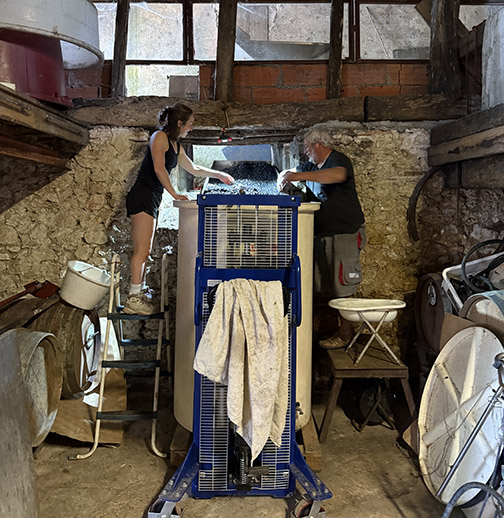
Whether or not you decide to fine or filter your wine for even greater clarity, or age the wine on its lees, the wine will need to be racked off accumulated lees at some point. Racking is the process of removing clear wine off sediment at the bottom of a tank, barrel, or carboy. For barrels and carboys, a racking wand is employed with a stand-off that keeps the suction end of the wand out of the sediment. For tanks, a pump and hose are employed through the top or racking door of the tank to slowly lower the liquid level of the tank until the sediment layer is reached. Racking is a critical skill to develop in winemaking to remove sediment from wine (or wine from the sediment) with the least possible wine loss. Depending on the grape variety and your level of concern for haze in the finished product, skillful racking can produce very clear wines that may not need further processing.
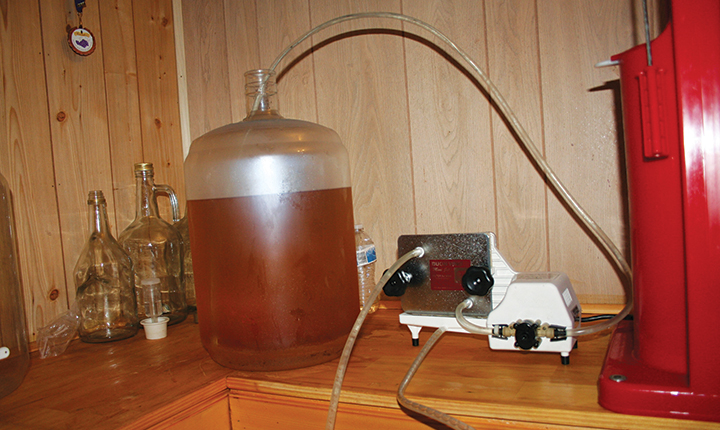
If you decide you’d like a more brilliantly clear white or rosé wine than simple racking allows, but don’t have the equipment or philosophical inclination to filter your wines, I’ve found that isinglass fining and careful racking produce quite clear wines. Isinglass is a structural protein isolated from the swim bladder of sturgeon. While it doesn’t sound like something you should be adding to wine, it is approved for use in wine production and does work quite well. The only downside to isinglass fining is that it is quite slow to settle, often taking 3–4 weeks to settle completely.
Filtering wine should be one of the final activities prior to bottling, as the wine should be free of anything that could cause precipitates prior to the final filtration. Again, filtration specifics are covered elsewhere, so in this article we will just be discussing timing and the importance of filtration for specific styles.
Are fining and filtration necessary? This is a philosophical question each winemaker needs to answer for themselves. I personally don’t mind a slight haze in my wine, or a few potassium bitartrate crystals in the bottom of a bottle. Potassium bitartrate crystals and haze are only aesthetic defects, after all, and don’t impact aroma or flavor. However, I’ve also had bottling disasters with wines where I retained some sugar for balanced taste. These wines were not sterile bottled effectively and thus ended up refermenting, and sometimes exploding, in bottle. If your wine contains residual sugar, it is necessary to either sterile bottle or add a yeast inhibitor like potassium sorbate. Sorbate works well but does tend to add some aromas to wine (celery-like when young and honey-like when aged), which may compete with delicate wine aromas in varieties with subtle aroma properties (e.g., Pinot Gris, Chardonnay, Cayuga White, etc.).
As mentioned earlier, filtration is usually one of the last activities to occur prior to packaging, especially for wines that are sterile bottled. Because of the tight membrane filtration required for sterile bottling, fine filtration using a pad or cartridge should be performed no more than 48 hours prior to bottling to ensure colloidal agglomerates do not plug the sterile filter membrane. The other aspect to consider in sterile bottling is that the filling and packaging equipment needs to be sanitized as well.
Timing of Packaging and Considerations Prior to Packaging
So, is it possible to package wines in late winter or early spring? Of course! But if racking, heat and cold stabilization, and filtration are necessary for the wine style and your preference, then these activities need to be completed relatively quickly after harvest. If you wait until after the holiday season, then the time it takes to complete stabilization and clarification can easily push bottling into late spring and early summer.
Another consideration for packaging early is that it precludes the ability to adjust the wine balance based on the evolving flavor of the wine. Some of the aromas produced during fermentation will fade relatively quickly (within 3–6 months). Cold stabilization can change the acidity slightly, malolactic fermentation even more so, thus waiting and tasting the wine in early spring may give you an opportunity to adjust the acidity or blend wines for better aroma and balance. If wine is kept in a full, airtight container at a reasonably cool temperature there is little downside to allowing the wine to age for a few months prior
to bottling.
Packaging Checklist and Final Adds
Once you’ve determined the wine is ready for bottling, it’s important to confirm you have everything prepared for packaging:
Bottling Equipment
A bucket with a spigot connected to tubing and a bottling wand, a bottle tree and sanitizer injector if reusing bottles, and a corker (floor corkers work best for anything more than a few bottles) or crown capper, depending on bottle type.
Mandatory Raw Materials
Bottles and corks or crown caps – corking should be checked prior to bottling day to ensure the corks fit in the bottles and the corker works with the bottles and corks.
It’s also good to double-check an appropriate quantity of bottles and closures are on hand for the volume of wine you plan to bottle. If you are reusing bottles, they should be clean and free of sediment prior to bottling day. It’s best to rinse bottles immediately after use if you plan to reuse them, but bottle washing adapters for home dishwashers also make bottle cleaning relatively convenient. Regarding corks, we could spend a whole article discussing cork products, but in my opinion the current best cork products available to home winemakers are microagglomerated corks labeled as TCA-free.
Optional Raw Materials
Labels, capsules, wax, etc. It’s not necessary for home winemakers to label and capsule wines at the same time as filling and closing the bottle, but if you plan to do so you should have the appropriate number of labels/capsules/etc. available, as well as a capsule applicator and labeler if you plan to produce many bottles.
The Final Step – an SO2 Addition
The final step prior to packaging is usually the addition of SO2 in the form of potassium metabisulfite. Most winemaking texts recommend a 20–30 ppm SO2 addition for white wines, but the exact amount you add is dependent on several factors. If you haven’t added SO2 in some time (within the last 3-6 months), then a significant percentage of the SO2 added will be bound to acetaldehyde and unavailable for protection against continued oxidation (both during the packaging step and the slow oxidation through the bottle closure as the wine ages). Thus, it’s appropriate to add more SO2 if the wine has not had a recent addition, perhaps in the 40–50 ppm range.
Another consideration for SO2 addition is the length of time the wine will age prior to consumption. If you plan on aging the wine for long periods, a high SO2 addition (perhaps 50–75 ppm) will help the wine stay fresh for many years. The downside of too high an SO2 addition is that the wine will smell like a struck match, obscuring the fruity and floral aromas in the wine, and the wine may even have a slightly metallic taste. The struck match aromas blow off when the wine is oxidized, so a hint of this aroma when the wine is first poured is OK, but high levels of SO2 are off-putting and may not dissipate quickly. In commercial wines I notice this hint of struck match most often with German Rieslings. Some consumers like to age Riesling for many years, like 20–30 years, thus I think German producers often add a higher level of SO2 at bottling than producers in other regions. If you plan to consume your wines in the next year or two, as most white and rosé wines are intended, then a standard addition of 20–30 ppm
is fine.
If you’re unfamiliar with how to calculate SO2 additions, refer to the WineMaker sulfite calculator.
To summarize, let’s end with a bottling checklist:
1. Does the wine smell and taste acceptable?
2. Is the wine cold and heat stable, if desired?
3. Is the wine clarified to the degree desired?
4. Do you have the correct number of bottles and closures for the wine volume you plan to package?
5. Has the bottle, closure, and packaging system been tested to ensure each component is compatible and there will be no surprises on bottling day?
6. If the wine will be sterile filtered at bottling, has the wine been pre-filtered less than 48 hours prior to bottling?
7. Has the final SO2 addition been added to the wine? SO2 may be added as the wine is racked into the filling bucket, but you should mix the bucket gently to ensure it is fully distributed.
8. Has the bottling equipment from the membrane filter to the filling and corking equipment been sanitized?
9. Have the bottles been sanitized and left to dry on the bottle tree?
When the answer to all of these questions is “yes,” you are ready to bottle your wine.