Sampling for Ripeness
We get one chance a year to make good wine. From budbreak to harvest, we pour as much as ten months out of the year into managing our vineyard, managing frost and pests, grooming our canopy for sunlight and air flow, and preparing our winemaking equipment. Through all that work, a few critical errors can sour or even ruin a season we anticipated to be successful.
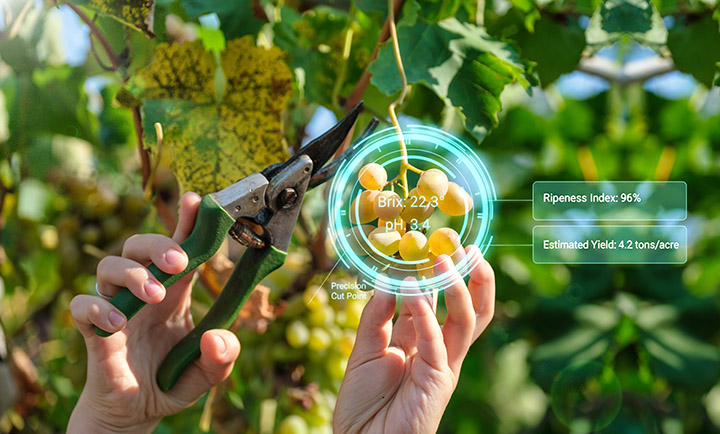
The moment we cut the fruit from the vine is of monumental importance vis a vis timing and discernment. A wine’s potential quality is dictated by the moment of harvest: The wine’s sugar, pH/acidity, and phenolic ripeness cannot be replicated by additions at the crusher, because great wine is not made in a lab — it has natural balance and deliciousness that were born in a well-managed canopy and punctuated by a picking decision that’s spot on to the wine style you are trying to create.
Too often, that decision is based on a quick taste of a few berries, or a single Brix reading pulled from the most accessible cluster. The result? Wines that miss their mark: Overripe and flabby, underripe and angular, or simply out of balance. The truth is simple: The accuracy of your vineyard sampling directly determines the quality of your wine.
This article will walk you through how to sample grapes properly, interpret your results, and make better harvest decisions, all with tools and techniques accessible to the small-scale grower.

Why Sampling Accuracy Matters
Variability is the rule in small vineyards, not the exception. Even within a few rows, you’ll find differences in sunlight exposure, soil depth, vine vigor, and crop load. That variability translates directly into differences in sugar, acid, and flavor development.
If your sample doesn’t reflect that variability, your data won’t reflect your vineyard. And if your data is off, your harvest decision will be too.
Here’s the main problem with most winegrape sampling procedures: We have hundreds of thousands of years of primate (frugivore) evolution nature influencing our decisions. Imagine being at the supermarket, looking at packages of strawberries. Your eyes are seeking out what the palate desires: Calories and deliciousness — dark berries that will be sweet and ripe down to their core. You are programmed to seek ripeness, like a simian Robert Parker, and even the most ancient wine writers like Vago and Pliny the Elder suggest hanging wine grapes to full ripeness.
The common mistake is “convenience sampling” — grabbing fruit from the same vines, often from the ripest clusters or at the edge of the block or near the path of least resistance. Another is relying entirely on Brix as the indicator of ripeness. Both approaches can lead to inaccurate results and wines that are out of balance from poorly timed harvest.
Accurate sampling is about representation. Your goal is not to find the best fruit in the vineyard; it’s to understand the average condition of all your fruit and determine a method for increasing consistency of ripeness from cluster to cluster, vine to vine, row to row.
Here’s how improper or inaccurate sampling can negatively impact your wine quality.
Without strict rules for sampling, your choice of berries will naturally be riper than the average in the vineyard because of your (primitive) desire to pick the ripest fruit.
It is very common, even in the pro wine world, to deliver ripeness reports to winemakers that have exaggerated sugars and acidity. My winemaking guru and teacher, Bryan Babcock, was famous for ignoring growers’ “ripe numbers” — “Never trust a farmer’s numbers,” he would say to me, which led me to vow that I would have the most accurate field sampling in Santa Barbara for my contracted buyers.
Expecting red wine grapes at 25 °Brix and receiving them at 22 °Brix is a nightmare for commercial wine production. The acidity will also be likely higher from a too-ripe sample, which can cause green and sharp edges to the wine that will either need to be de-acidulated or drunk with a sour-puss.
It may look like you got an accurate sample — even if you do get a good representation from all the fruit for a balanced and accurate sample, I worry about “bucket bias.” The fruit all combines to good numbers, say 24 °Brix and 2.5 pH, but some of the fruit was raisined and overripe, and some was still pink with screaming acidity.
Fruit sampling should inform our senses and discernment to see how uniform the ripeness is. Uniformly ripe berries, from shoot to shoot and vine to vine, are of immense importance in making great wine. Every berry in the harvested section should be within 2 °Brix of every other, and in the greatest vineyards, within 1 °Brix. This is not easy to achieve, and requires green-harvesting lagging fruit at 90–95% veraison.
Of course I am lucky to make wine in Santa Barbara County, California, where weather rarely forces us to pick outside our desired ripeness parameters. Take into account that I understand that rains, hail, heat spikes, etc. may force our hand on harvest, wrecking sampling’s magic ability to dial in style and quality.
A Case Study in Ripeness:
When I managed Clos Pepe Vineyards in California’s Santa Rita Hills, I taught interns my protocol for field ripeness testing each year for 20 years. Here are the basics:
I sent the interns to do a field sample, and I would do one as well, without any instructions except to pick about 30 representative clusters from a certain section a few weeks after veraison and green-dropping lagging clusters.
They used their “primate” senses, I used a very specific system of taking my primate senses out of the process, which I’ll detail soon.
The interns’ samples came in 1.5–3 °Brix higher than my samples, and the pH was 0.1–0.3 higher (lower acidity due to higher ripeness).
We tasted the crushed fruit/juice after letting it sit on the skins for 24 hours — my sample was a bit more acidic and green — theirs tasted sweeter and softer.
Using the interns’ samples to determine a pick date might have led us to pick 1–2 weeks too early.
When we did our last field sample, the day before picking, we would save our Brix and pH numbers and correlate them with the actual testing of the entire crushed block. My numbers would usually be spot on, and the interns would be 1–2 °Brix high in their estimates. Just that slight miscalculation will fundamentally change the style of wine we are making.
Then, after this lesson, I would train the interns to do proper random berry sampling, and give them the gift of accuracy that I have honed in my own sampling protocol.
What Are You Measuring?
When you sample grapes, you are trying to quantify three key components of ripeness:
Sugars (°Brix) determines potential alcohol. As grapes ripen, sugar levels rise steadily, making Brix the most familiar metric for growers. Grape juice turning into wine has about a 0.55 to 0.6 Brix/Alcohol conversion rate, meaning a dry wine made from 20 °Brix fruit will have about 11.5–12% alcohol by volume.
Acidity (pH and titratable acidity, or TA) determines freshness, microbial stability, and how your wine will age. As grapes ripen, acids drop and pH rises, sometimes rapidly in warm climates. Usually, small-scale vineyards and winemaking operations can get away with measuring only pH, but it’s important to take careful notes on how the pH at harvest influences the wine’s style. Some regions tend to have high or low TA that are oddly matched with their pH. Testing TA a few times in juice and wine can help understand the perfect pH for harvest.
Phenolic maturity refers to the ripeness of skins, seeds, and tannins, especially important for red varieties. This is not easily measured with a tool; it requires tasting and observation. Most grapes have achieved full phenolic ripeness when the seeds have reached 75%+ nut-brown color, and the gooey pectin is easily removed from the seed cluster. I also like to take a berry in the palm of my hand and grind it in a circular motion with my fingertip to see how much color is bleeding out of the skin after 10 seconds or so.
No single number determines harvest readiness. The goal is balance between sugar, acid, and flavor — and hedging your bets against incoming weather, pests, or having to work on Monday.
Vineyard Variability: The Core Challenge
Even in a backyard vineyard, conditions vary more than you might expect. One vine may be slightly shaded, another may have deeper soil, another may be carrying a heavier crop. Clusters on the same vine can differ based on sun exposure or position. This variability is why representative sampling is so critical.
Think of your vineyard as a mosaic, not a uniform field. Your job is to collect small pieces from across that mosaic so your sample reflects the whole picture.
Measuring Brix, pH, and TA
Brix can be measured with a refractometer or hydrometer. Refractometers are fast and require only a few drops of juice, making them ideal for small growers. Be aware of temperature effects and calibrate your instrument with distilled water regularly.
pH is best measured with a pH meter. While inexpensive meters are widely available, they require regular calibration with buffer solutions to remain accurate.
Titratable acidity (TA) can be measured with a simple titration kit. While it takes a bit more time, TA provides critical information about the structural balance of your wine.
Together, these numbers give you a much clearer picture than Brix alone.
Sampling Frequency and Record Keeping
Sampling is not a one-time event: It’s a process.
Begin sampling a few weeks after veraison (when grapes begin to soften and change color). Early in the season, sampling every one to two weeks is sufficient. As harvest approaches, increase frequency to every few days.
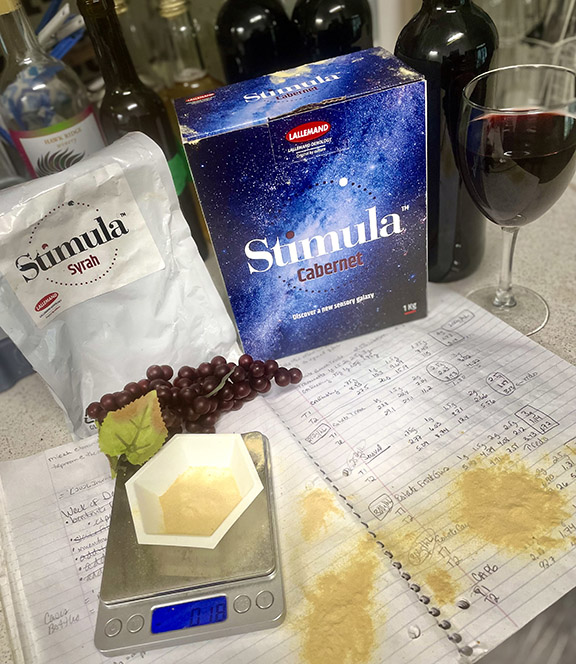
Equally important is keeping records. A simple notebook or spreadsheet tracking Brix, pH, and TA over time allows you to see trends. Ripening is dynamic, and watching how quickly sugars rise or acids fall can help you anticipate your ideal harvest window. Also include records on temperature, sun, rainfall, and other issues that may influence ripening cadence.
What you’ll need for these tests:
• 1-gallon (3.8-L) Ziplock bag for each block sample you intend to perform.
• Strainer and graduated cylinder for measuring Brix (if hydrometer is used).
• Lab with equipment to accurately measure Brix and pH.
• A refrigerator for cooling red samples overnight.
• Notebook or spreadsheet for recording numbers, flavors, and notes.
Protocol for Ripeness Sampling in the Small Vineyard
In commercial vineyards, I like 20-lb. (9-kg) samples, using whole clusters. I sample the vineyard a week or so after veraison is finished, and then every week to two weeks, more often if the weather is warm/hot. Then, close to harvest (22+ °Brix), I will sample a few mornings per week to finalize harvest date.
I prefer to do my sampling first thing in the morning, before the heat/sun impacts the sample. In small-scale vineyards, we want some fruit left to make wine, so we’re going to pivot to berry-sampling.
• Choose a random number: 3, 5, or 7. I like 3 for a slightly smaller vineyard, 7 for a vineyard at least half an acre or more. I’ll use 3 as my number for this example.
• Using your number, walk that many rows in, and then that many vines in. Third row in, third vine.
• Then use that number from the center of the vine to find the third cluster. Do not ignore interior clusters, or a cluster that is harder to reach. It is vital that the randomness of this sample is perfected.
• Collect three berries from that cluster. One from the top/wing, one from the middle of the back side of the bunch, and one from the base of the cluster. Choose the berries as blind as possible.
• Collect at least 150 berries from that section, continuing to move down the rows, but making sure an even amount of the fruit comes from that vineyard block, as a representative sample of all soil types, exposures, and varying vine vigor/crop load.
• With white grapes (or reds for rosé), crush the fruit in a bag or small bucket until it’s a wet mess. Pour off some juice immediately and test it for Brix and pH. Note the results in your harvest notebook with date and time.
• With red grapes, sample into a 1-gallon (3.8-L) Ziplock, macerate the sample completely, and then place in the fridge overnight, and test the next morning. Sitting on the skins for a day will give you insight into how the red fruit will macerate and soak up in the fermenter, and will give you an idea about color in the wine.
• For both red and white samples, don’t throw your samples away yet! Put some strained juice in a wine glass and evaluate it and take reference notes (unripe strawberry, kiwi, apple, spice, etc.) on the juice in your notebook. I find reference tasting notes on finished wine to be fairly useless. But understanding emerging aromas in juice of varying ripeness can really help you dial in wine style. When cherry becomes ripe cherry, or kiwi goes to apple and pear, might be the magic moment when the best wine can be made from the vineyard. This will require years of taking notes on juice and then correlating that data with final wine quality after bottling.
• Process the samples quickly, and don’t leave them to bake in the sun or in a hot car. If you travel to sample, most
pros bring a small ice cooler to keep the samples cool until processing.
Interpreting the Data
Typical target ranges vary by variety and wine style, but in general:
• Brix often falls between 22–26 for table wines. Higher Brix usually produces fruitier, sunnier wines with softer acid, higher extract, and alcohol. Lower Brix wines commonly have lower phenolic ripeness and higher acidity — and can err on the side of angular and green.
• pH might range from 3.2–3.8 depending on style and climate. Champagne is usually around 3.0 pH, structured Chardonnay around 3.3, Pinot Noir around 3.5, and a soft Cabernet Sauvignon or Merlot might be 3.7–3.9 pH.
• TA often falls between 5.5–8.0 g/L. pH can have a profound impact on how TA translates into mouthfeel and structure. Low pH and high TA can be green and shrill. High pH/low TA can make a soft, amorphous wine. Low/low and high/high combinations get complicated and need to be followed and understood by sampling and notetaking, if you choose to test your TA.
• When to test for TA? As I mentioned, most home winemakers/growers don’t commonly test for TA. But when should you splurge on the expense? If you think your pH was spot on, was measured accuracy, but the wine has odd acidity, or little to none, you may want to have the TA checked to see if it’s generally out of whack with the pH.
• pH is a test of hydrogen ion activity, and TA is the weight of the acid in each liter of your wine. The best analogy I’ve ever heard is a 10-gallon aquarium. There are 10 fish swimming in it. The speed of the fish is pH. If we halve their gallons, they still swim as fast (like diluting your wine 50/50 with water and test the pH — it hardly moves, as the hydrogen ions have more room to spin and swim. But if you measure the weight of the fish in the aquarium, that number is constant for 10 gallons. 1 lb. of fish/10 gallons for instance. If you cut the aquarium to 5 gallons of water, the TA would increase 50%. 1 lb. of fish/5 gallons.
Taste your berries. Are the seeds still green and bitter, or brown and nutty? Do the skins taste astringent or supple? Does the pulp taste fresh, sweet, and varietally expressive? A winemaking friend once told me that the flavor of the fruit will awaken the moment of harvest. She said that if you taste the fruit, consider the numbers and tests, but aren’t convinced it’s time, then it’s NOT TIME. She said that the mouth knows and will scream in your ear: I’m Ready! Easy for her to say that when you’re stuck at 22 °Brix and a hailstorm is approaching Long Island.
In short: The best harvest decisions combine analytical data with sensory evaluation.
Can We Fix Inconsistencies in the Vineyard?
What happens when you’re field sampling your vineyard and finding out things aren’t as consistent as you’d like. Some fruit is ready to be harvested, while a few rows over vines are struggling and grapes haven’t finished veraison. What do you do?
This is where we take notes for next year and then try to find a way to make better wine this year.
Next year: Identify struggling vines and spot-fertilize those vines to make them as vigorous (measured in leaf-to-cluster ratio and canopy height) as the rest of the vineyard.
This year: At 90–95% veraison, drop the rest of the fruit on the ground. Always keep the bottom cluster on a shoot and sacrifice the top cluster if you must choose. This will keep all the fruit in a much more consistent ripening and harvest window — getting us close to having every cluster within 1–2 °Brix from each other.
You may think that harvesting green fruit (dropping it), is untenable, as it reduces your crop and yield in the winery. If you believe 5–10% more wine is more important than increasing wine quality, keep the extra fruit. But you may want to try my method one year and then evaluate quality and see that I was right.
In Conclusion:
• Randomize your sampling protocol to keep your ripeness-loving monkey brain out of it.
• Measure the Brix and pH accurately — whites from an immediate juicing, reds with a one-day cold soak in the fridge on the skins.
• Keep tasting notes on the juice with the parameters of flavor that lead to the best wines you’ve made.
• “Green-drop” lagging clusters for better balance and flavor.
• Improve the vineyard’s consistency of vigor every year to try to dial every vine in to 12–15 leaves per cluster.
Further Reading . . .
• Learn more about setting up a home wine lab and conducting your own tests at home.
• Record your test results from the vineyard, winemaking process, and even when tasting the finished wine. Learn more about what to record here.